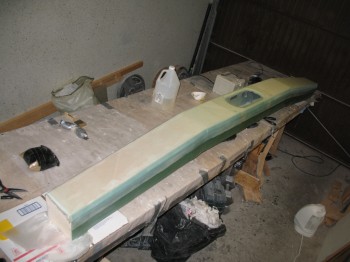
Today I started by using the Fein saw (again, I call it that for ID purposes, but mine is actually a cheapo version from Harbor Freight… but it works great!) to remove the overhanging glass on each end of the spar & on the straight runs of the oval access hole.
I then focused on the oval access hole with the Dremel tool. I knife trimmed it as well to remove all the excess/overhanging glass. I also used my Perma-Grit tool and sandpaper to smooth out the access hole edge and surrounding glass.
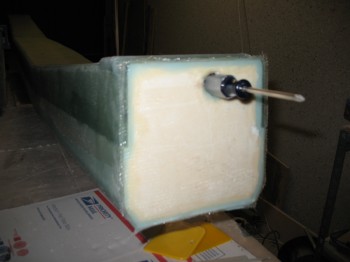
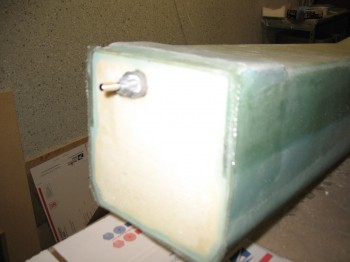
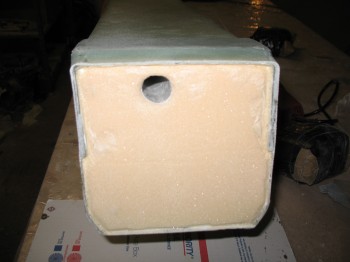
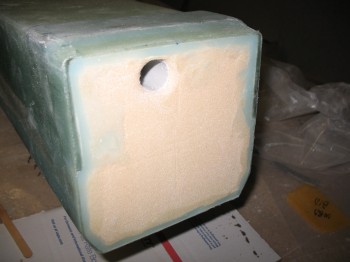
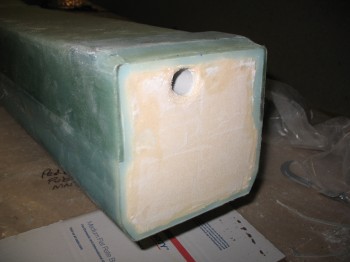
I used a 7/8″ bit to drill out the foam covering the electrical wire/antenna cable conduit at each end of the spar. I sanded it to round over the edge of the hole for a nice radius.
I then Dremeled out a narrow wedged-shaped channel into the foam at each end of the spar around the inside edges of the glass. I removed the foam on the inside of the glass to maybe 1/4″ deep max.
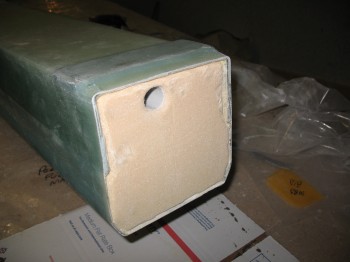
I sanded the foam faces at each end of the spar, vacuumed the end bulkhead surfaces & prepped for glass.
First, I cut 2 pieces of 7.5″ x 7.5″ of BID at a 45° bias.
Then I floxed the edges of the glass into the channels I had just created in the foam. What this does is create a fillet in the corner between the existing 4 sides of the glass & the newly laid glass. Once it cures, there will be a very solid “triangular” (as best possible) corner bead that will greatly increase the strength of the corner, and also the bulkhead’s glass ply covering.
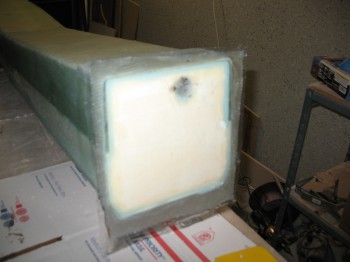
I micro’d the remaining foam in the middle of the end bulkheads. I then wet out the pre-pregged 1-ply of BID…. which is hard to see with only one ply. I then glassed each end of the spar with the 1-ply BID pre-pregged layup.
I trimmed the excess glass with my Dritz scissors (still awesome!) & then made an X-cut in the glass over the hole and plugged each one so the glass would wrap around the radiused edge of the hole and cure securely onto the interior of the channel conduit.