
I remember as a young pup, just in the Air Force, someone telling me that on long runs you just keep putting one foot in front of the other… and you’ll get there. Then I got even more crazy and started running marathons… same thing. Just keep putting one foot in front of the other and eventually you’ll finish the race.
While there seems like there’s a million unending things to do on this bird, in reality of course there are just so many… not an endless number. Which is a big reason why I chose to clean out a good swath of them on this left sidewall area: it’s target rich. Just pull the trigger… you’ll hit something! ha!
Thus it is with something requiring seemingly endless steps and multiple rounds of layups… with no how-to’s to boot. That’s what I’ve kicked off here with the throttle friction lock corner pocket on the armrest. I’ll note that aesthetically I prefer my armrest sans corner pocket… it looks much cleaner in my opinion. But operationally I don’t like the thought of having to reach down between my leg/seat cushion/armrest to rotate a small lever every time I want to set the friction on my throttle and mixture.
Or who knows? … maybe I’m just secretly envious of the guys running carbed engines and having that third carb heat lever!
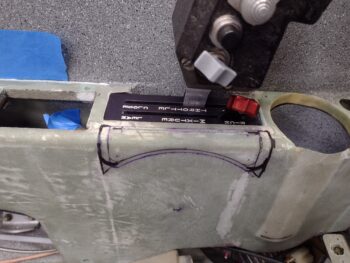
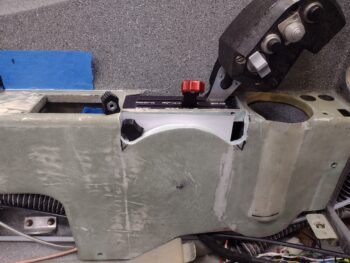
I spent a good little bit finalizing the depth and profile of the friction lock lever/handle pocket before employing my ‘ol trusty Fein saw to do some cutting on the corner. Note that just by putting the armrest back into the bird the friction lock lever popped up to say hi. Fairly EZ there . . .
What wasn’t EZ was the spacing I mentally hoped I’d have to squeeze that CS screw into the outboard side of the friction lock lever for the roll-your-own knob I made. Nope. Zero room. To throw out another military quip, another boss I had used to say, “Hope is not a plan.”
Yep, he was right here!
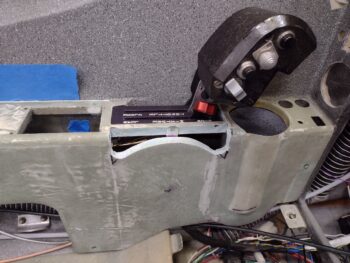
So I quickly converted my throttle/mixture friction lock knob to a push-on type by creating a very thin slot on the bottom. I then removed the lever and trimmed the sides down to square up the lever 0.5″ down from the top. The new knob slid right on with a bit of pressure, and voila! Ready to roll. Note that I placed the old knob off to the side for comparison.

The new knob looks better IMO without the screw poking through into the embedded nut, but I did forget to re-round the bottom corners on this new version debut (I put a piece of white paper behind to enhance the visibility of the knob). Those bottom rounded corners actually come into play for allowing the lever to swing a bit further forward or aft without digging into the corners of the upside down smile (not sure if we’re allowed to say “frown” anymore? … so negative! haha).
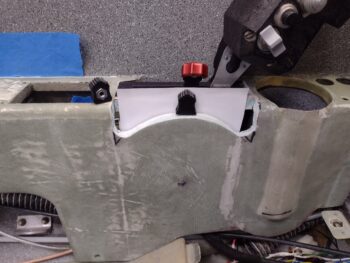
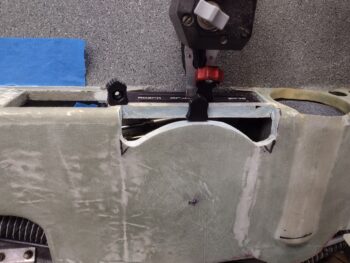
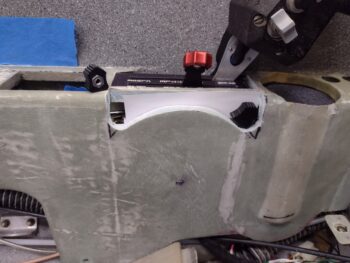
Here we have the throttle friction lock in the unlocked (L pic) and locked (R pic) positions.
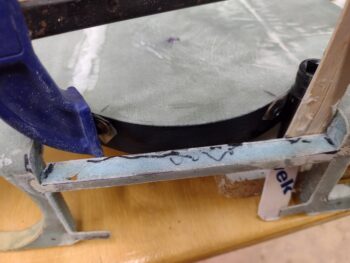
In starting my journey to fill back in the corner cubby that I made for the throttle friction lock, I cut a piece of thin 0.026″ thick G10 and micro’d it into place. Hours later as I pondered the “just how to do it” I realized I should have left a larger gap at the inboard edge for a good flox fillet. I want radiused edges but without vacuum bagging this sucker, intricate large layups in with these curves and corners are going to be hard to do. I think I’ll let flox be my transitions at the corners with small radiuses after I layup mainly glass-to-glass corners in this pocket.
As an aside, I’ll note that since I’ve Swiss-cheesed this armrest top about as much as physically possible, I will be replacing foam with flox on the narrow cross pieces [the rectangular throttle quadrant notch sides being prime candidates… see below] with a ply of glass or two on those, and a considerable number of plies of glass on the inside/underside middle area of the armrest. I don’t want all this work to be ruined by any pressure I might place on the armrest —most likely during ingress or egress of the cockpit.
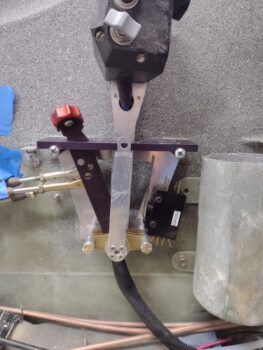
While the above was curing I pulled the throttle quadrant out of the bird to position and mount a rather robust DPDT “micro” (that ain’t so “micro”) switch onto the front side of the quadrant frame using #6 nutplates. This guy is primarily for the Landing Brake auto retract at full throttle that Jack Wilhelmson thoughtfully engineered into his landing brake system (I bought his landing brake actuator with switch setup when I bought my nose gear actuator). This switch also handles some panel reporting signals as well.
Clearly I need to install another one on the aft side, which will require a bit more intricate planning and implementation as I suspect I’ll have to rivet an additional piece of aluminum in place as an aft extension to mount the aft switch low enough to avoid the cable rod ends.
Speaking of which, since I had to drill an added hole between my 2 original planned holes on the throttle lever for dialing in the throttle cable movement, I took the opportunity at this point to drill the new bottom 3/16″ hole for the GIB throttle cable attach.
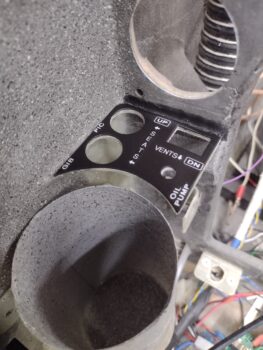
I also spent about 20 minutes labeling up the front corner heat sub-panel cover and then hitting it with a few coats of clear. Since this is just mainly cosmetic I simply used the 3D printed piece, sanding the back of this cover for attachment to the original sub-panel plate and hitting the front with a couple rounds of primer and then black paint before labeling.
Tomorrow I’ll continue to work filling in the throttle friction lock corner pocket on the armrest, and probably do some electrical wiring on the oil heat sub-panel switches in between the cure cycles on the armrest pocket foam micro additions & glassing.
Inching forward!