
Today really was all about prep on the canopy as I didn’t get one thing glassed.
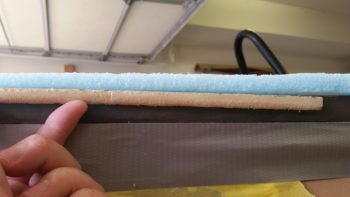
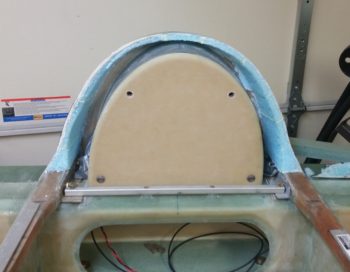
I’ve been pondering for a few weeks now just how exactly to deal with the inside aft bottom edge of the canopy. The blue foam is wide enough back there but the canopy comes down so low that there’s only about a half inch of foam underneath the canopy bottom edge. I had thought about using pour foam, but I really just didn’t want to mess with building the dams for the walls and edges.
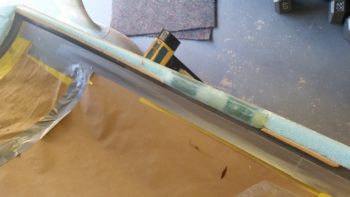
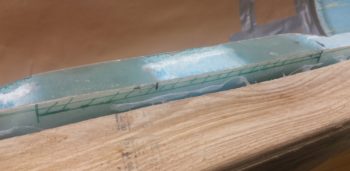
So I started off today by making up some PVC foam “quarter round” insert “molding” to increase the interior foam edge of the canopy and still have plenty of room for the canopy frame rail glass to grab ahold of the lower canopy edge. Here you can see my testing out the fit of the PVC foam molding, which measure 0.2″ thick x 0.45″ high and is radiused significantly at the top to allow for a better glass transition from foam rail to canopy edge.
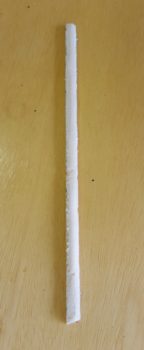
Here’s some shots of the first PVC foam aft canopy rail “quarter round” addition that I made up.

I then micro’d the new PVC foam “quarter round” additions to the aft left canopy frame in 3 spots.
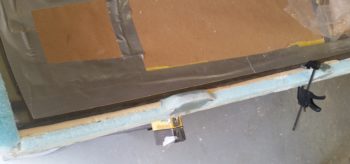
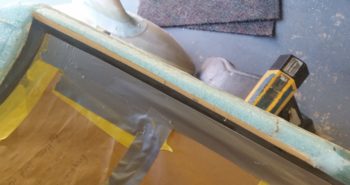
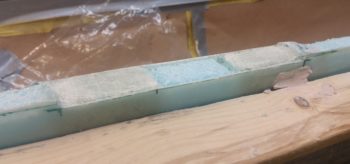
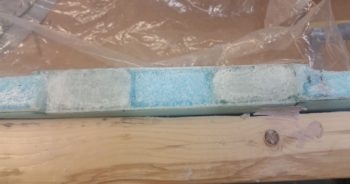
Here’s a closer up view of the very aft foam “quarter round” addition on the left side aft canopy.
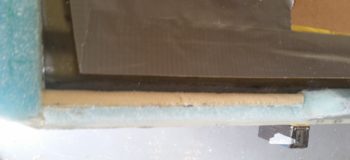
A little while later I did the right side aft foam “quarter round” additions in 2 spots.
Again, below is a close up of the very aft foam “quarter round” addition on the right side.
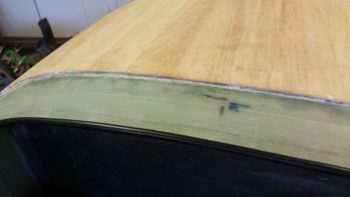
In addition, I also took a little bit to finish taping up the interior canopy so that only the edge to be glassed was exposed. Then I finally finished sanding the interior canopy edge to allow for a good bond to the glass that will secure it in place.
With the leftover micro from adding the foam “quarter round” to the aft right side canopy, I threw in some flox and applied it to the aft end of the 1/8″ thick Balsa wood strips to reinforce the aft nose cover lip that interfaces with the very front edge of the canopy’s front skirt.
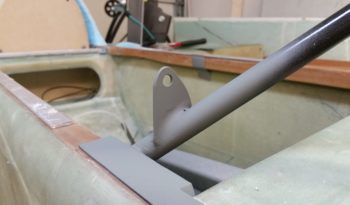
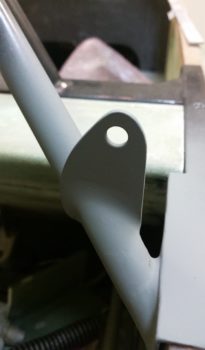
I spent a good 45 minutes doing another round of sanding on the Metal Glaze that I had applied to the canopy strut mounting tab on the roll bar. After I got it shaped down very close to what I wanted I took it outside and hit it with a couple coats of primer. Clearly there’s still some areas that need working, but with the primer applied they become much more apparent and easier to see.
After cutting the perimeter edge of the foam out and Dremeling the inside of the glass edge to clean it up for a nice flox corner for the entire remaining canopy side rails, I then got to work on the canopy’s front hinge mount. Since the closed canopy hinge measures 0.270″ at the midpoint, I then set the depth of the hinge notch at 0.140″ vs the plans called out 0.150″. I then spent another 45 minutes Dremeling and sanding the front hinge hard points to create the 0.14″ deep notch for the hinge half. Now, this is just the initial round of cutting, sanding and shaping… tomorrow I’ll dial it it so that the hinge sits in the notched canopy rail nice and clean.
Since it was late and I had made quite enough late-night noise, I simply measured and marked the canopy’s aft hinge 0.14″ deep notch.
In addition to all the above, I spent a good bit of time drilling, chiseling, etc. to remove the cured micro that had oozed out onto the firewall when the turtleback foam pieces were glued into place . . . should have used thicker micro!
Tomorrow I plan on getting a good deal of glassing done. At a minimum I plan to get the interior turtleback foam glassed and the aft end of the canopy frame.