
My friend and realtor Mindy came over this morning to discuss selling my house and also to see the progress on the Long-EZ build, which she had not seen yet in person. So before she got here I spent a good couple of hours today straightening up, which included a good 45-minute cleanup of the shop.
We then discussed the plane build for a good while as I showed her the fuselage and then the panel avionics and EFIS goodies. After discussing house-selling stuff for a bit we went to lunch and BS’d even a bit more…. all this to say that my morning and afternoon was pretty much used up on Mindy’s visit, which was quite productive in itself. BTW, during her visit I removed the canopy from the fuselage to enable her to look inside the fuselage.
I got down to the shop a bit after 5pm and got to work making a PVC foam plug for a hardpoint that I’ll have in the front right corner of the canopy to mount what is essentially a hook to keep the canopy front lip from lifting up in the airstream.
The PVC foam plug is 0.8″ deep and comes to within a 1/4″ of the glassed outer surface of the canopy.
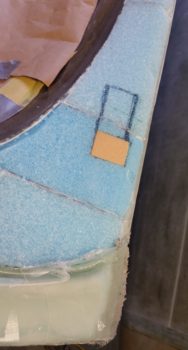
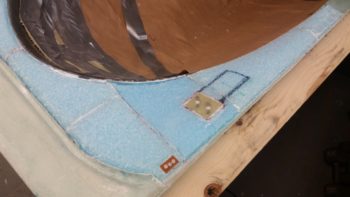
Using a piece of 1/16″ thick G10 Garolite I made a 2x K1000-3 nutplate for the front right corner canopy “hook.”
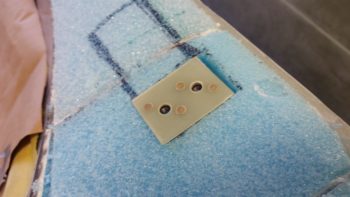
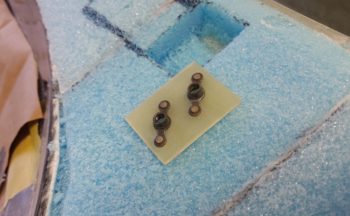
I also made a K1000-6 nutplate assembly for the right front canopy corner to allow mounting a small 1/16″ aluminum spacer plate on the canopy, whereas another 1/16″ spacer plate will be floxed to the top of the longeron. Obviously added together they will make up a 1/8″ gap which is very close to optimal for compression of the canopy seal. [The left side has a hardpoint where I would mount the nutplate assembly, so I’m waiting until after the internal canopy frame is glassed to figure it out].
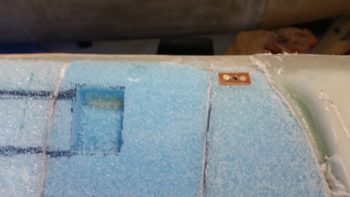

I glued the two pieces above in place using micro and flox and then left them alone to allow them to cure.
I then got busy on the mess that awaited me regarding the canopy front underside skirt layup. I was correct in that the glass did in fact get folded up underneath itself and thus jammed multiple layers up into the groove and –worse yet– off the aft wall of the glare shield interfacing groove.
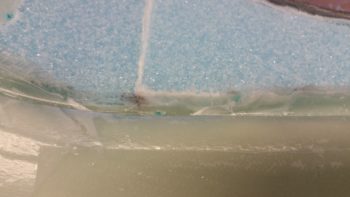
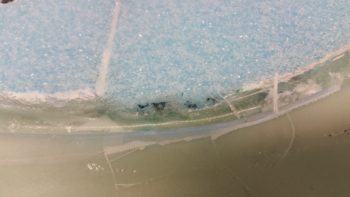
It took over 2-1/2 hours to get the front canopy skirt trimmed, cleaned up, and sanded with the extra glass down in the groove removed.
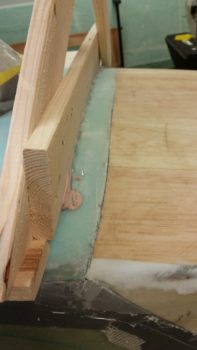
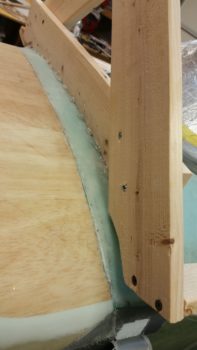
I then set the canopy back in place on top of the fuselage. The elevation of the canopy vs the aft nose cover looked great…. in fact, at most in any dimension the mismatch is about 0.030″ or less… max.
Here are a couple shots of the canopy skirt and aft nose cover interface . . . not bad!
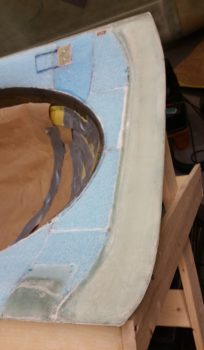
Since it was getting late, and knowing that it was too late to use the Dremel or Fein saw, I decided to get nearly everything prepped for the canopy forward interior 3-ply layup. Since the layup is “U” shaped, I decided to go with 2 pieces of BID per ply to conserve BID and simply overlap all of them…. below you can see the 6 pieces of BID that will make up 3 plies.
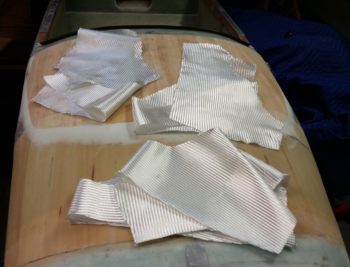
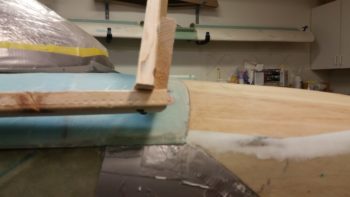
Here’s a wide angle shot of the prep to glass in the next forward plies of BID at the front canopy loop.

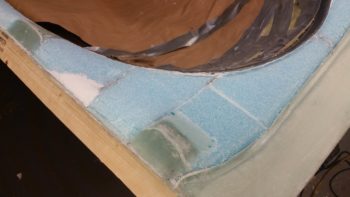
If you look closely you can see that I used a razor knife at all the edges that will enable a flox corner. Since the flox is the only thing touching both inside and outside glass where it meets in the outboard corner, I wanted to make sure that the bond was robust so I’ll wait until tomorrow to Dremel the interior crud off of the inside glass (I can’t do it tonight because of HOA rules and just wanting to be nice to my neighbors!)
Tomorrow I’ll continue working on the canopy to try to get it well on its way before hauling it down to NC.