
Today I got back to work on the canopy latch handle attachment to the left cockpit sidewall.
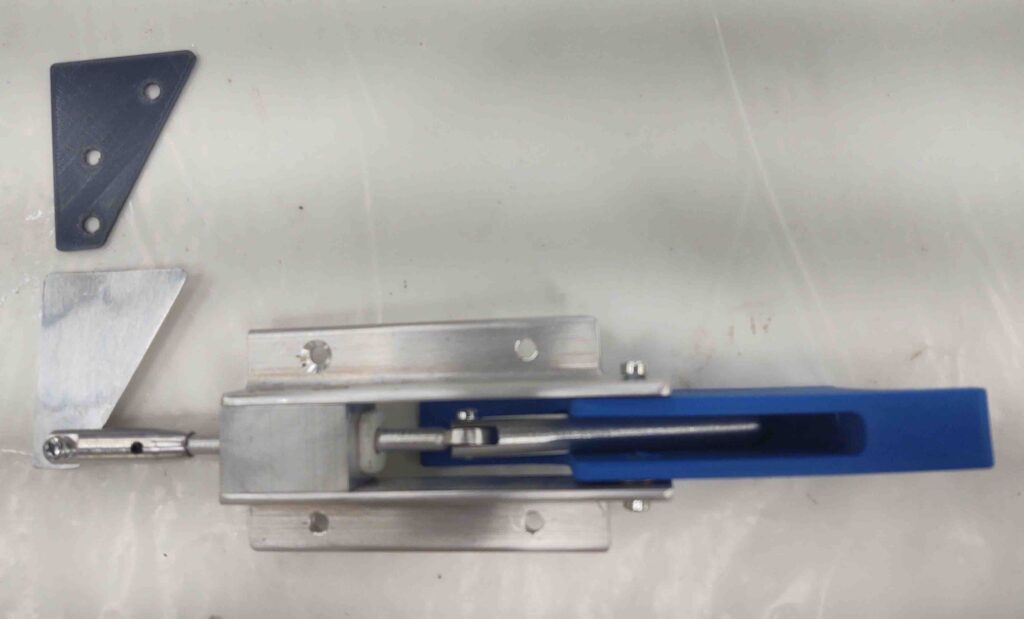
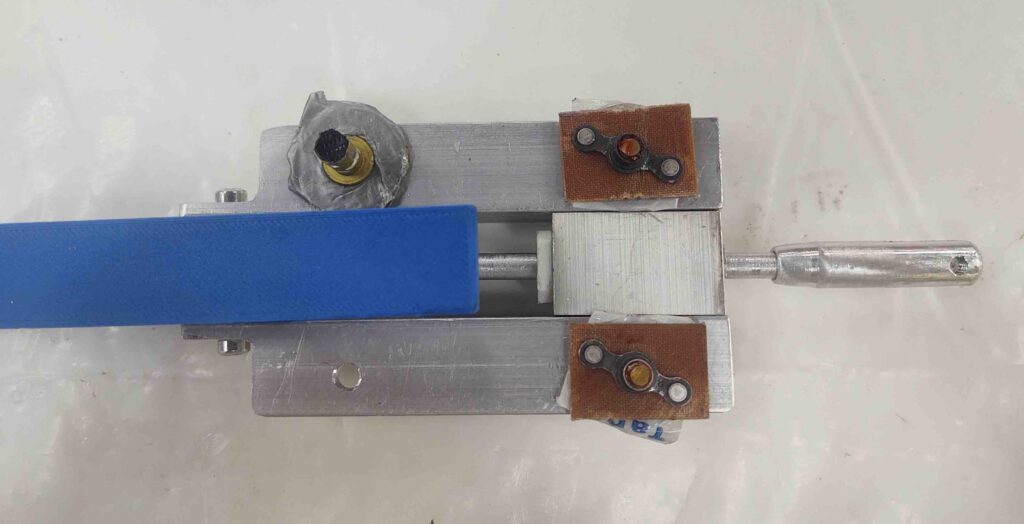
I started out with making up 3 nutplate assemblies: 2x #10 for AN3 bolts/screws (R side) and 1x for a #8 screw (L side). Two RivNuts will also be used to mount the handle assembly, both above and below the slot in the fuselage side.
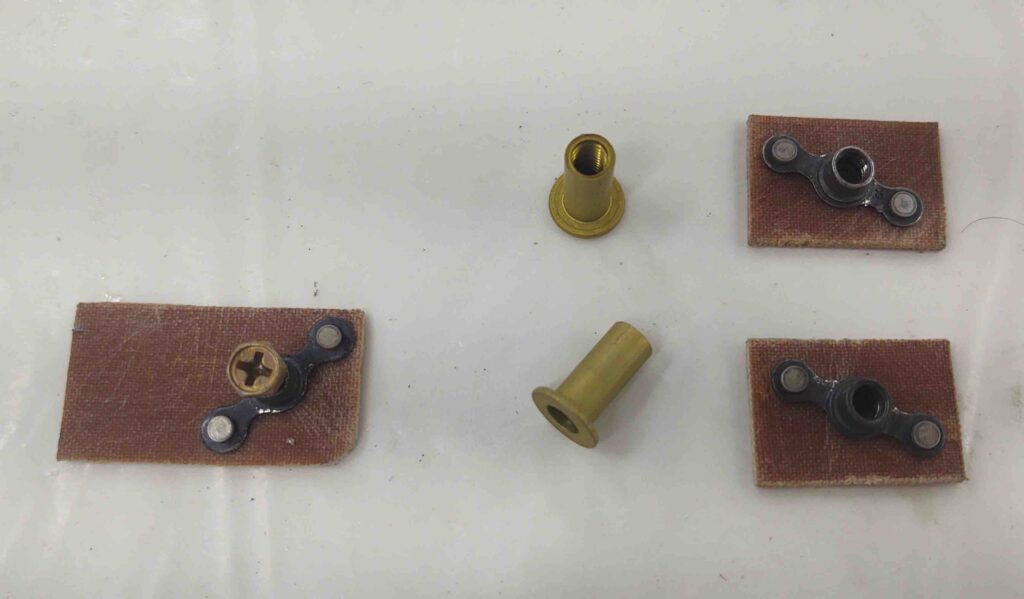
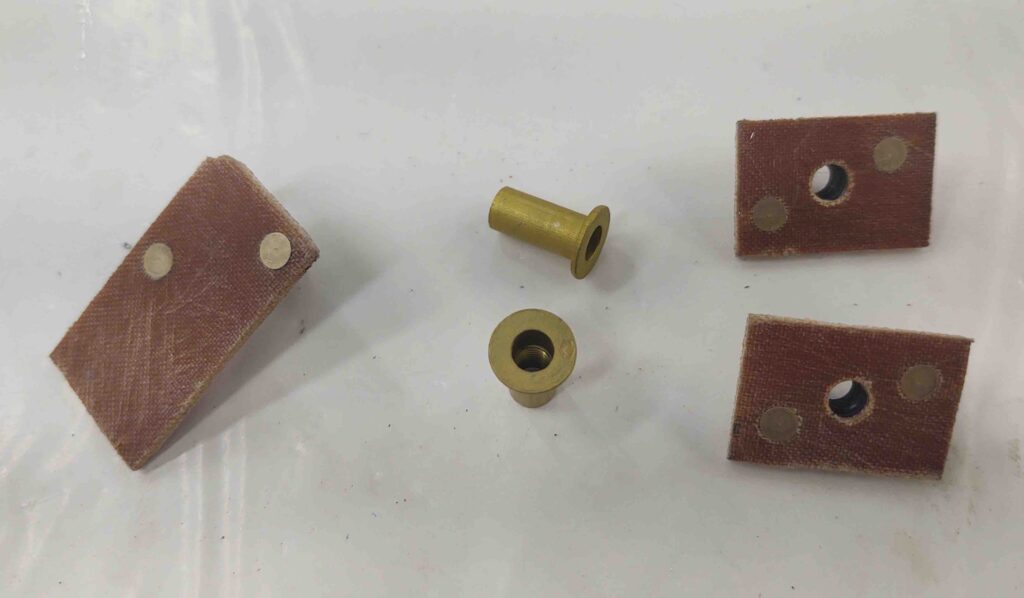
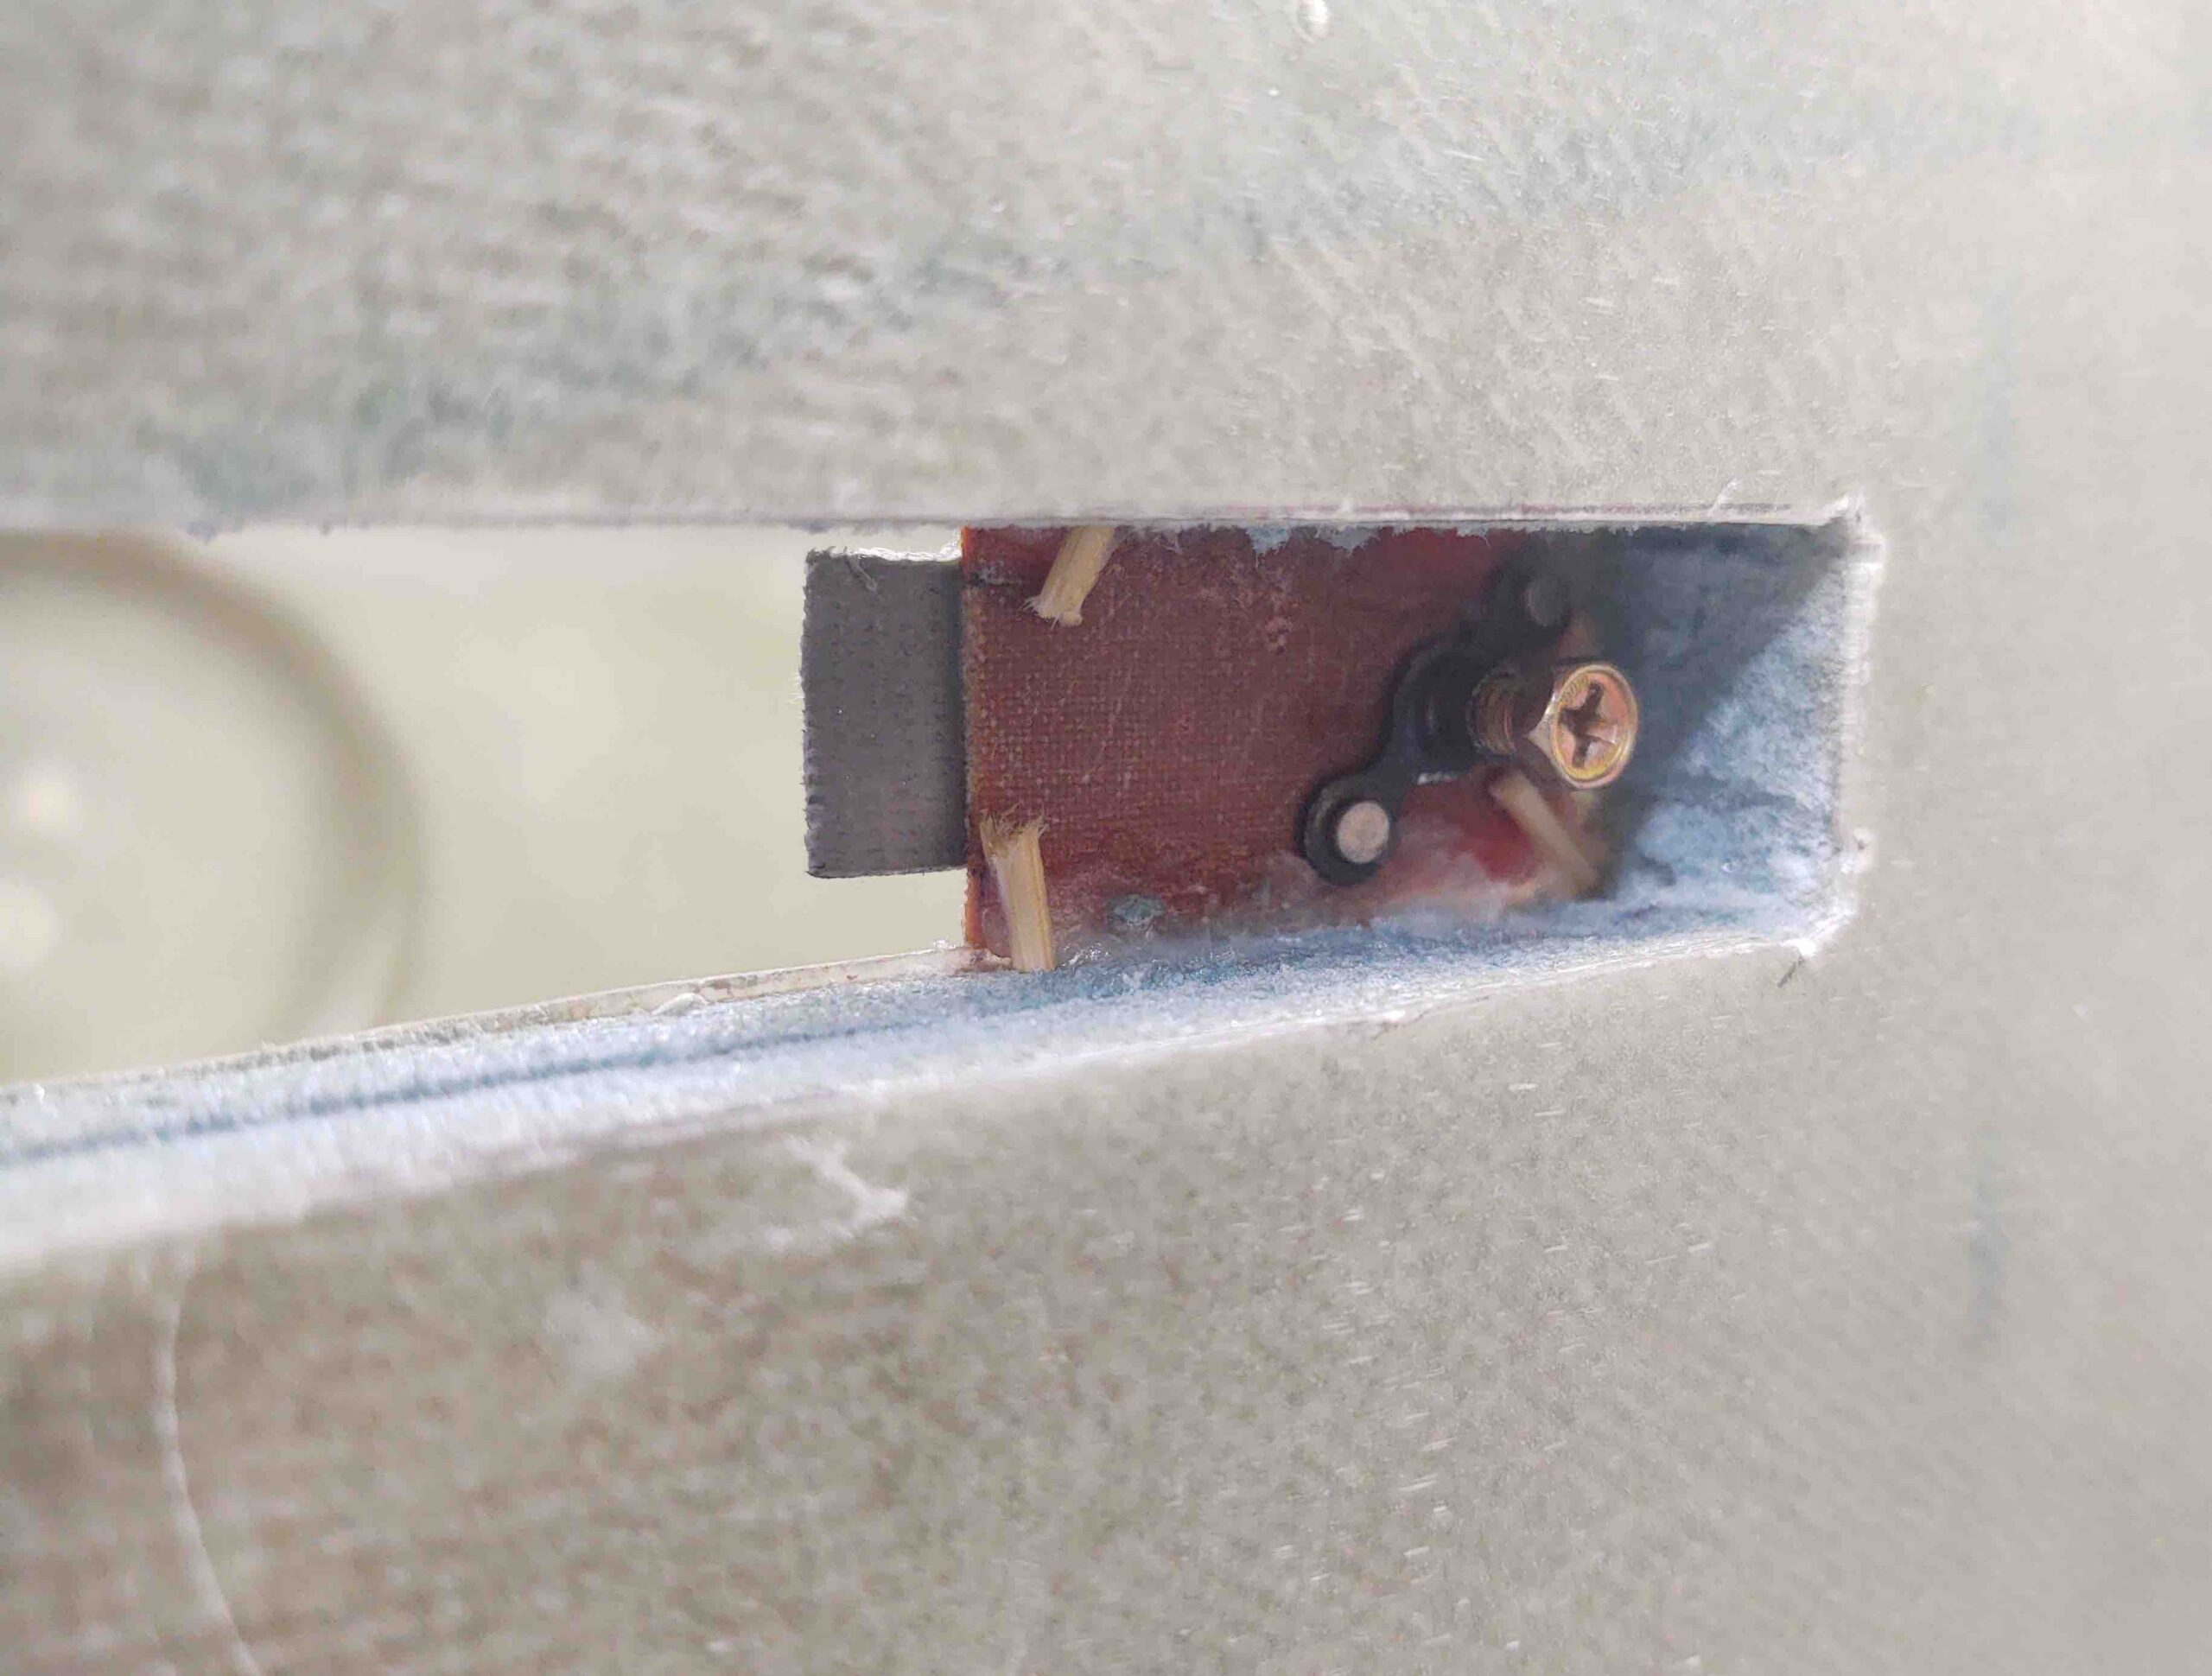
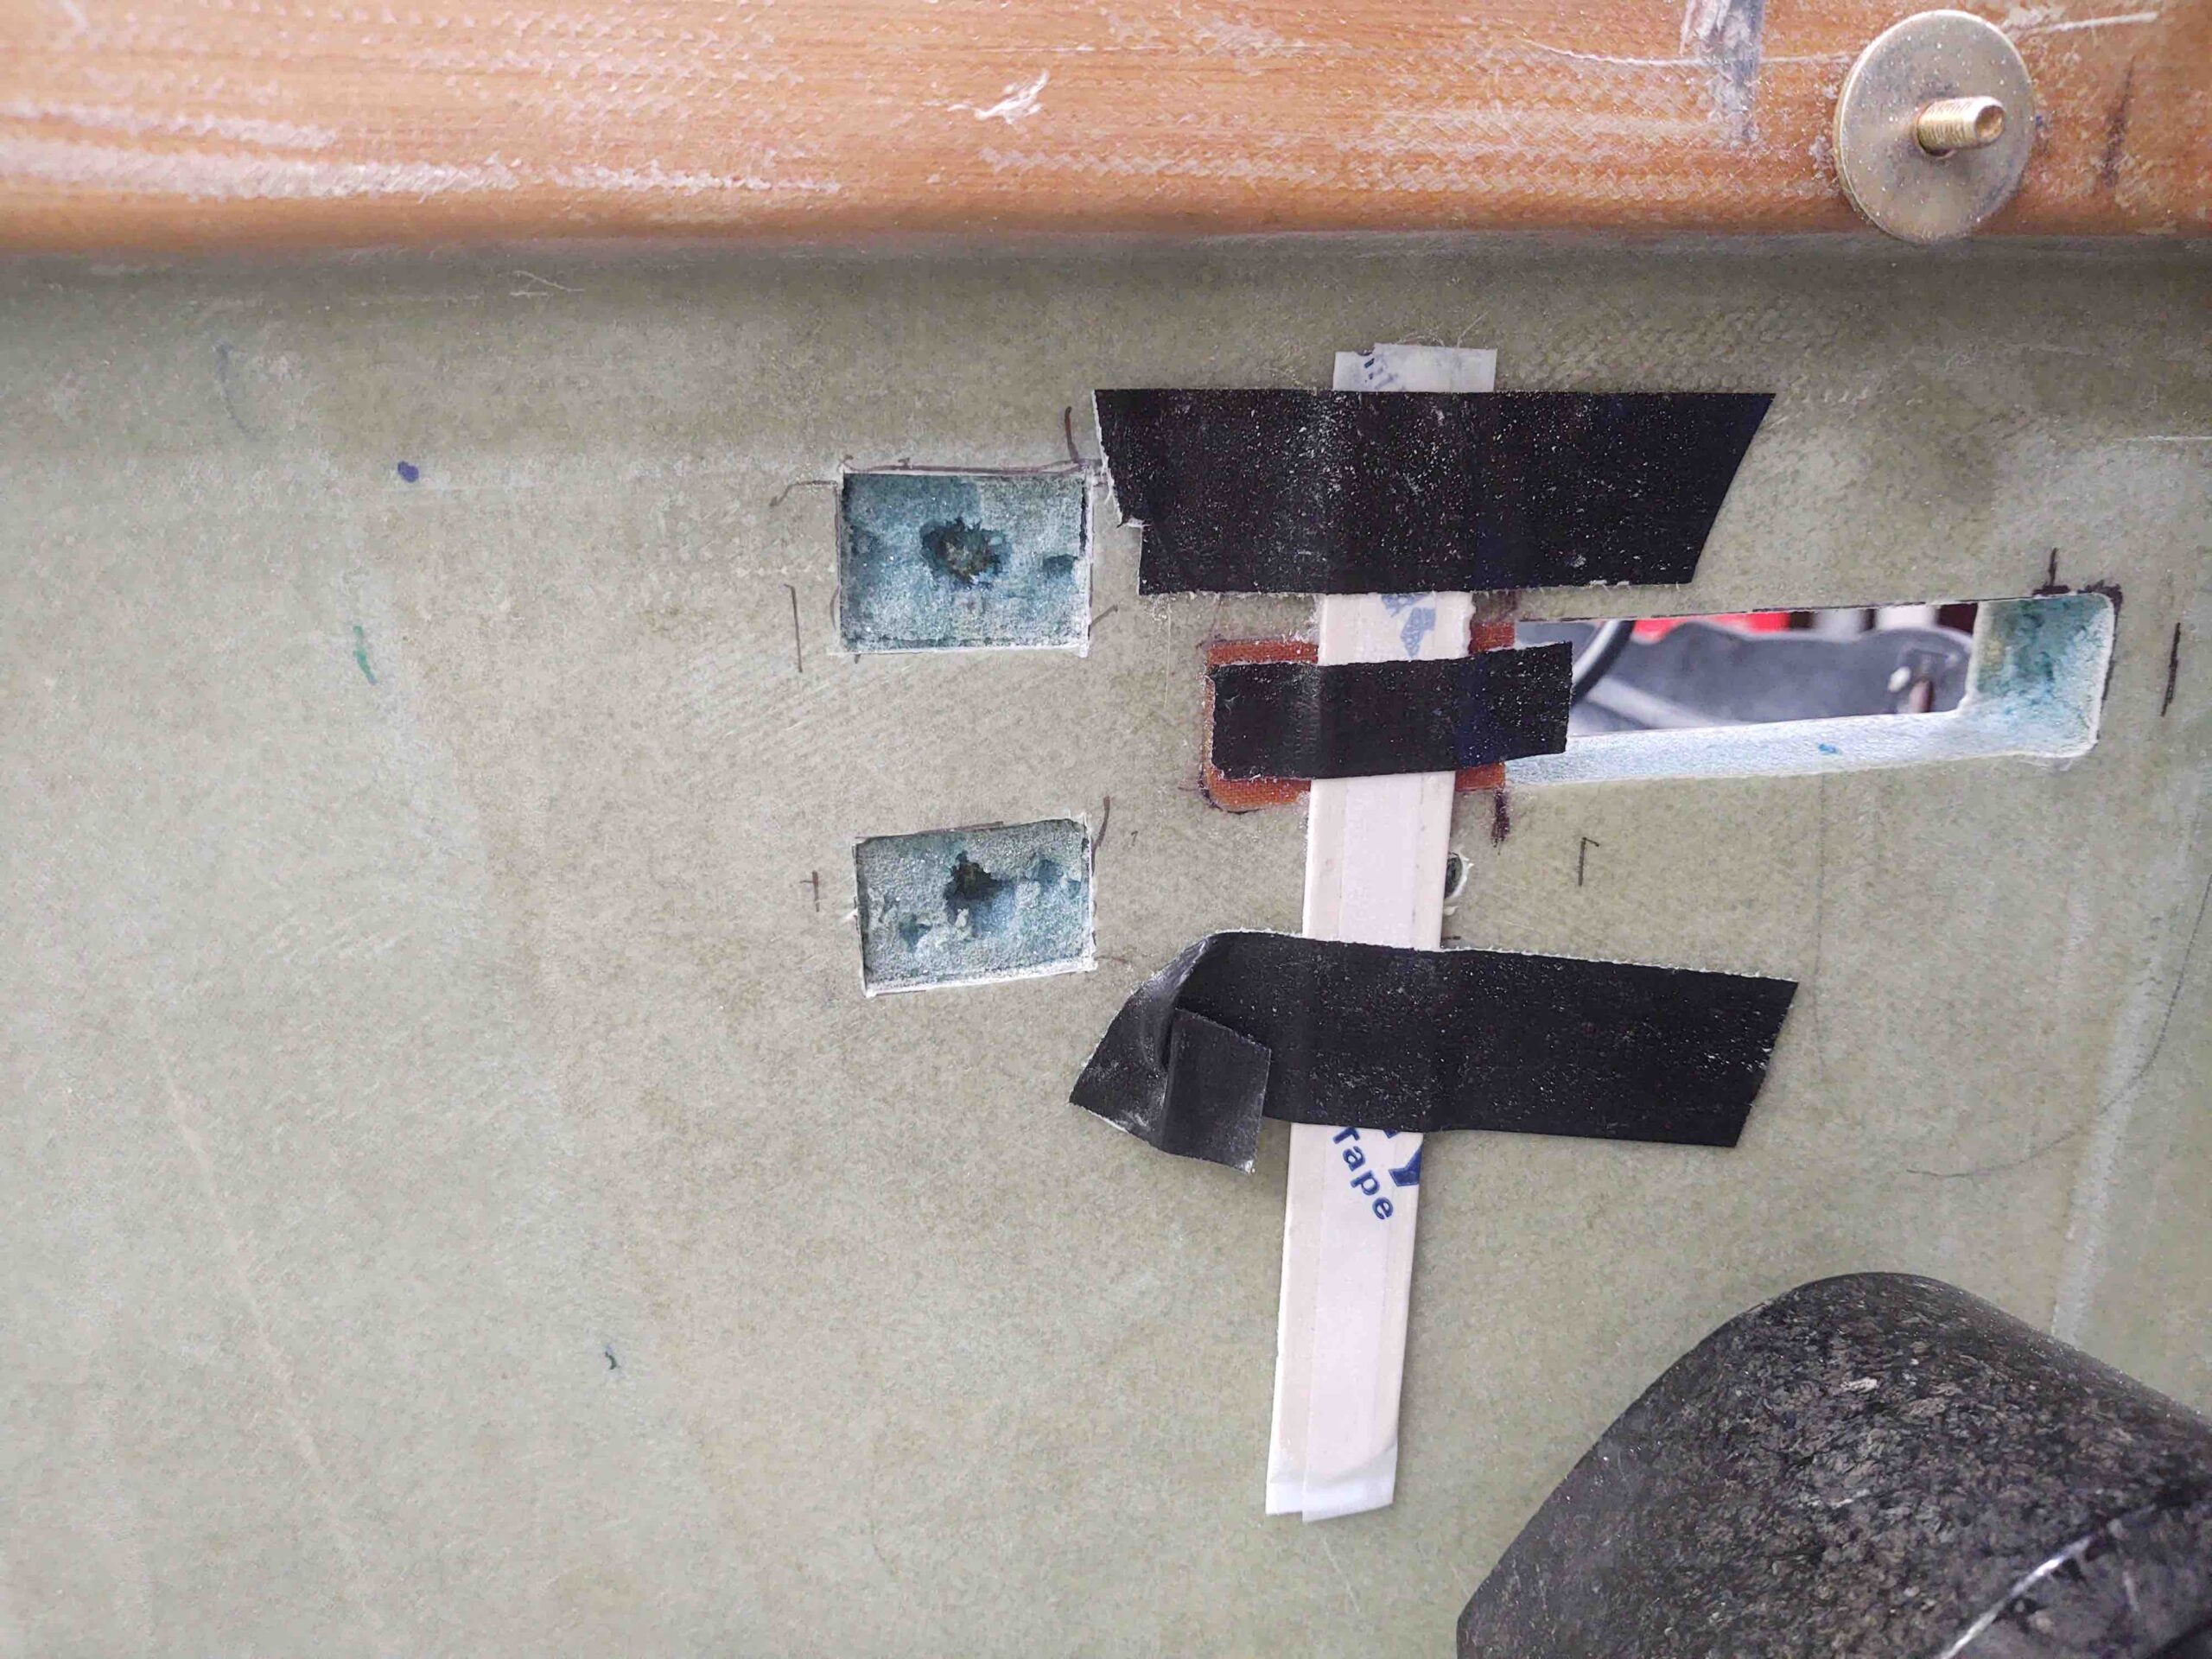
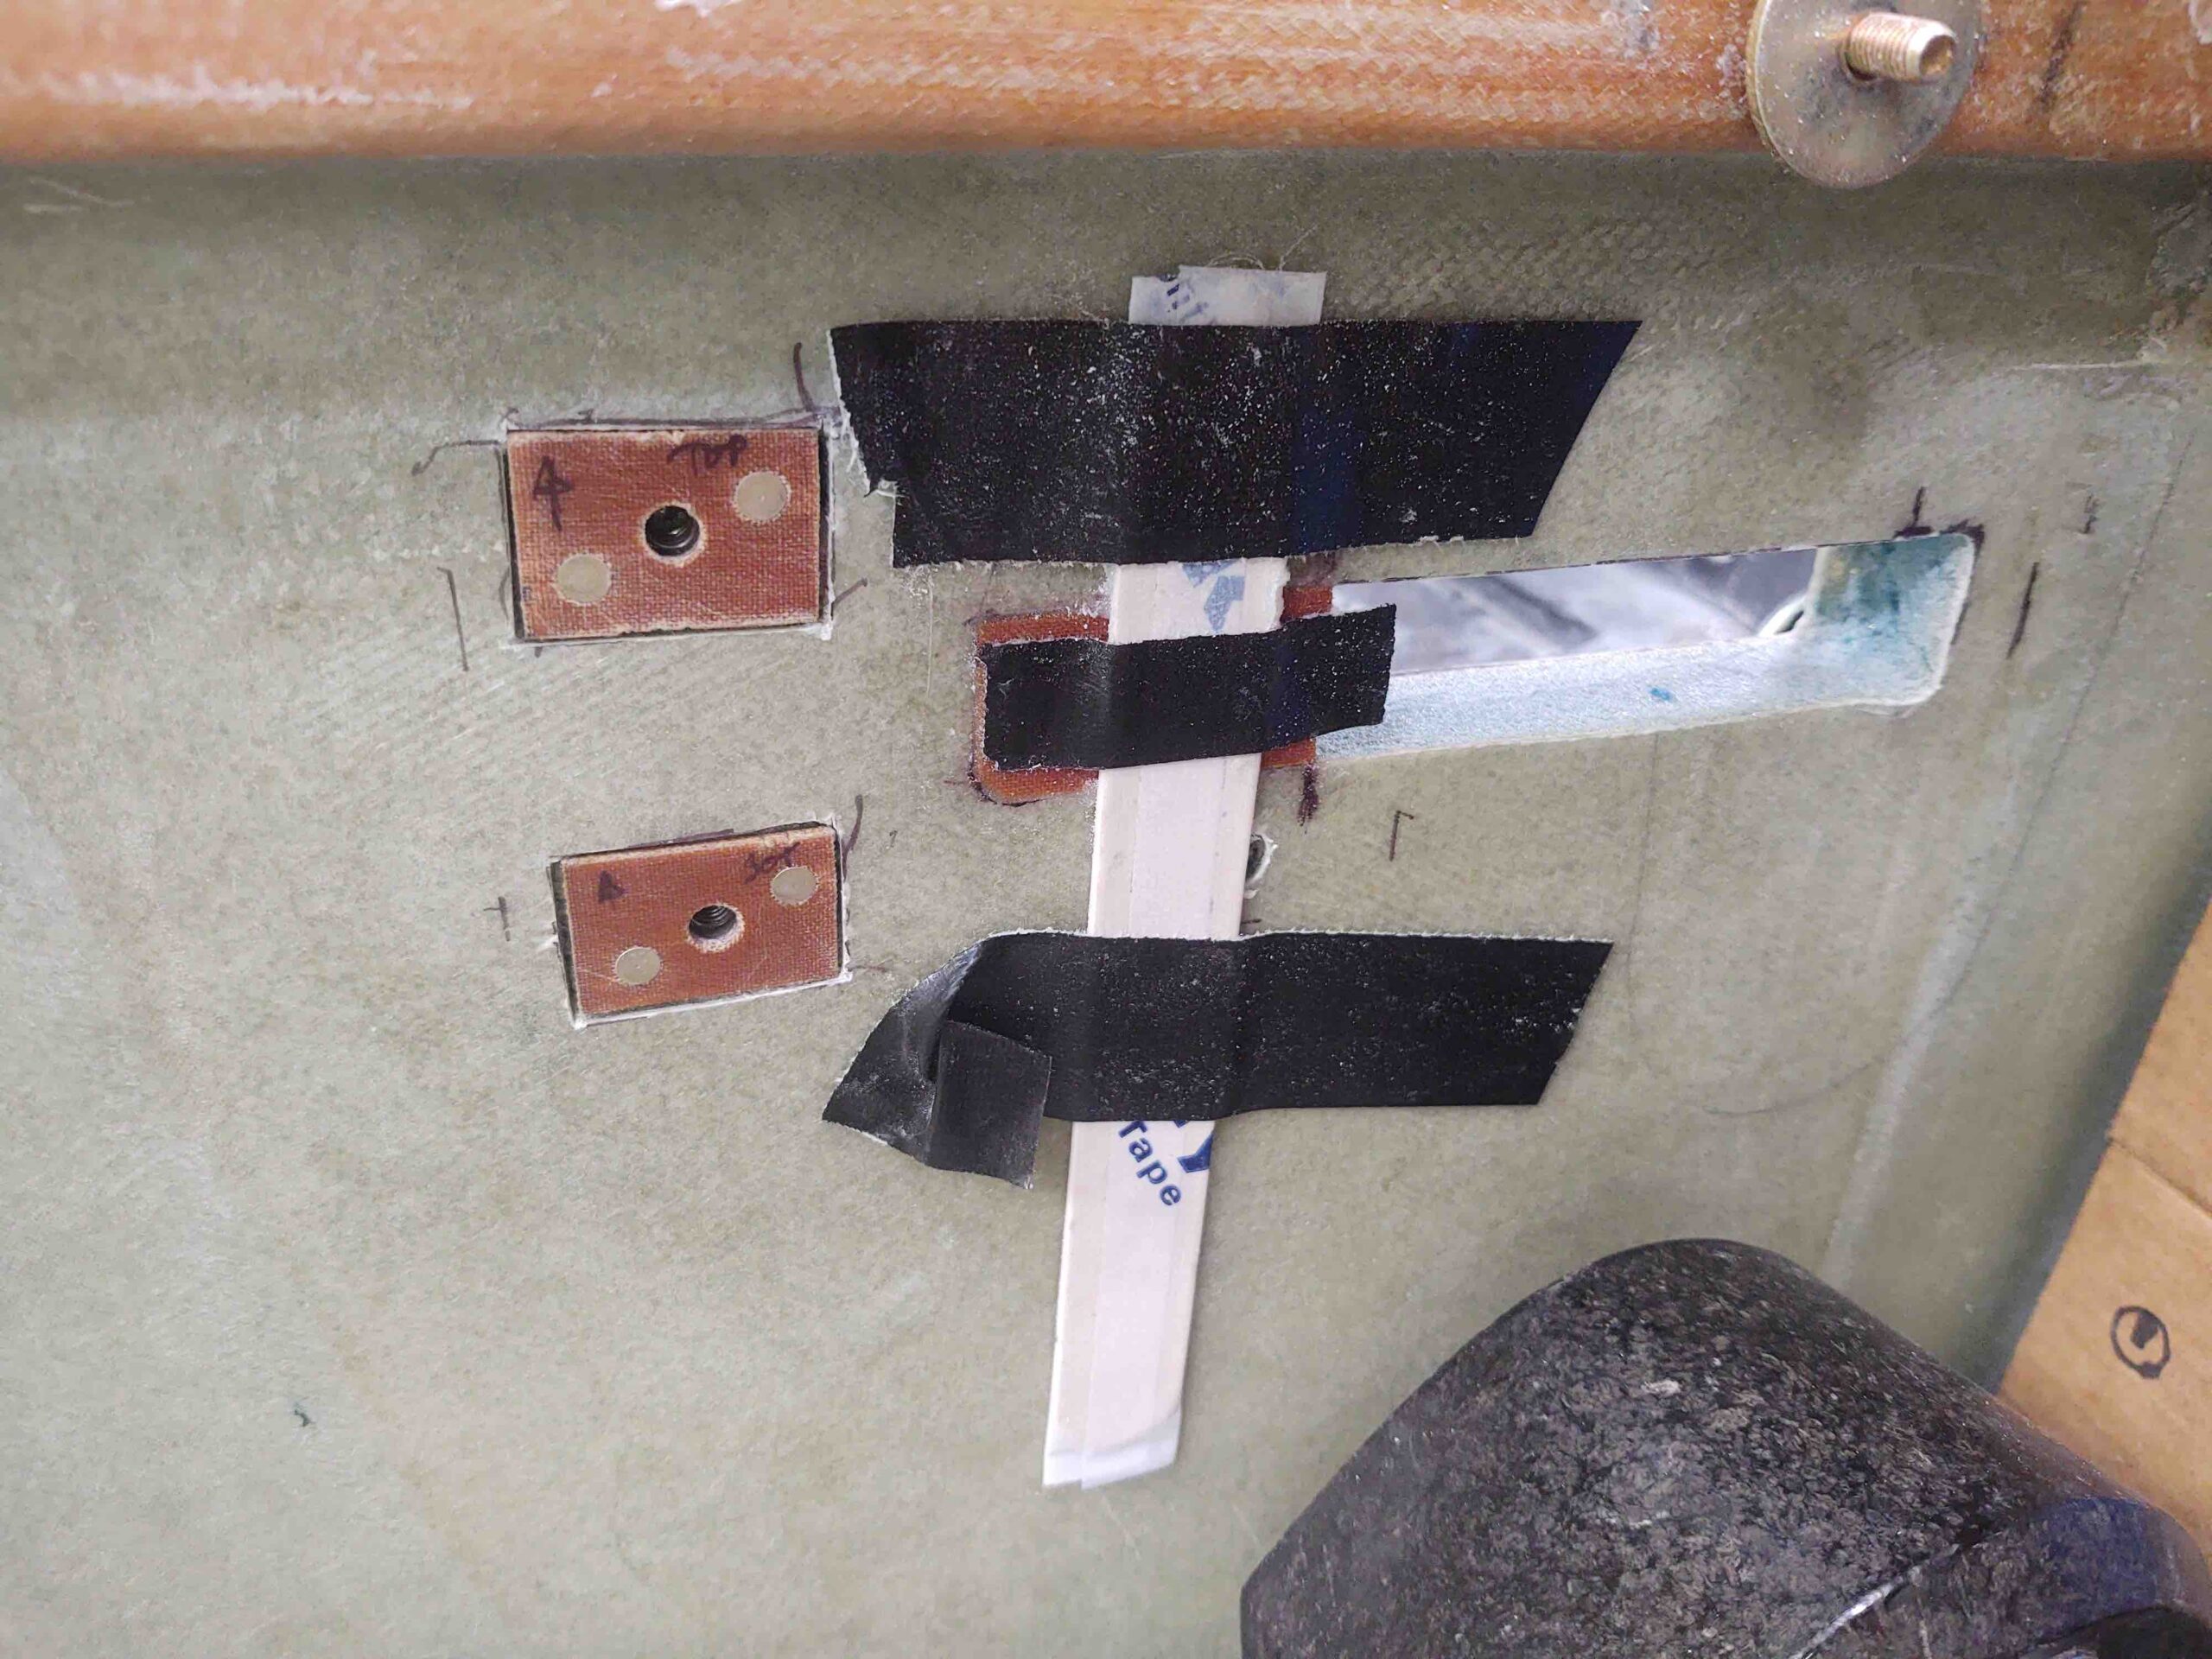
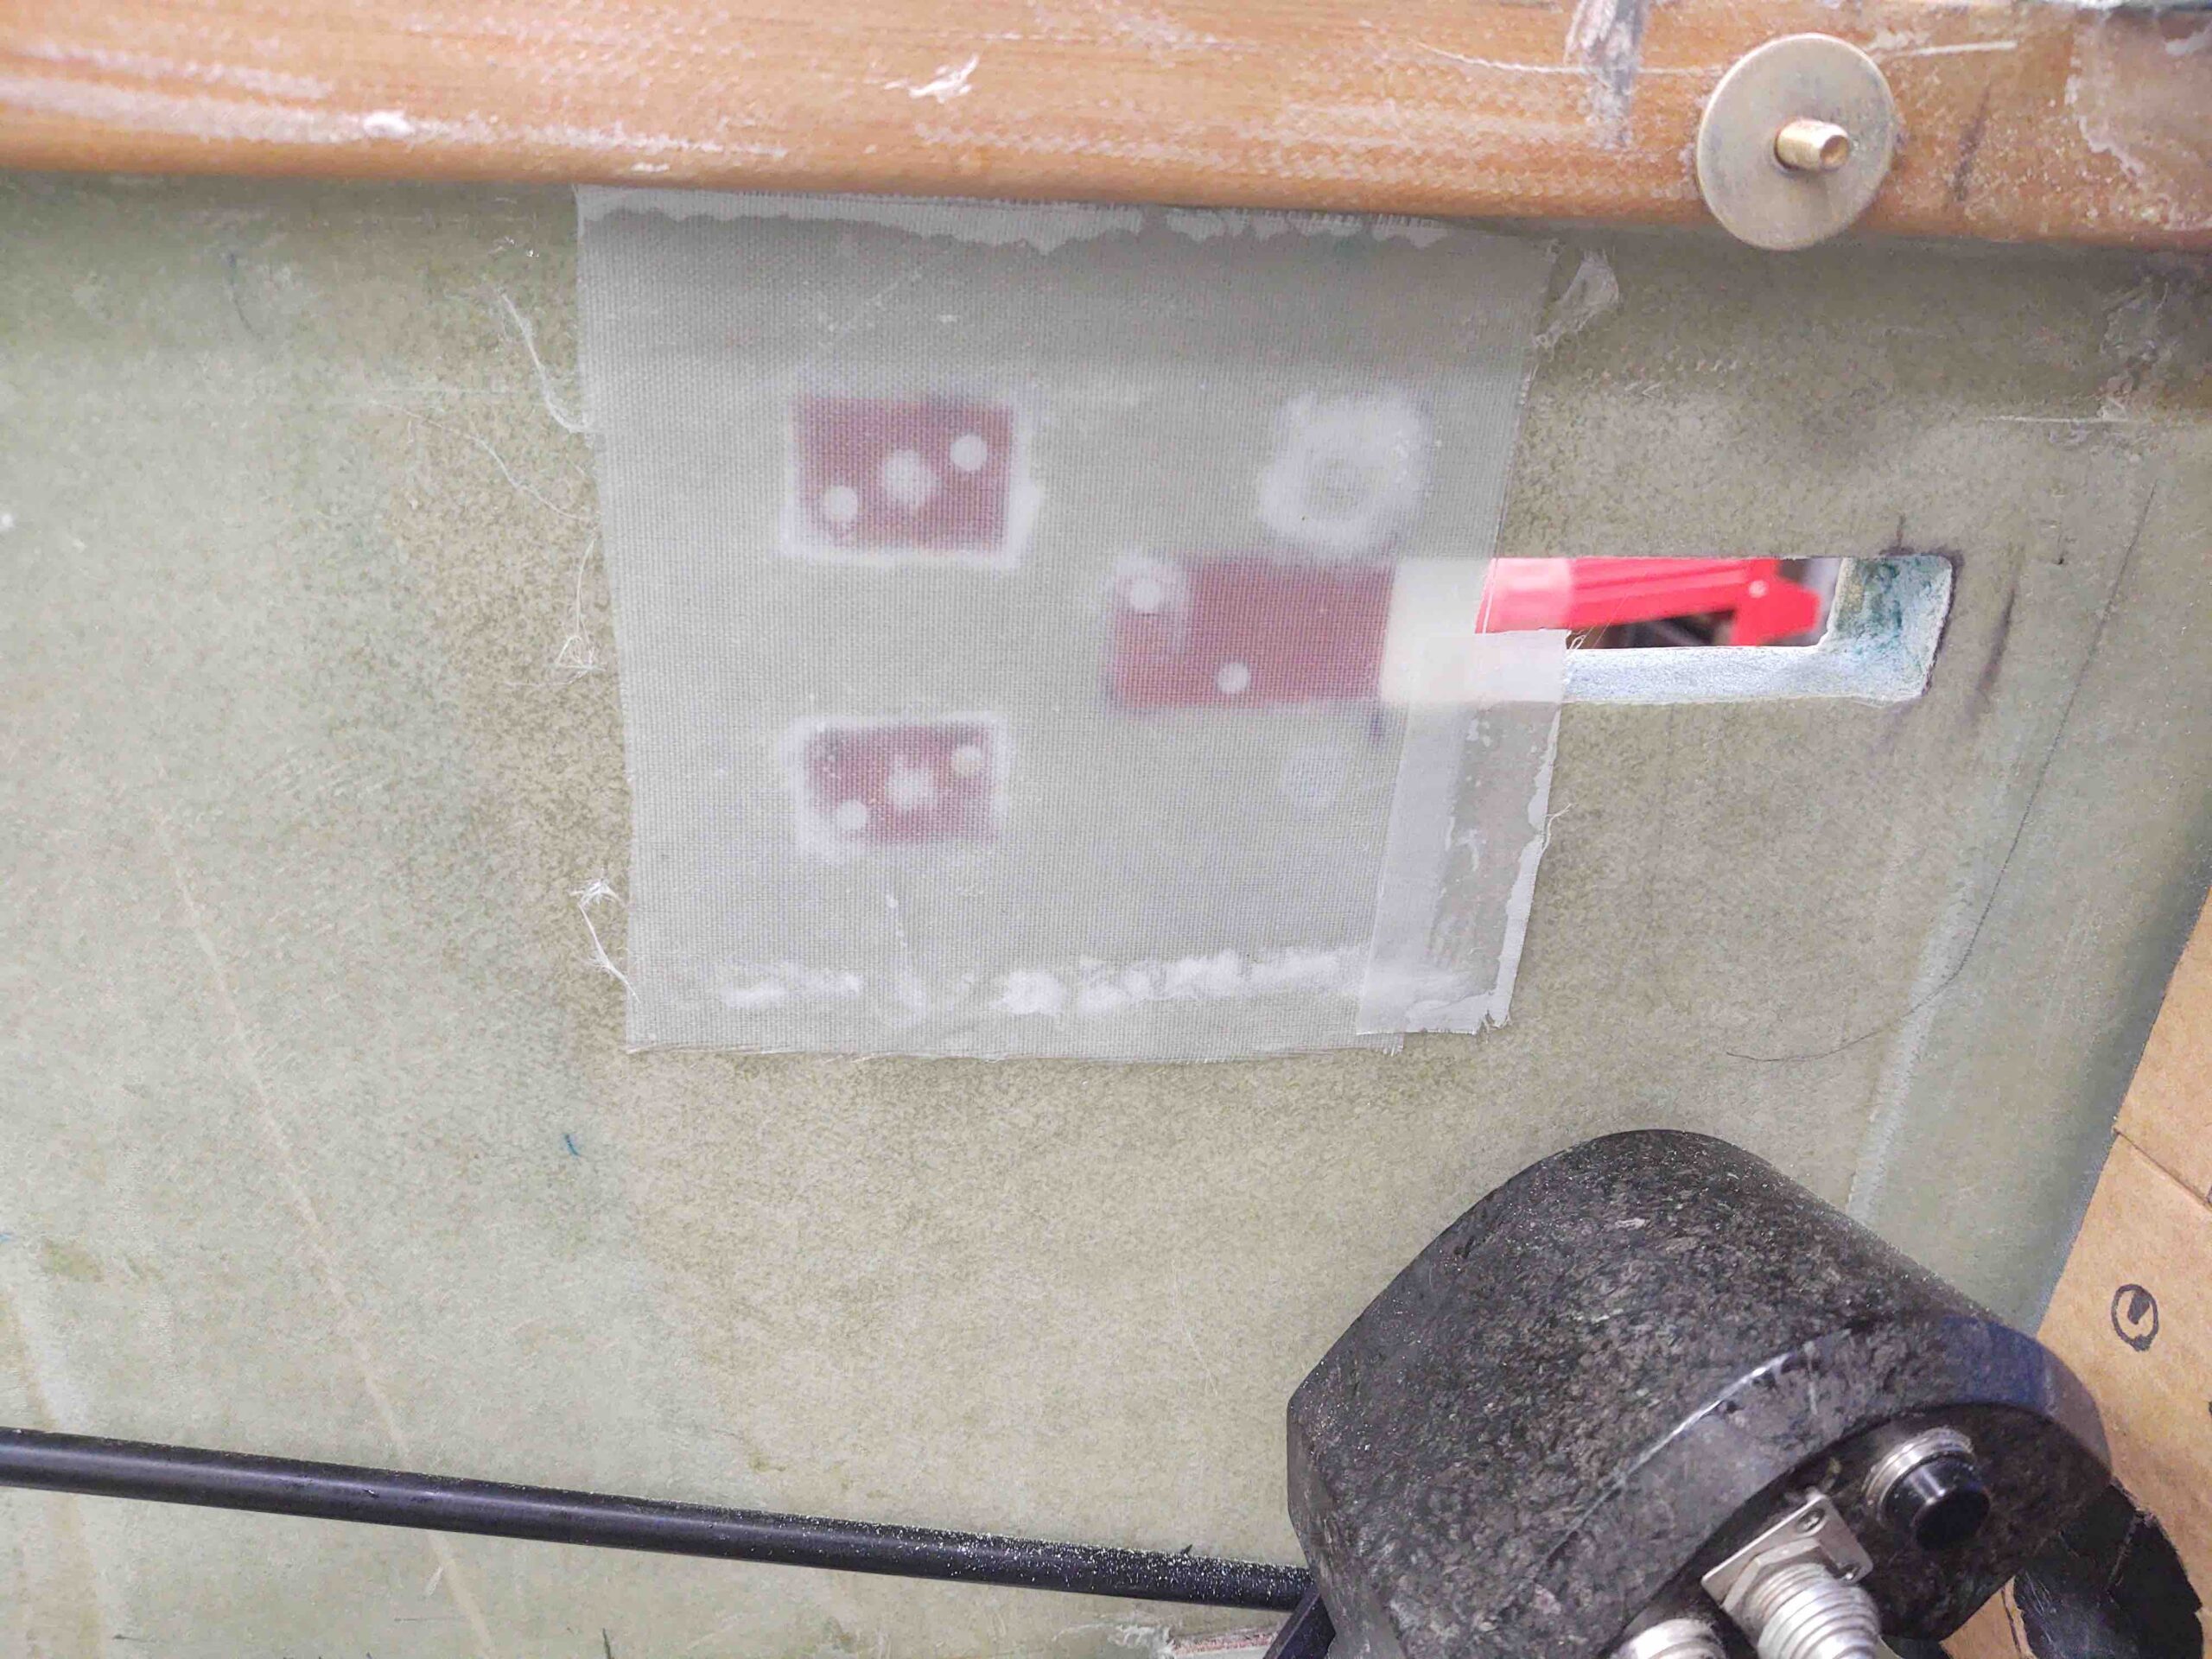
The first task was to flox in the #8-screw nutplate assembly into the interior side of the canopy latch handle opening in the fuselage. I made the phenolic nutplate backer as wide as I could to fill back as much of the interior sidewall as possible simply to block as much incoming air as I can. This piece is just under about 30% of the entire width of the opening.
I guess I should tell you that the screw is a stop screw to adjust the depth of the handle at rest inside the fuselage slot. This keeps the exterior face of the handle even with surface of the exterior fuselage side. Clearly having a screw here makes it adjustable, but it should be a one time adjustment, “set it and forget it” type deal.
The small toothpick pieces are simply a backstop for pressing the phenolic piece into place. I removed them after the flox started greening.
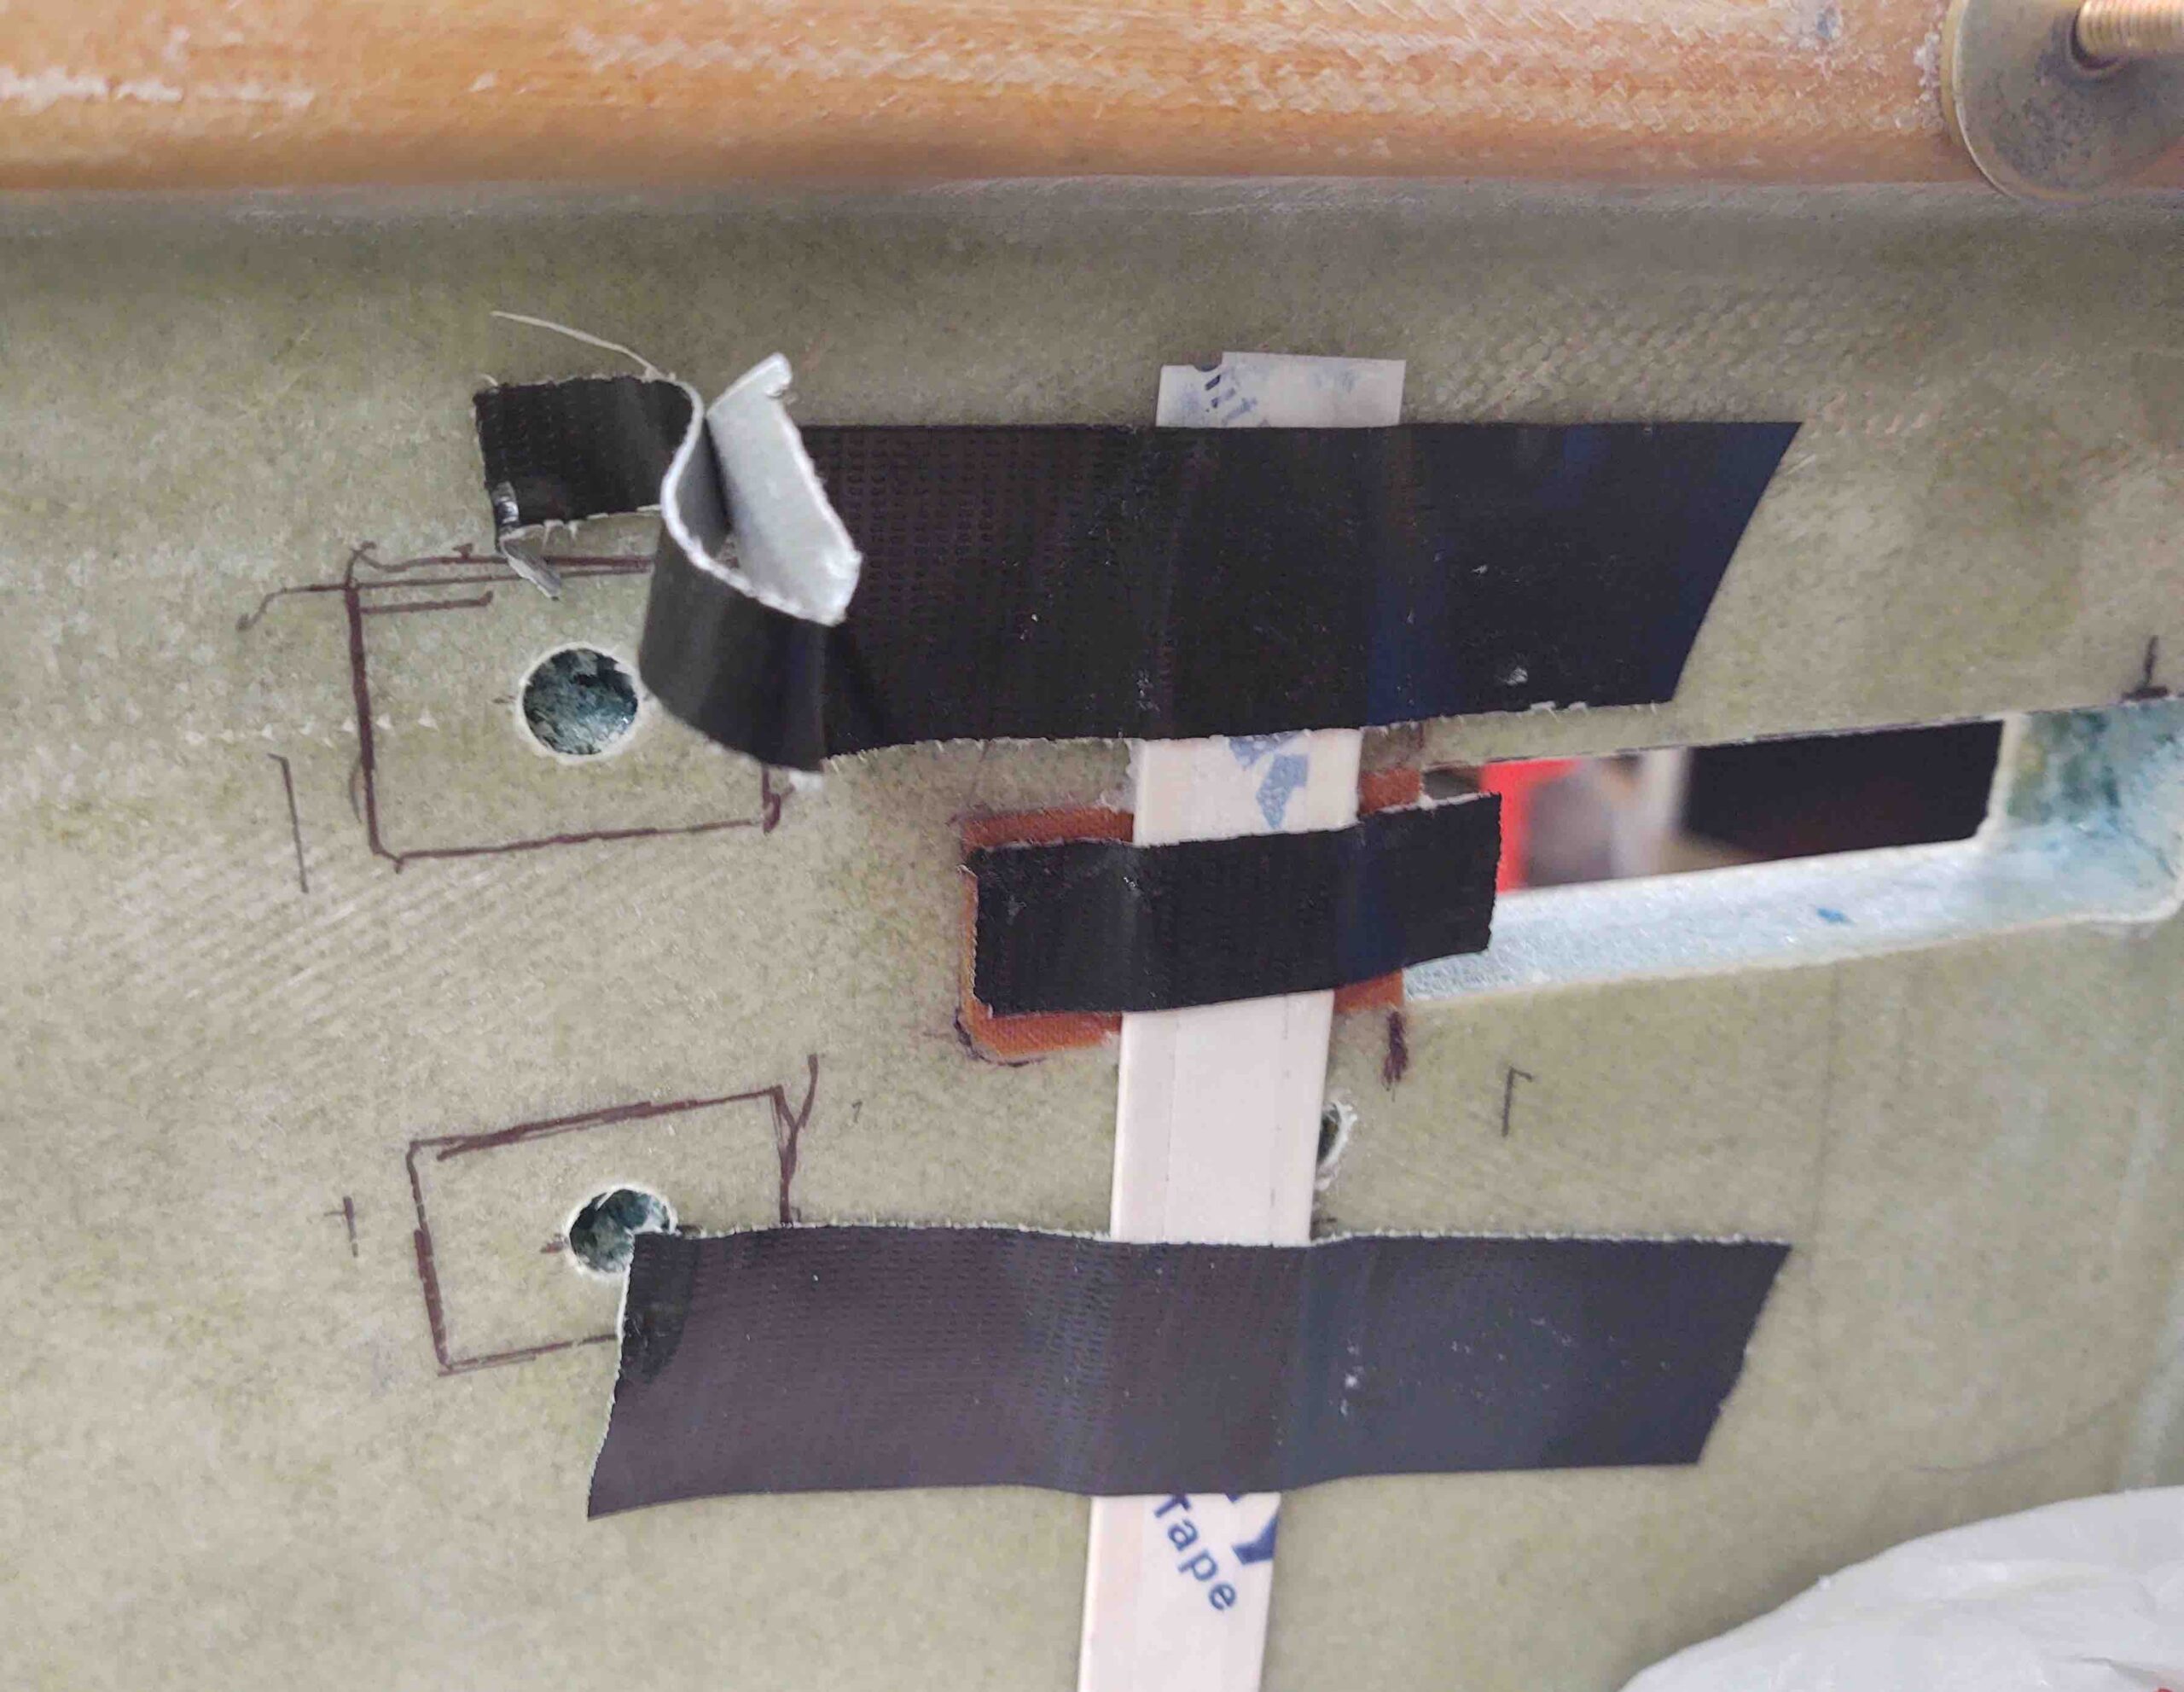
A bit busier on the interior side, with a taped popsicle stick taped even more to the phenolic insert and the sidewall.
As the flox on the above insert piece cured, I cut the triangular canopy latch rod/hook interface piece out of 1/16″ (0.063″) 2024 aluminum. I didn’t drill the rod attach holes yet because I’ll actually test the geometry out using the gray 3D printed PETG plastic piece first.
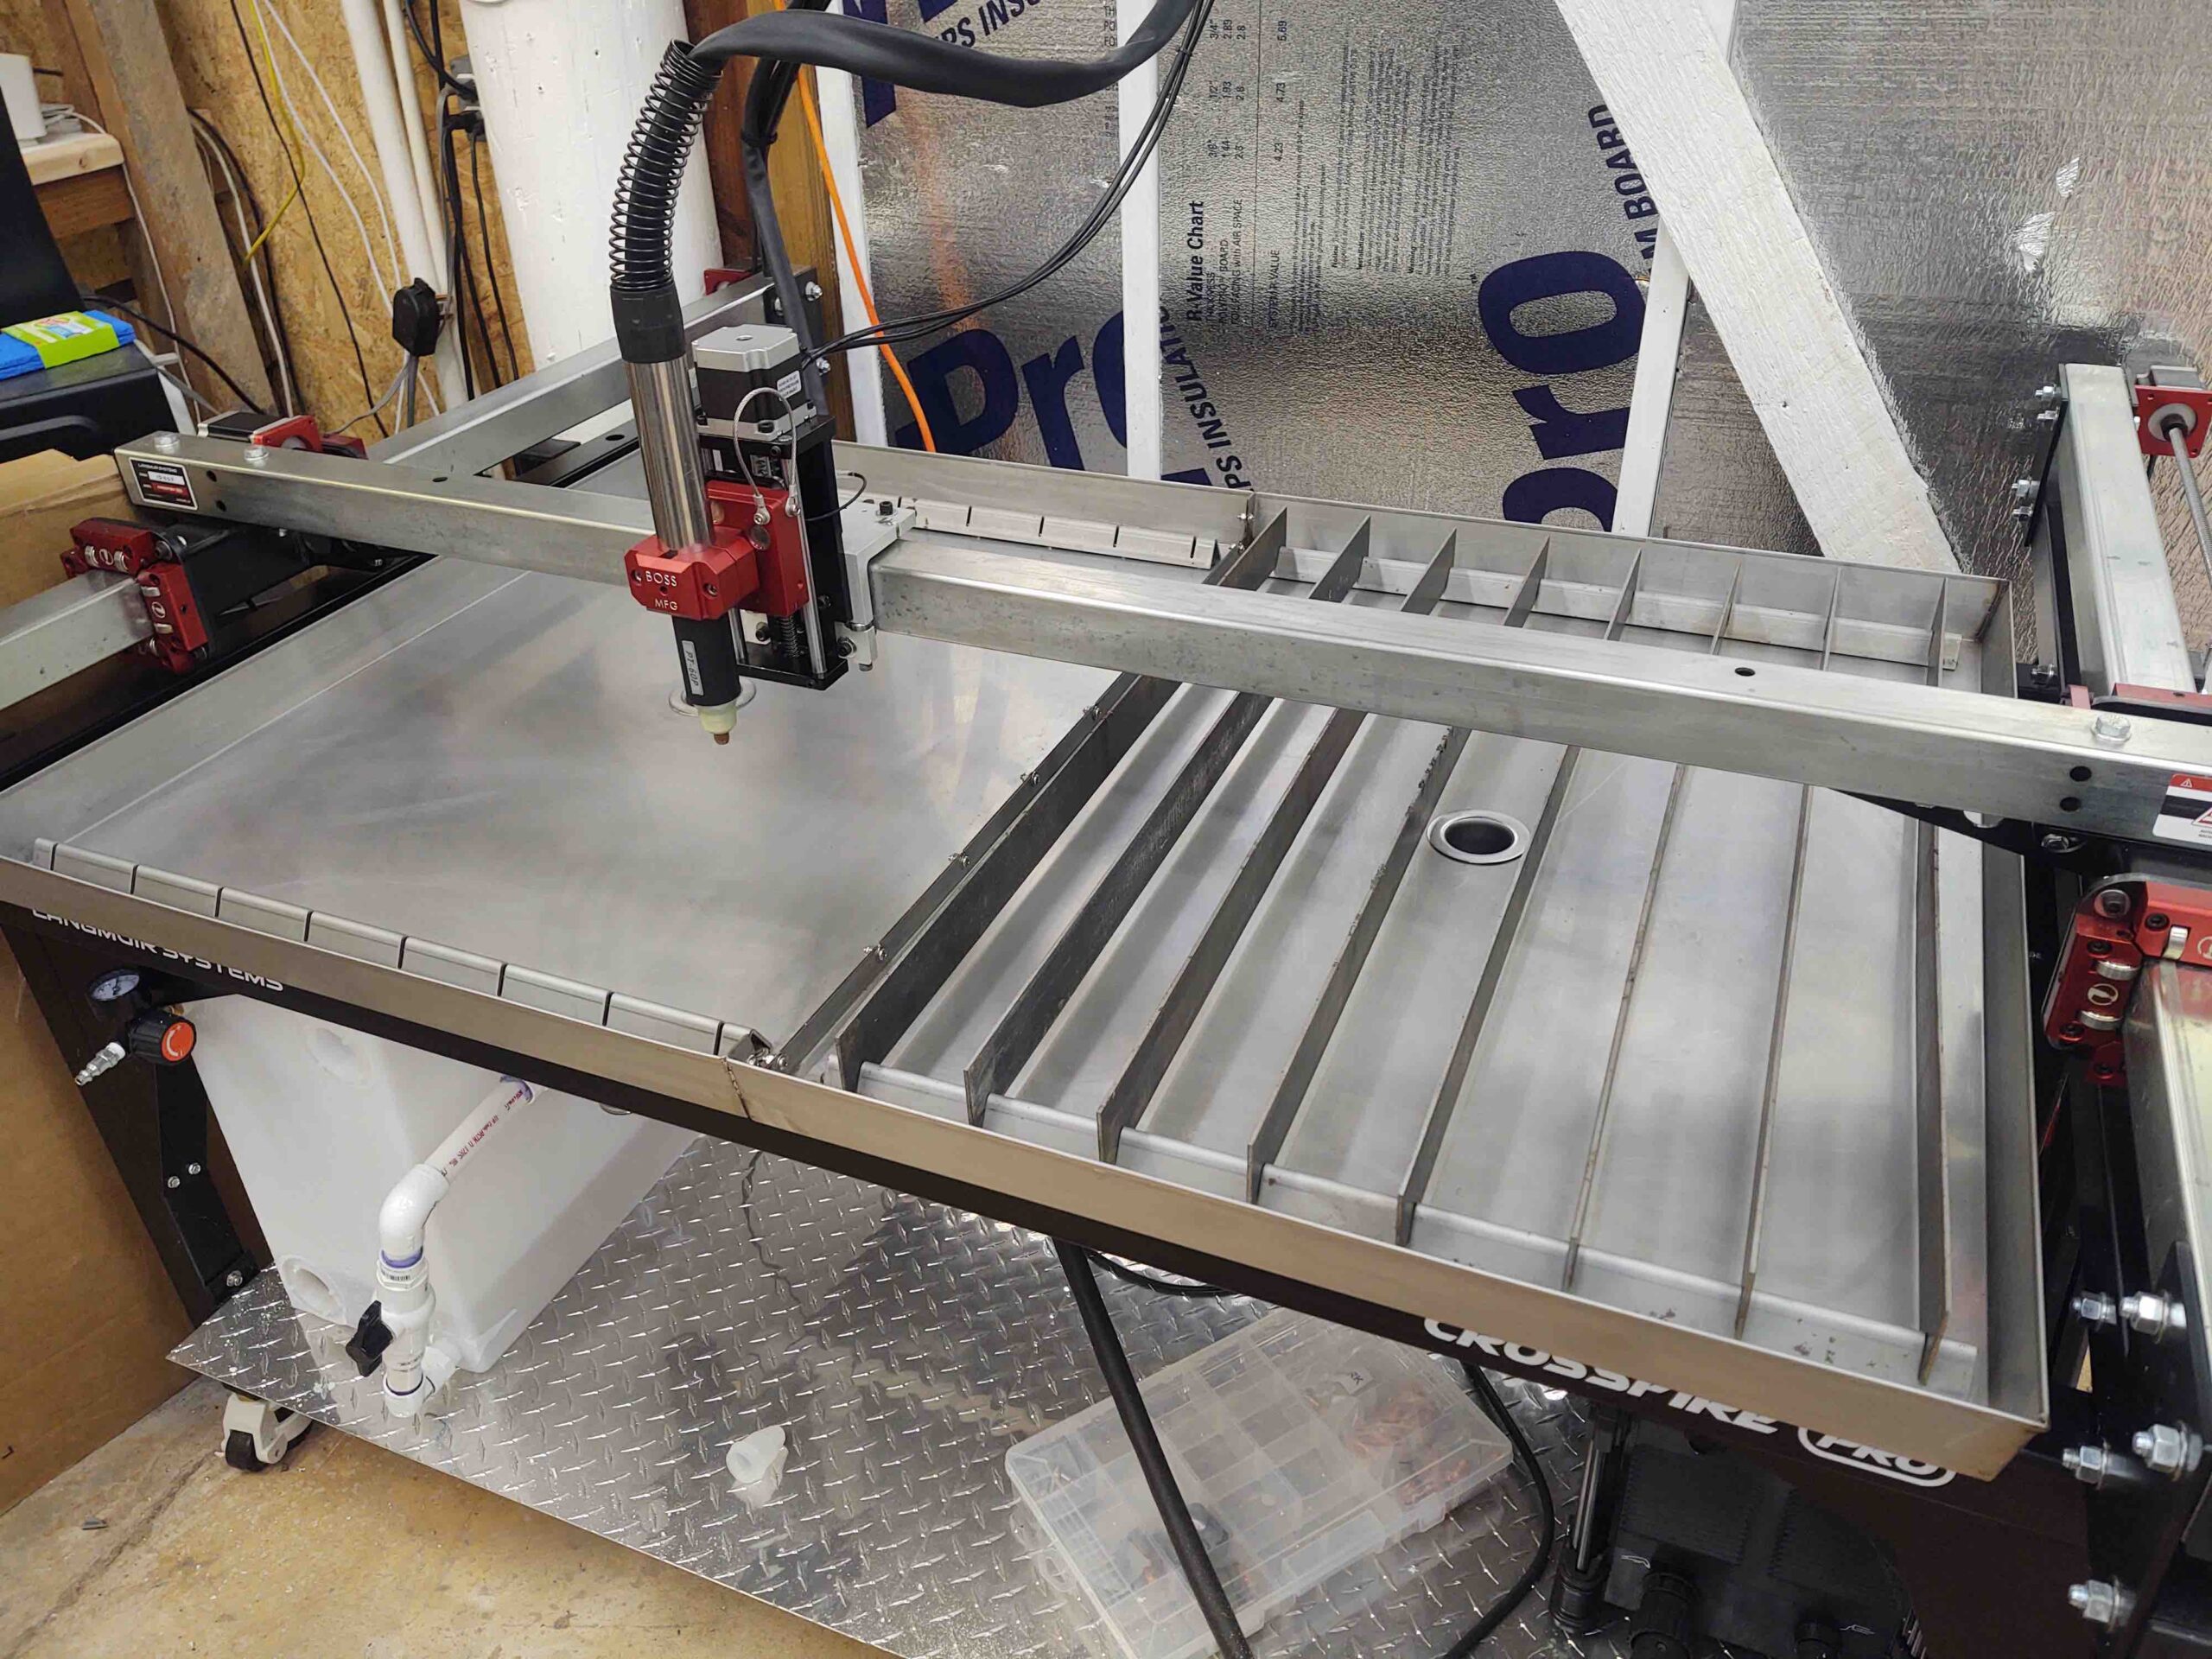
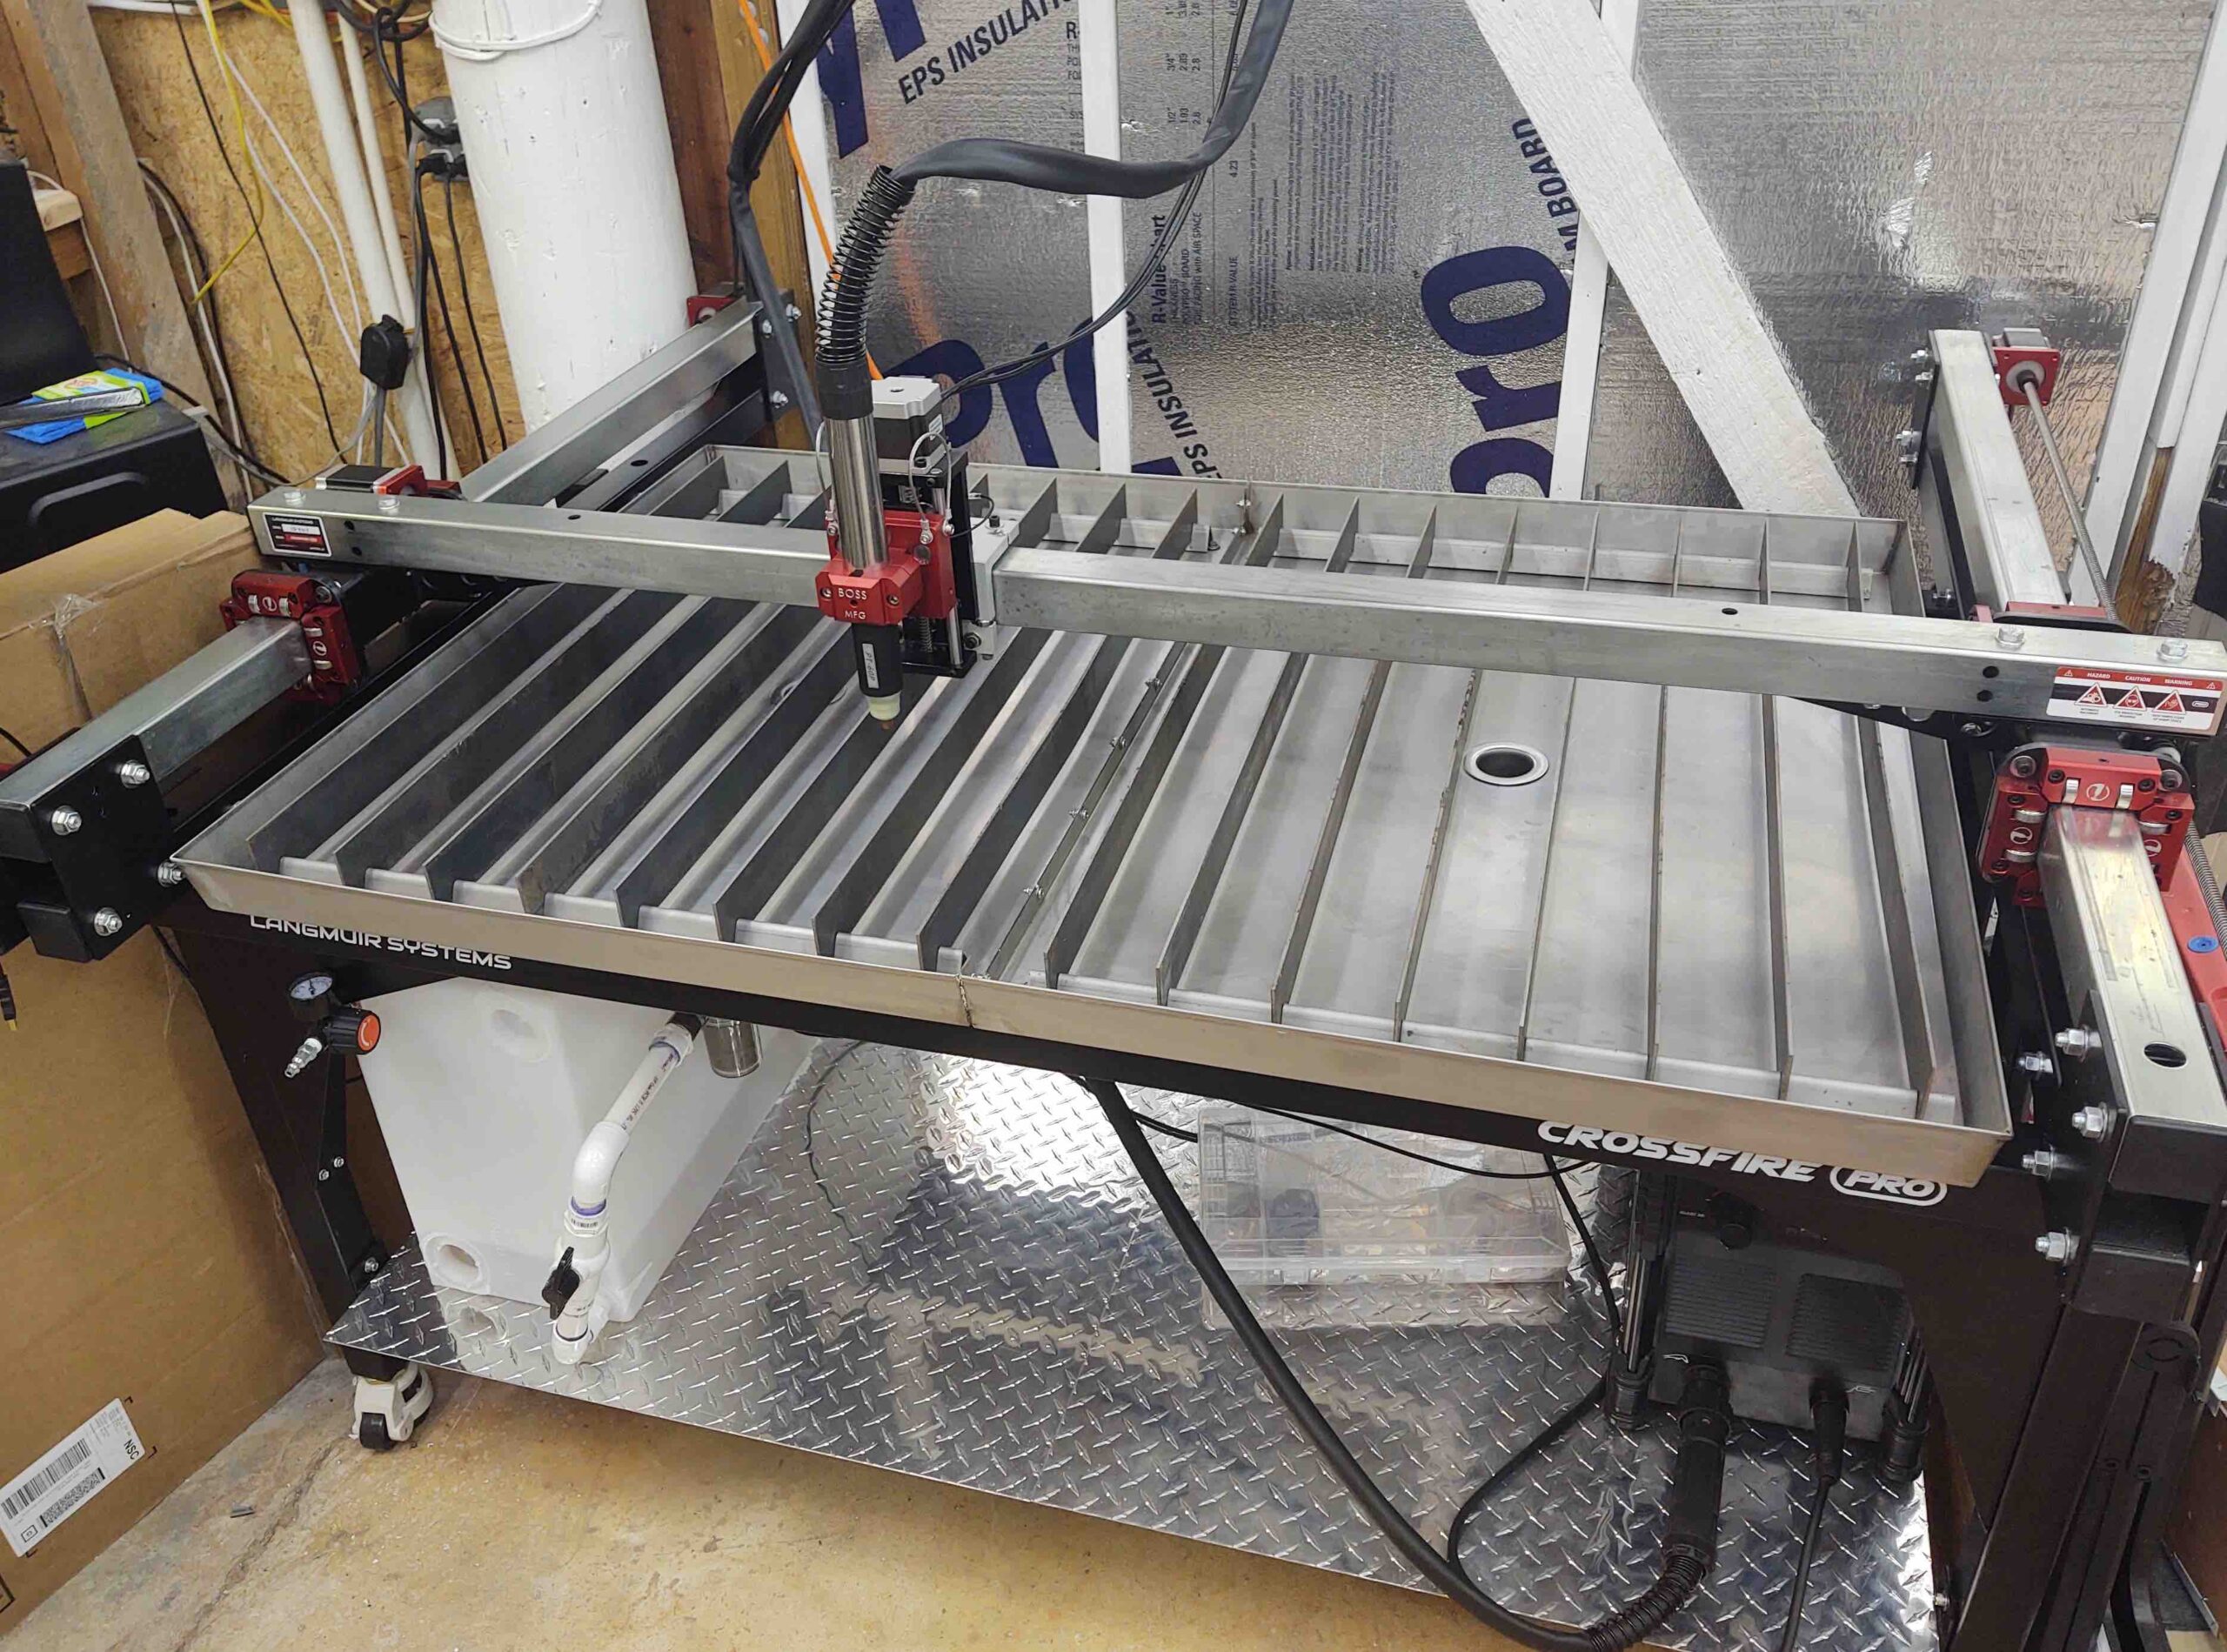
I then got busy cleaning up the plasma cutting table, which desperately needed it. I had actually floxed in the above phenolic piece to get something curing because I was supposed to go swimming with my little buddy, but plans changed. Dinner was still on, so I figured I’d get some cleaning in….
Plus, I’ll actually need the plasma cutter to finish off the canopy (keep reading!).
Again, I used fast hardener for my MGS 285 epoxy. After a couple hours of flox-curing, I used the Fein saw to cut rectangles out of the inside sidewall skin for the canopy handle nutplate assemblies.
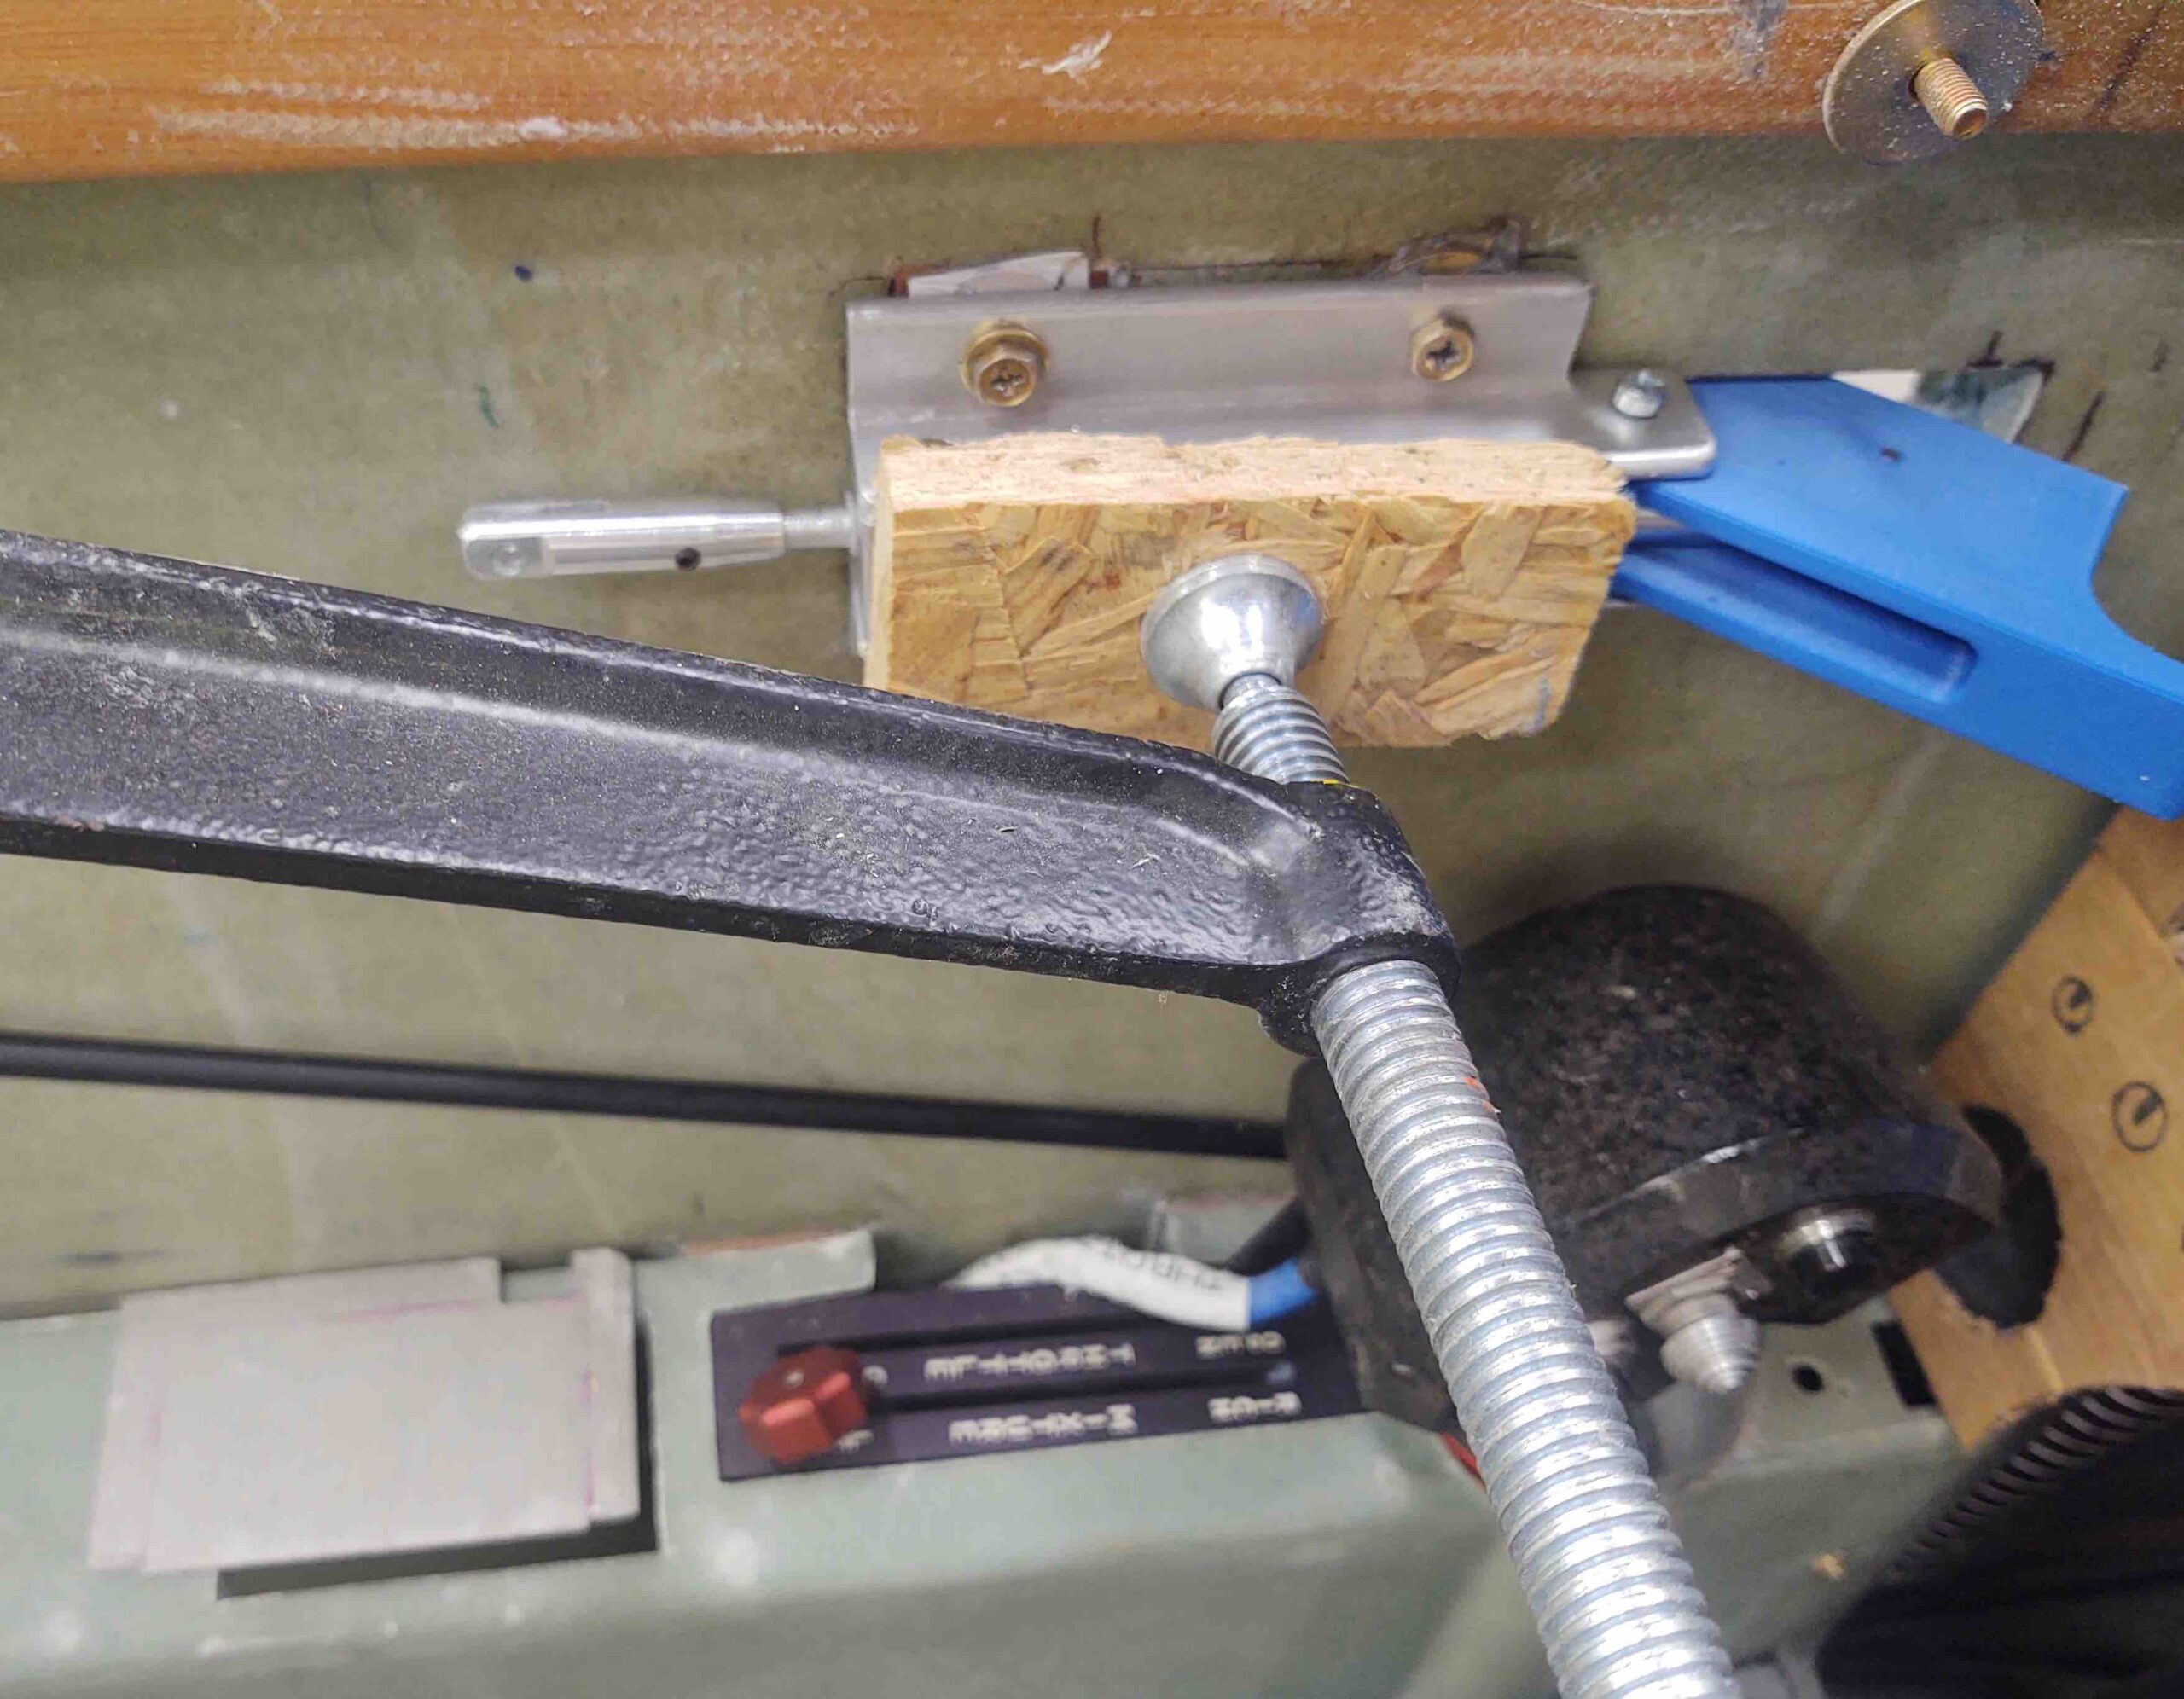
Test fitted here . . .
I then prepped the handle with the 2 nutplate assemblies and just one of the RivNuts –the top one– for floxing into the sidewall.
The reason I’m not mounting the lower RivNut is that I need to run a Nylaflow electrical conduit through the bottom of this latch opening out to the end of the left strake for the 2 GRT EFIS magnetometers. I don’t want to have to work around an intruding RivNut right in my path, so I’ll wait until l install the strakes to flox in the final, lower RivNut.
Also note that I had originally planned to criss-cross the RivNuts and nutplate assembly hard points, but upon realizing that I didn’t want to mess with cutting out a rectangular opening for a phenolic nutplate backer so close to the handle opening, I switched to nutplates on the aft end and RivNuts above and below the opening.
I then floxed the nutplates and RivNut into place in the sidewall. I clamped the handle in place and then left it to cure as I went to dinner at my friends’ house.
Almost 5 hours later I pulled the clamp off of the canopy handle assembly.
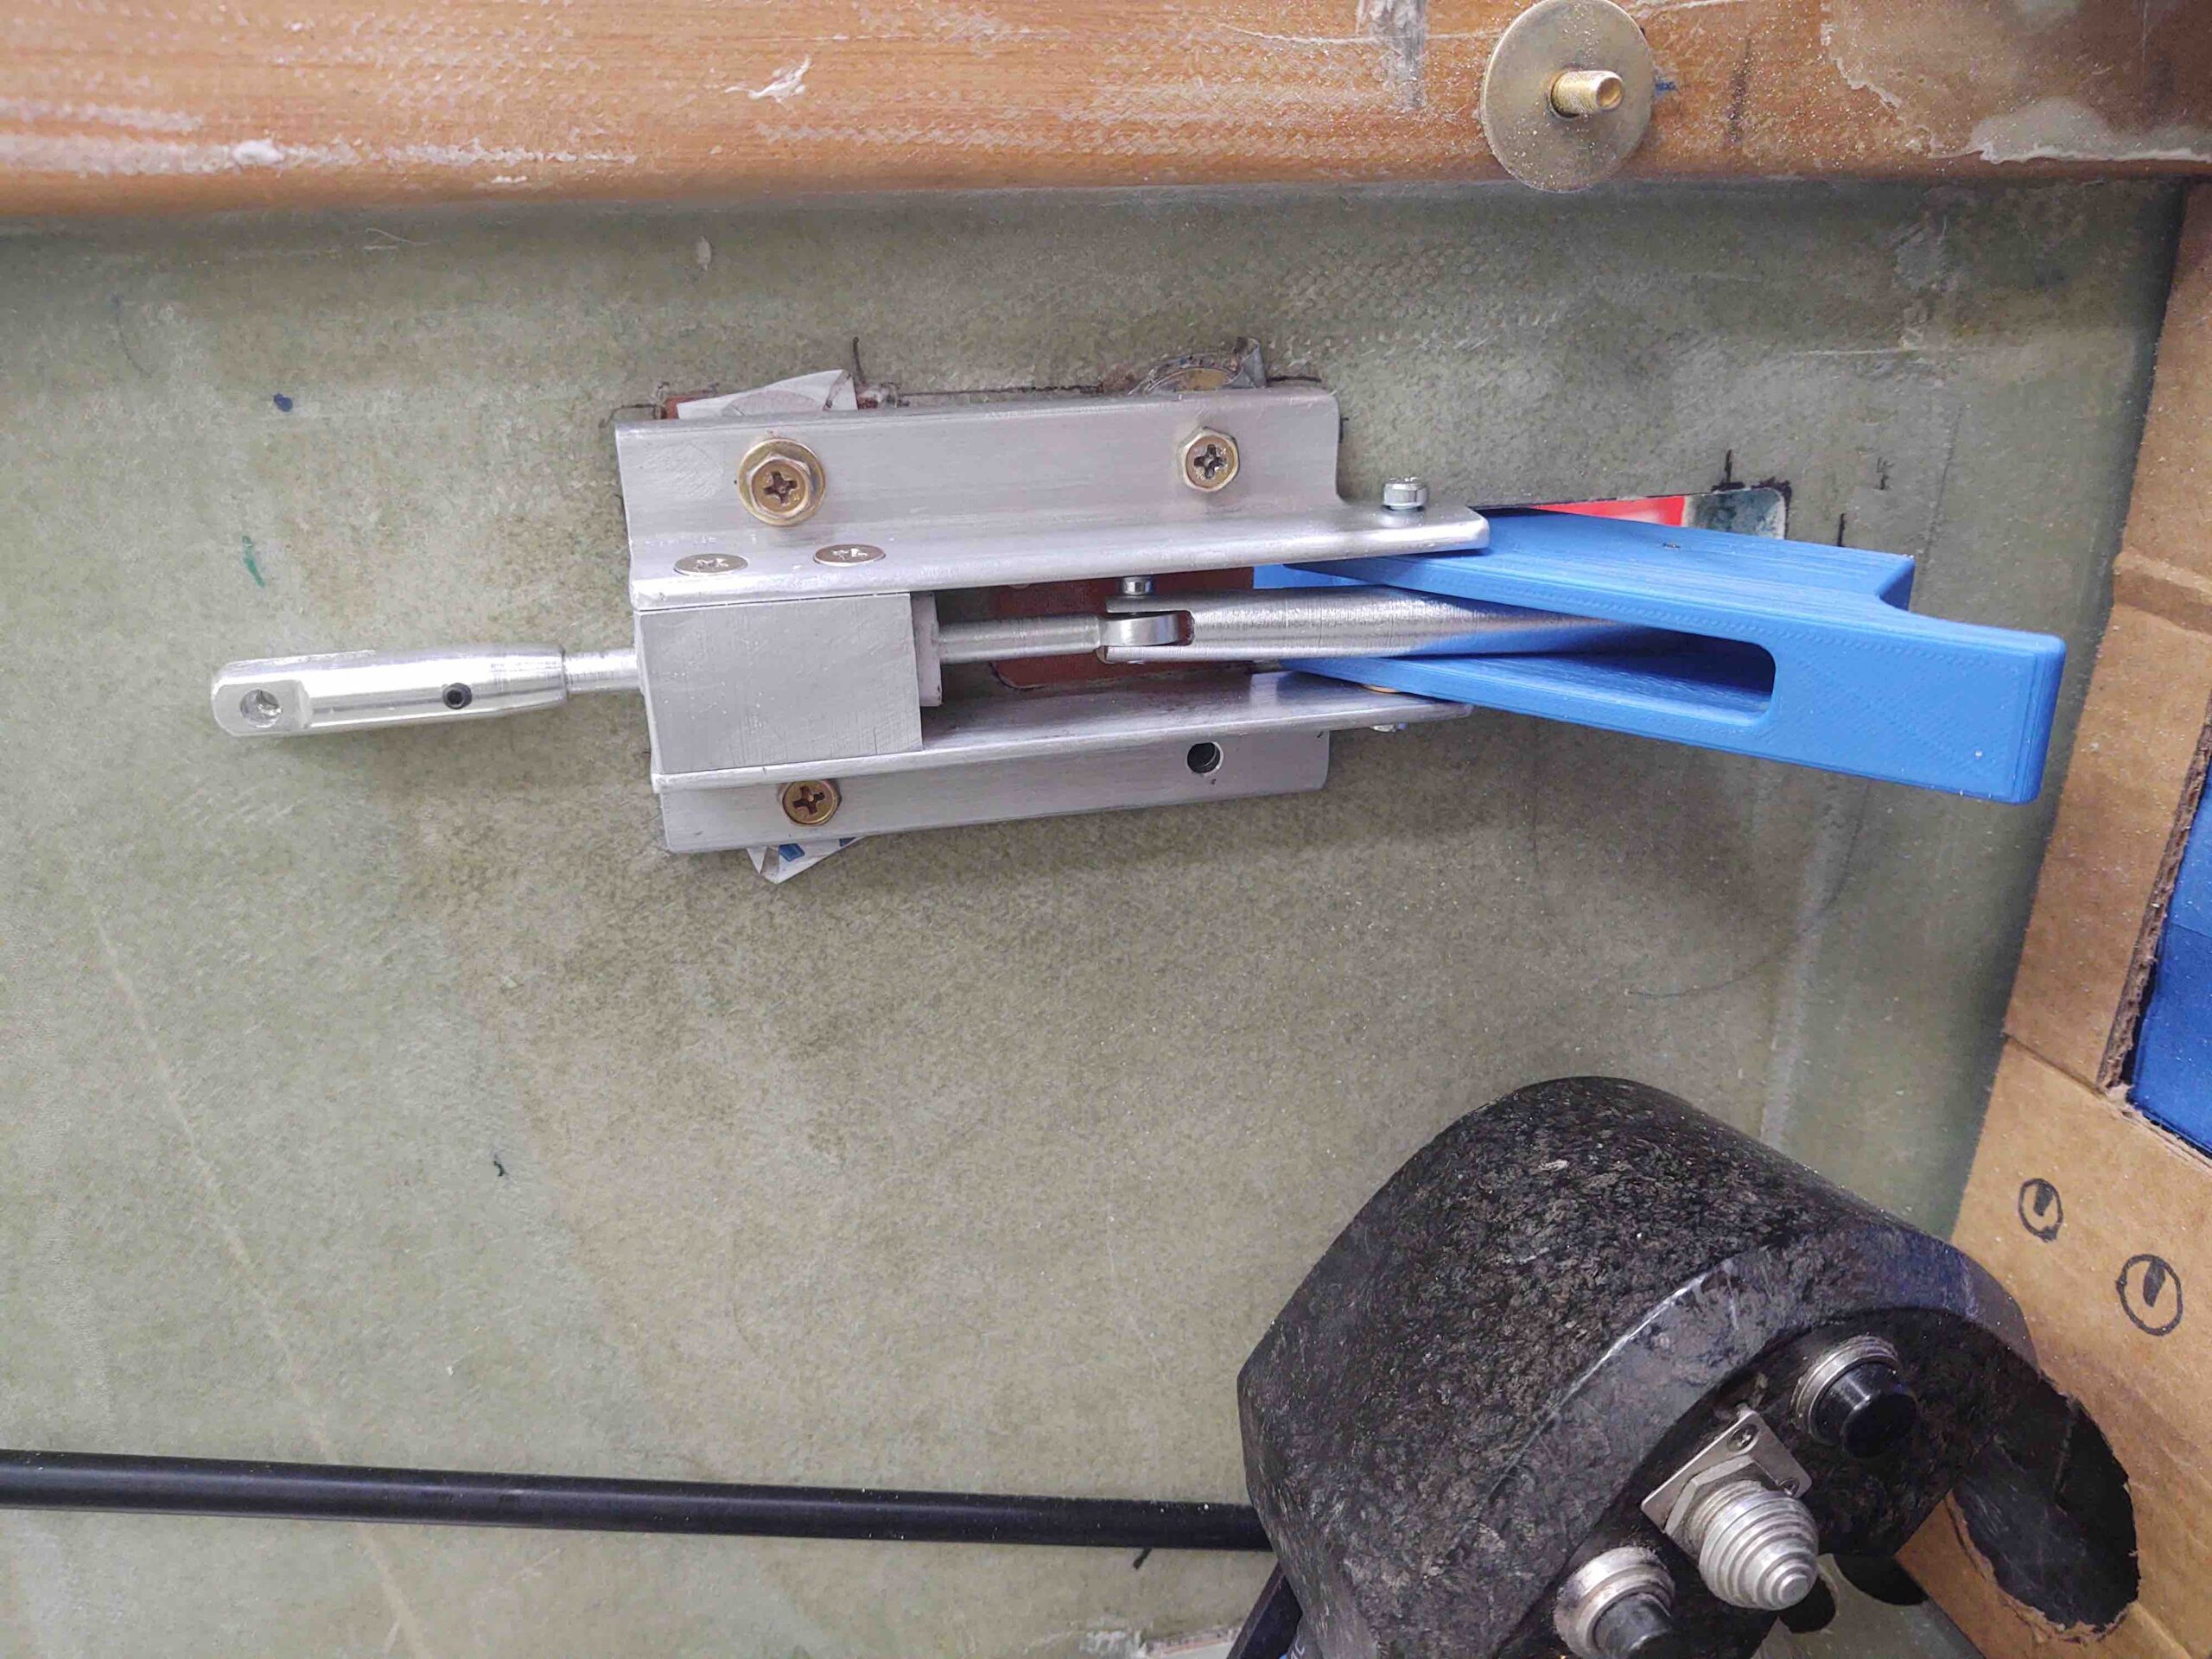
I then pulled the handle assembly off and cleaned up some of the oozing (cured) flox.

And then sanded the area down in prep for a 2-ply BID layup.
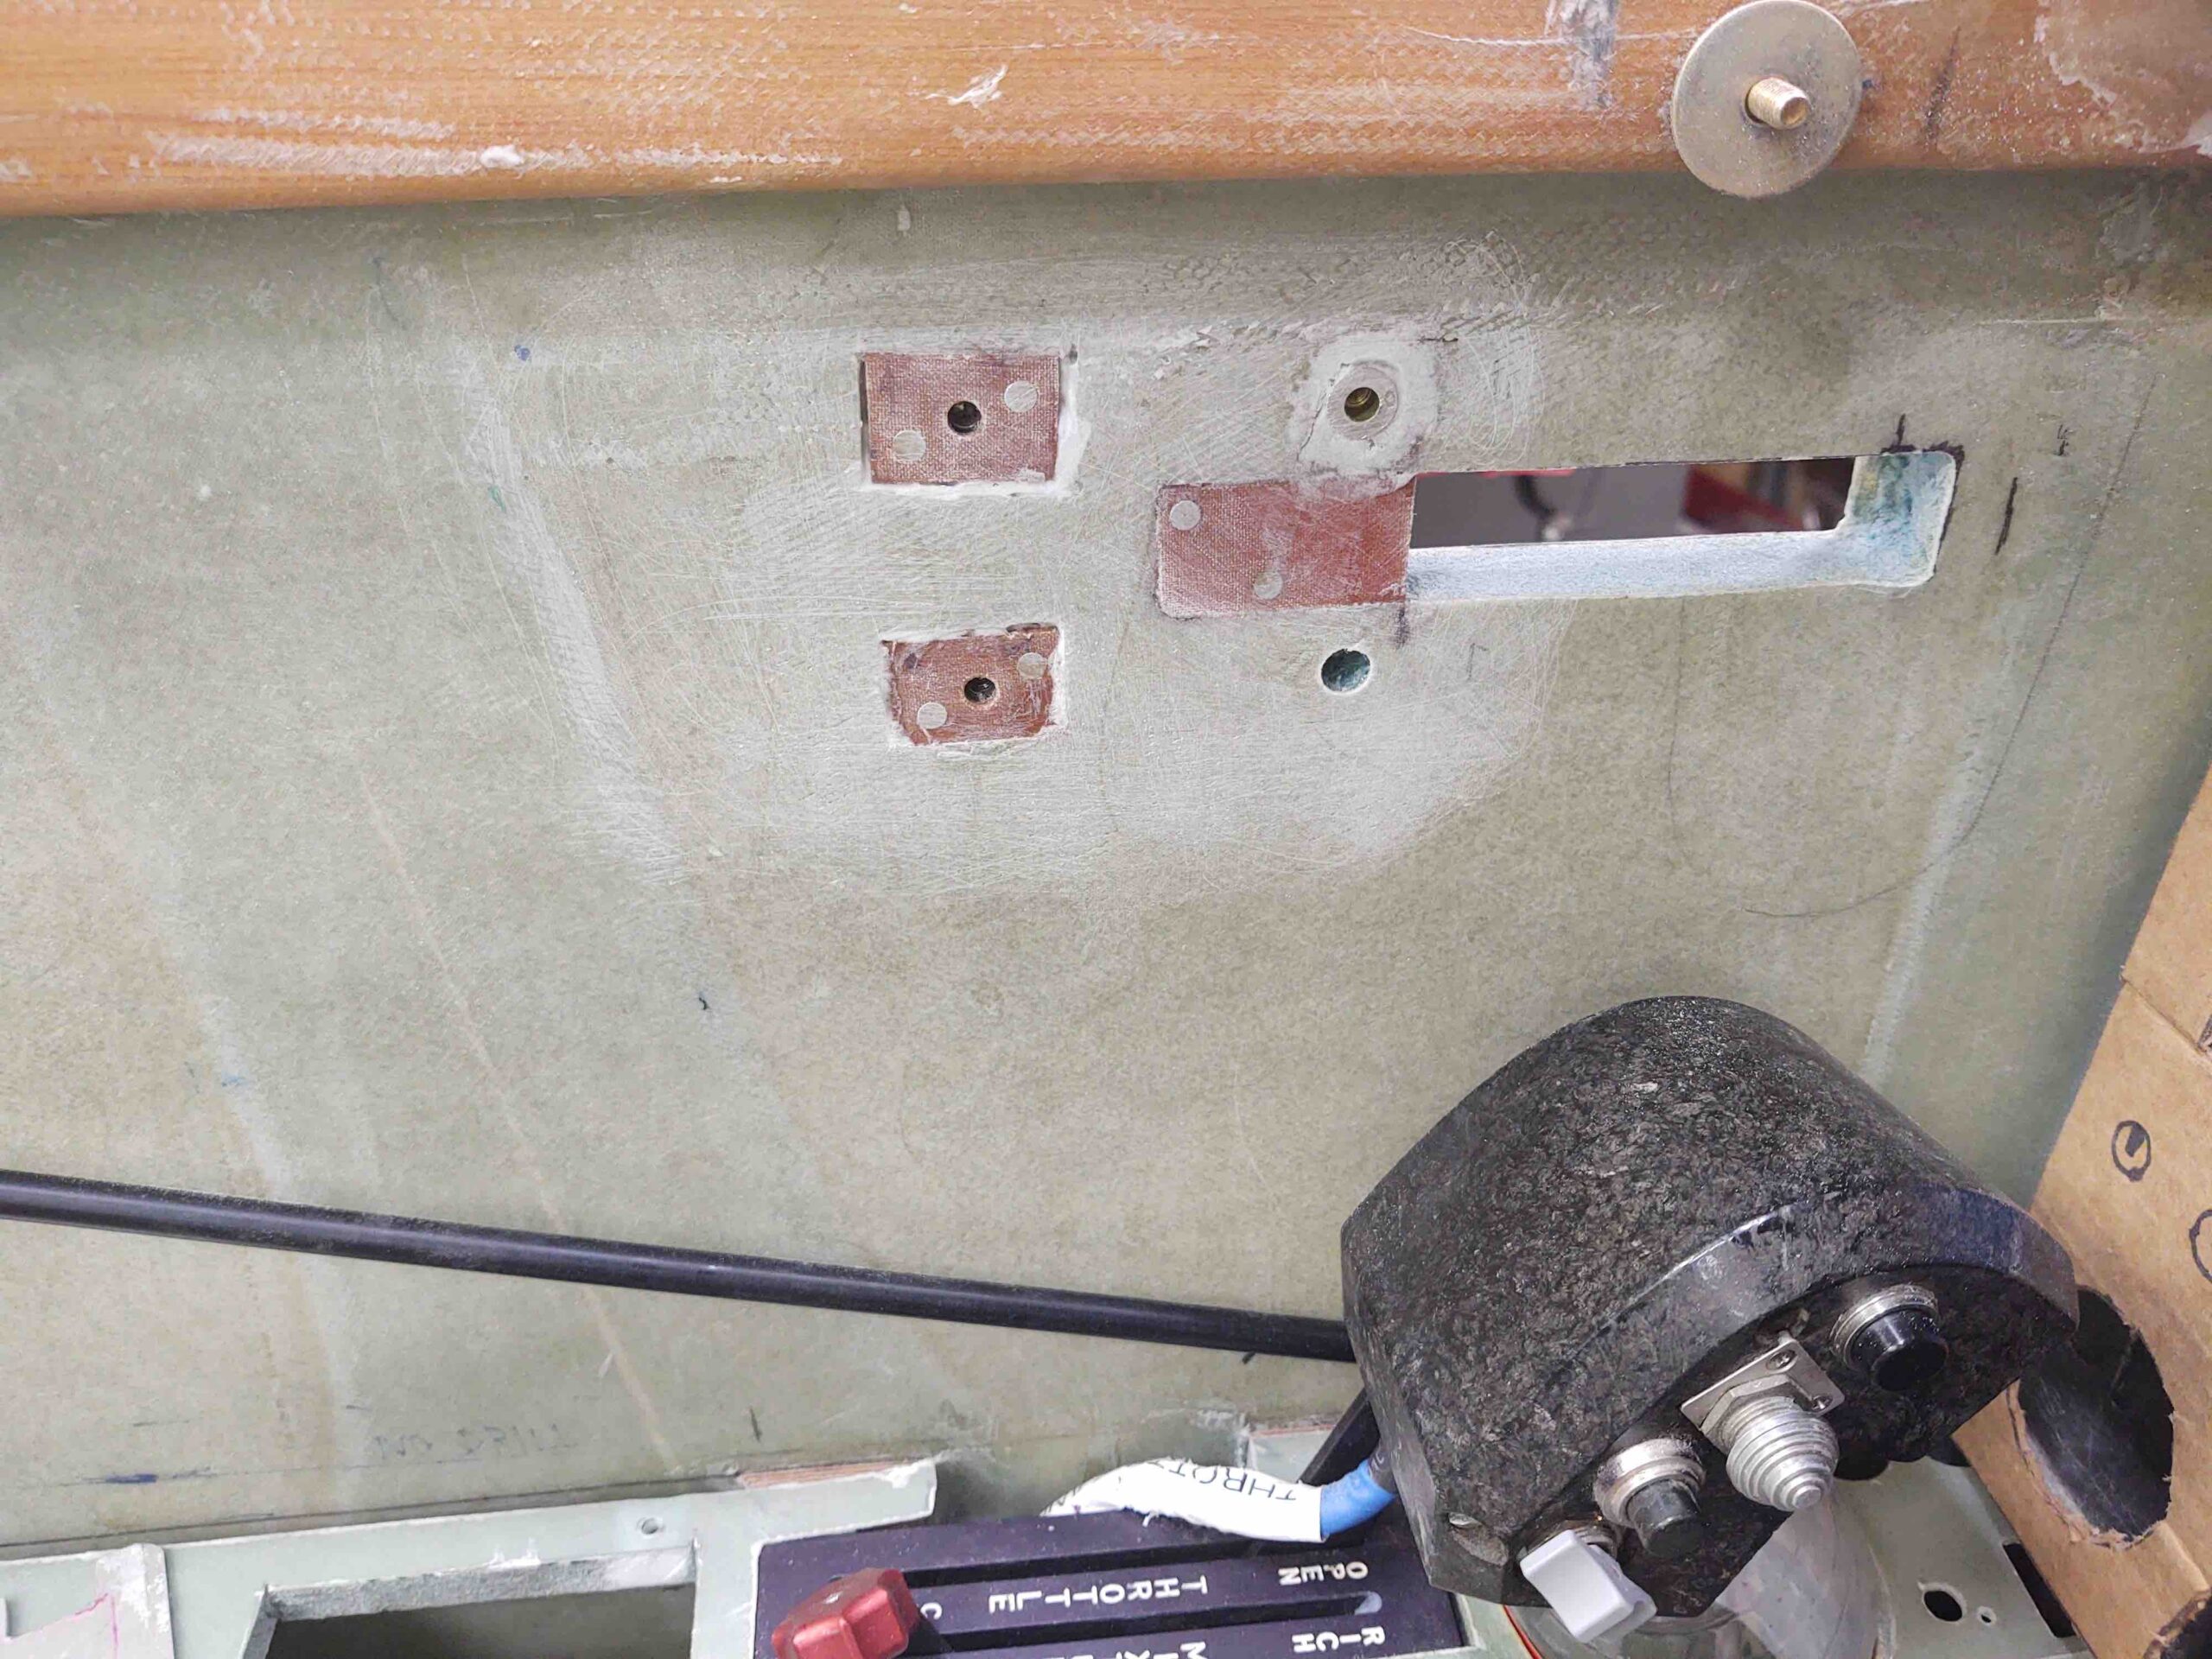
Which I did next… not forgetting the peel ply of course!
My last task in the shop for the evening was cleaning up the remaining plasma cutting table slats and putting them back in place.
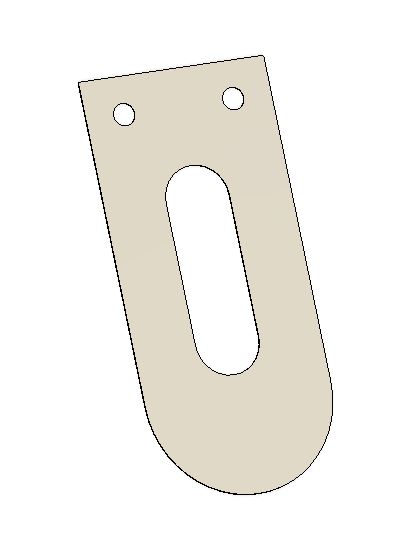
Why am I messing around with the plasma table at this point? Well, as I mentioned above I will need it soon if I want to be diligent in finishing Chapter 18…. since I’ll use it to plasma cut the Canopy’s SC-1 Safety Catch.
Which was my last official build task of the evening: drawing this guy up in Fusion 360 CAD. After a few test runs, I plan on cutting the SC-1 out of some 0.018″ stainless steel (yep, the plans call for 0.02″… but hard to find in small quantities).
With that, I called it a night.