
It’s interesting that when looking down the road at required build tasks some things pop out as seemingly challenging but then they end up being fairly routine, while there’s other tasks that you barely make mention of mentally, mere background noise, that in your mind should merely take hours but end up taking days . . . in other words, predicting man-hours spent in all the wrong places!
Ahh, thus is exactly the case with the canopy hard points! Who knew they’d take so long or be such pain in the backside?! Regardless, no matter how long it took, the canopy hard points are glassed!
I started today by pulling the peel ply off the canopy forward hinge hard points and inspecting the layups…. they looked fine.
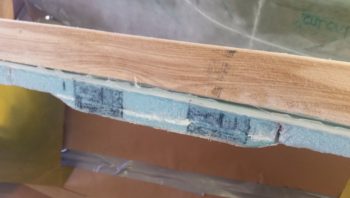
I then curved the outer edges and tops of the last round of foam additions I made for the 2 aft canopy latch hard points on the left side canopy frame. The forward of these 2 hard points was already at the exact width I needed, 1.85″ while the aft hard point needed a little narrowing so I sanded it down to 1.85″ width as well.
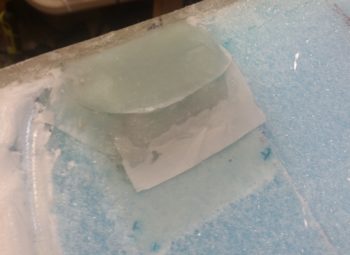
I then laid up 2 plies of BID on the forward hardpoint of this pair, canopy latch #3 of 4.

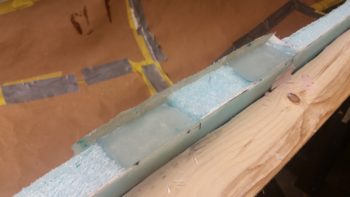
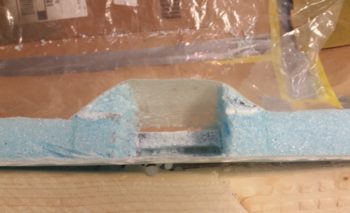
And then also laid up 2 plies of BID on the aft canopy latch hardpoint.
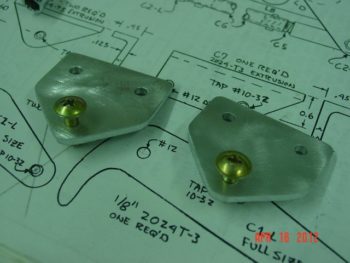
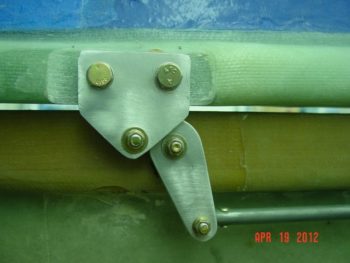
I would like to note that these 2 aft protruding canopy latch hard points (above) are 1 of 2 options that I have for mounting the canopy latch hardware. As per plans, the standard canopy latches will get mounted with bolts running vertically. However, if I find these hardpoints too obtrusive, unsightly or the plans method of latch catch installation too problematic, I reserve the right to shave these off and mount new latches (which I would have to cut out of flat aluminum, see pic below left) which would mount with the hardware installed horizontally (pic below right).
Option #2 is a blatant copy of Mike Beasley’s outstanding work that he did on his canopy, which is pretty close in size & shape to mine (from what I can tell pic wise). I nabbed these pics off Mike’s very informative Long-EZ build site.
One final point of note on my 2 canopy latch options is A) for option #1 I already have all but one set of latch hardware in hand, and B) since these hard points traverse the width of the canopy frame, it’s clearly much easier to lop off the protruding hardpoint section to go with option #2 than it would be to add it later if I wanted to go with option #1.
Moving on.
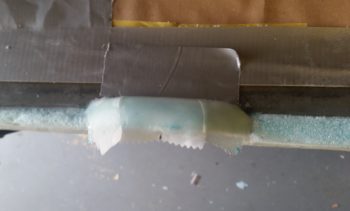
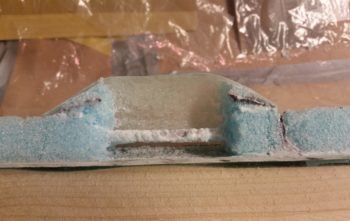
With the 2 aft canopy latch hardpoint retaining glass laid up, I then spent about 5 minutes per forward left side hardpoint with the Fein saw for an initial cleanup. Here is the aft most hardpoint of the 3 that had an accelerated curing event (not quite your typical “violent” exotherm).
Here’s the middle of the 3 forward hard points, which will be where the safety catch will get mounted. I had a pic of the forward hardpoint as well, but it was very blurry so I deleted it.
I will say that trimming off the nasty tops and then digging down into these front 3 hard points proved to be the normal arduous task of trimming solid flox & glass. Although not pictured, I later dug down into this hardpoint almost 1.5″ and found nothing to be concerned about structure wise. And given each of these hard points weren’t quite full when I stopped, with about 3/8″ more of new flox and BID required to get them to level with the bottom canopy frame, I’m very confident there is no structural issue with these hardpoints (I did a fair bit of research as well and from what I could ascertain 160-200° curing temps are not damaging in any manner to a layup).
And here we have the 2 forward hard points on the right side for the forward canopy hinge after I pulled the peel ply. I then hit the hard points with the Dremel tool to clean them up a bit.
I then got to work on the right side aft canopy hinge hard points.
I dug the foam and dead micro out, pulled the peel ply on the inside of the newly applied “retaining wall” glass and prepped them for the BID/wet flox hard point mix.
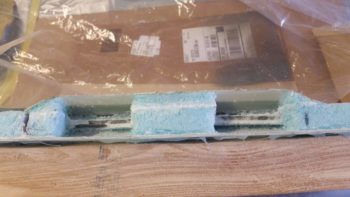
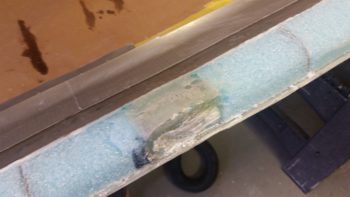
This time around I decided to avoid any exothermic type reaction so I simply use slow hardener and filled each hardpoint up only about 2/3rds of the way. I then peel plied each hardpoint. The plan was after the first round cured I would then pull the peel ply and top off each hardpoint hole in an attempt to minimize any excessive curing heat.
Here you can see the aft hinge hard point holes filled with wet flox and BID, but not all the way. The layup mixture is peel plied and allowed to cure before another final round of wet flox/BID mixed was added to fill the hardpoint holes level with the foam canopy frame.
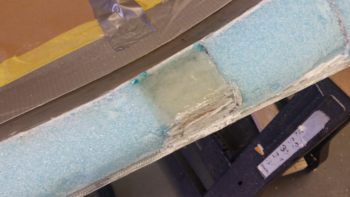
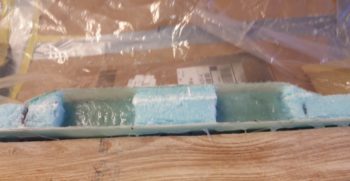
I then dug out and cleaned up the hardpoint hole for canopy latch #3 of 4….
And the canopy aft latch hardpoint.
Here we have the 2 aft canopy latch hard points ready for their wet flox/BID concoctions.
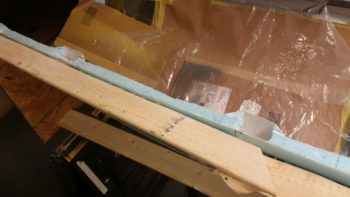
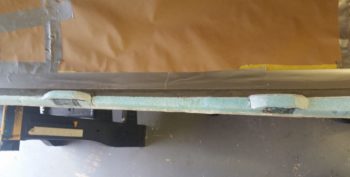
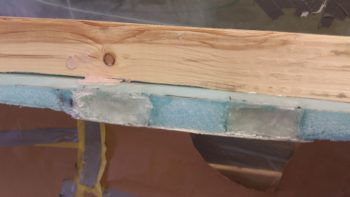
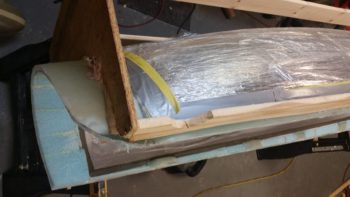
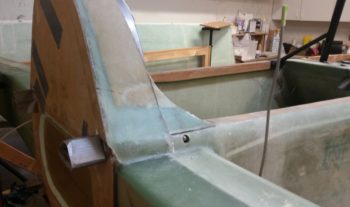
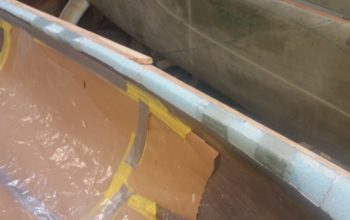
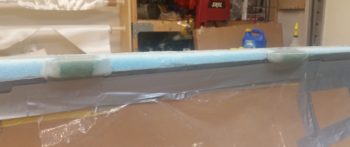
It was getting toward the end of the evening and I wanted to get the aft canopy corners cut off since I needed to first use my battery powered “skil” saw to trim down the canopy’s wood support frame to allow access –if you can call it that!– to get the Fein saw in to lop off the aft lower corner of each canopy side. You can see the visible green cut line. [Note: all the above power tools make a lot of noise, and it was getting late… my community homeowners association and I already have a strained relationship….. so…. ya know!]
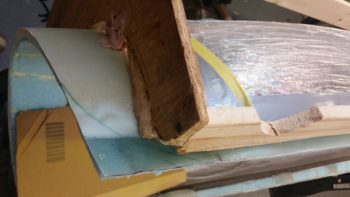
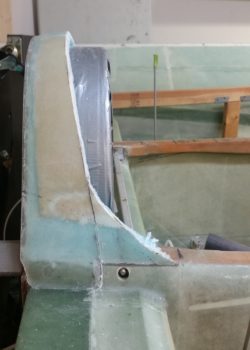
I then cut off the lower aft corner of the right side canopy frame.
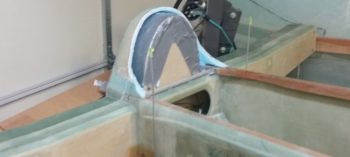
I discussed this in an earlier post, where I noted I couldn’t just do this during canopy removal because I had duct tape under the aft canopy frame as a release agent. This piece will be attached to the aft side turtleback (sans duct tape) and will allow the forward part of the upper cowling’s protruding shoulder (faintly marked on the side of the turtleback) to be installed without any clearance issues (if my prognosticating is correct!). It also provides clearance for the canopy when it is opened with the forward part of the cowling shoulder structure.
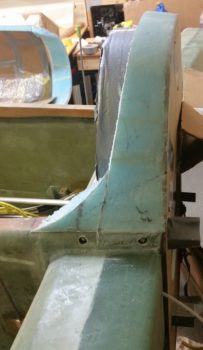
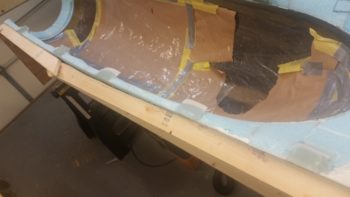
 Here I’ve done the same on the left side, lopping off the lower aft corner of the canopy (seen in background) to add it onto the left side turtleback structure.
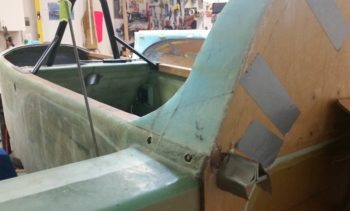
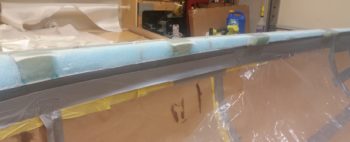
Here’s a tandem shot of the new turtleback additions.
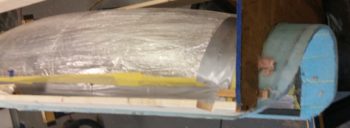
And I couple wider angle shots. I left the first pic even though it’s blurry to get an idea of how these turtleback lower corner additions will look.
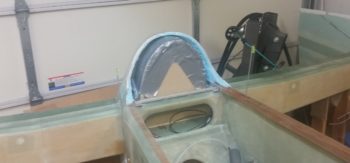
And a final shot of the canopy with the lower aft corners lopped off. Now, to be clear this is not a design feature dreamed up by me –although admittedly I’ve come up with a few doozies!– but rather the quickest, most acceptable response to having to contend with the upper cowling shoulders and ensuring clearance for the canopy to open without hindrance. Obviously I only needed this for the right side, but doing both sides makes the canopy and turtleback symmetrical. So, if you don’t like it, than bicker at Mike Melvill –the guy who designed these cowlings– next time you see him . . . not me! haha!
Ok, so jumping ahead about 5 hours, I finally completed glassing ALL the canopy hard points . . . whew! As I said at the beginning of this post, I would not have expected these darn things to take so long.
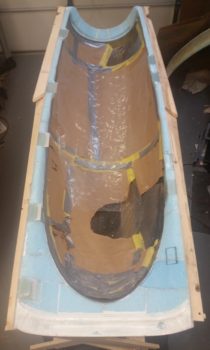
Here’s a shot of the right side canopy hinge hard points.
And the 4 canopy latch (remember, I added a latch) and safety catch hard points.
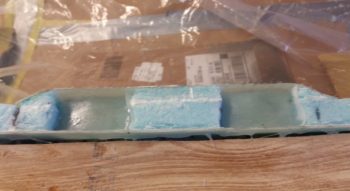
The aft 4 hard points on the left side canopy frame.
And the aft 2 canopy latch hard points.
Finally, we have the front canopy latch hardpoint, floxed, glassed and peel plied.
Tomorrow I’ll continue with some tasks on the canopy, but I need to start packing since I’ll be taking a quick load down to North Carolina in a couple of days. I will then return, do a mad blitz to finish as much as I can to make the fuselage road worthy before I load it up and haul it down to NC as well on 1 August.