
Todyay’s significant tasks mainly involved the ailerons. To be clear, while closing out the wings’ aileron pockets with their respective sheer web layups was a prerequisite in my book to flipping the plane [technically it simply had to be done prior to mounting the wings on the inverted fuselage, and then subsequently finishing the bottom of the wings at the bottom strake junction and out to the edge of where the winglet glass will get laid up]… finishing the ailerons themselves is not actually a prerequisite.
However, since it only adds a few days I figured I might as well get them knocked out while they’re here in front of me… and get that build variable transmuted into a constant. Thus, while I do plan to get the ailerons mounted on their hinges to the wings over the next few days, I will not be finalizing the aileron control linkage installs until after the plane is back upright.
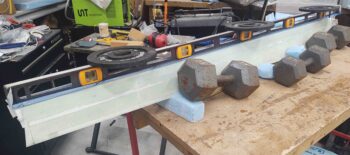
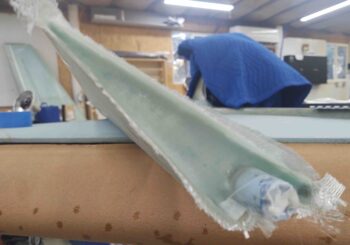
With that, I glassed the big closeout layup on the left aileron. I started by microing the blue foam and then installing (with thicker micro) the middle and outboard A5 aileron hinge plates, the inboard A10 torque tube covered by the inboard A2 aileron hinge plate.
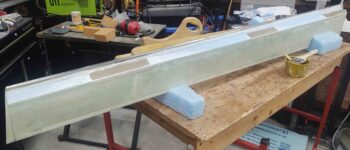
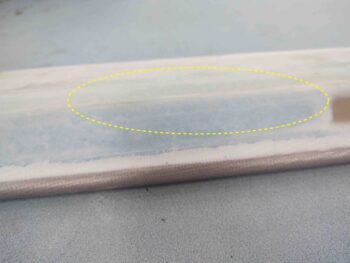
I then laid up the single ply of BID (one piece) across the entire length of the aileron. Now, unlike the right aileron –which I had some air pocket problems at the new glass to old glass corner junction along the top edge– I used a 3″ wide piece of peel ply and only applied it to the top of the aileron up to the corner edge of where the new glass was laid up. I then let the layup cure for a couple of hours so the micro and glass would firm up quite a bit.
Then while the glass was still tacky, I made up some fresh epoxy, folded the piece of peel ply down around the corner edge onto the front surface of the aileron –where the hinge plates are located– and then added the taped level with a 5-pound weight over each respective hinge plate. At this point I also taped the 1″ A10 nub (protruding out of the inboard edge of the aileron) to the overhanging level. I then left it alone to cure the rest of the way.
With the left aileron curing I then got back to work on the right aileron’s end ribs. Here’s a beggining look at the mess that makes up the inboard side of the right aileron.
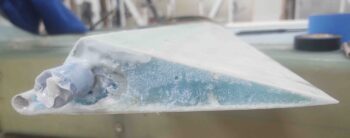
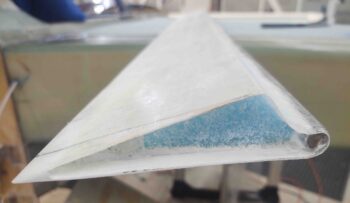
I then hacked out as much foam with a razor knife into a garbage can I placed right beneath it before taking it outside to hit it with the Dremel tool. Now, while this inset is only 0.4″ deep, the reason you see a swath of micro is due to the fact that on both ends of the aileron these inset rib pockets cross the original edges of the micro junctions between the huge blocks of the wing foam cores that are glued together to make up the wing structure.
After slathering in a fair bit of micro, I then glassed in 2 plies of BID as per plans.
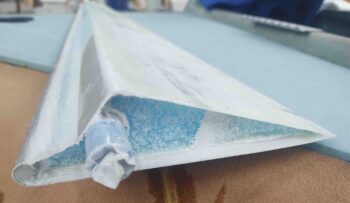
Here’s the other end, the outboard side. I of course cleaned it up at the same time as the inboard side. But to give a before and after shot, here it is immediately following the cleanup and shaping of the foam… again, to about 0.4″ deep.
And the 2 plies of BID that goes into that end rib pocket.
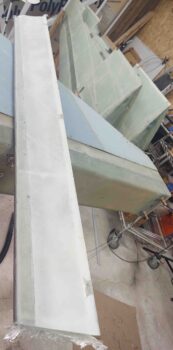
Prior to these end rib layups, while I had the aileron on the bench outside, I also spent a good bit of time removing all the excess micro from the aileron bottom surface. Finally, after all these years at least the aileron is back to normal!
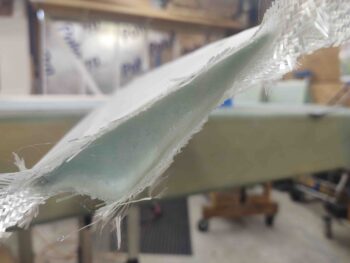
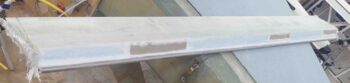
Just another full shot of the right aileron.
And a shot of one of the problem bubbles/air gaps I have near the corner edge. I’ll be doing some drilling-n-filling on those of course.
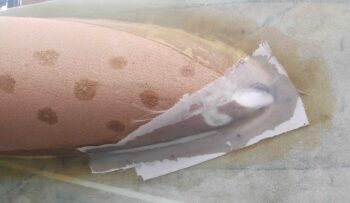
In addition to the ailerons, I also did some minor “repairs” to the lower edge of the right strake leading edge near its intersection with the fuselage. When I had taped the leading edge up tight against the fuselage during the initial strake leading edge install, it bunched up some glass (the lower white circular spot below) and caused it to separate from the foam, essentially causing a delam. I of course cut out the dead glass.
Also, since these leading edges are tricky beasts to nail perfectly since so many alignment variables are happening concurrently, there was a small gap between inboard leading edge edge and the edge of the strake opening on the fuselage… along the bottom edge for a bit that I simply filled with flox. Well, when the layup cured I noted a slight trough (white strip on bottom) for about 6″ where the glass was depressed up into that gap. With the flox and the glass it still resulted in a very strong joint, but since this layup is in part cosmetic, and the underlying structure is sound, I am committing the cardinal sin of overlaying glass atop of micro in this trough.
Now, the main reason I’m doing this now is because I wanted to get a ply of BID around that vent inlet hole to do some edge floxing. This will allow me to slowly start shaping that hole to refine it into a “pleasing shape!” Also, I want to get the inlet hole somewhat figured out so I can actually get the inside interior wall glassed and close out the vent structure and be done with it. Currently the wall-less interior opening provides me needed access to the interior inlet hole to micro/flox/glass as required.
Although quantity-wise it may not seem like much got done today, those end ribs took a surprising amount of time to clean out and prep for a small 2-ply BID layup. Of course even the 1-ply final big layup on the left aileron was a multiple hour affair. Even more with final layup preps required.
Chipping away at it!