
This morning I started off by a myriad of cycles of climbing in and out of the backseat to test and mount a small white LED light externally above the left fuel site gage. Although it is a bit brighter than it was before, it fits the requirement and doesn’t look bad at all. I 5-minute glued the LED in place and then covered it with Gorilla duct tape. I then covered the black Gorilla duct tape with a strip of blue painters tape I saved that is covered with the granite gray cabin paint. Not a perfect match, but you’d really have to be looking hard to see my little slight of hand.
I’m calling this task complete and pressing forward.

On the strake top I added dry flox to the ends of the wire channels where there was a hole entering into the baggage compartment below. In the rest of the channel I used much wetter flox. I’m using flox on the left side just to add strength any way I can in reinforcing this area where some passengers may be climbing in and out of the plane. On the right side I’ll use micro.
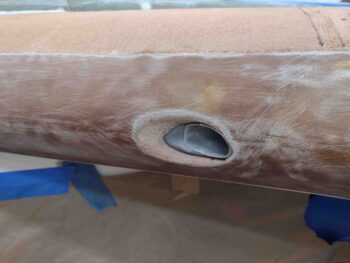
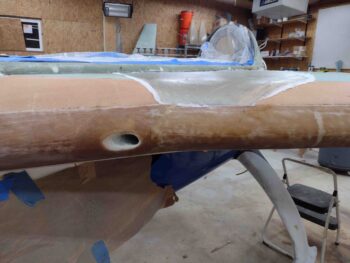
As the flox in the wire channels (above) cured, I then got to the task of trimming the extruding oil heat RAM air scoop on the front of the left strake’s leading edge. I had just started to take the Fein saw to it after I marked it when I thought I should grab a final shot of it.

I trimmed the actual RAM air scoop protruding out, then I sanded down & contoured the LE foam and glass surrounding the scoop entrance.
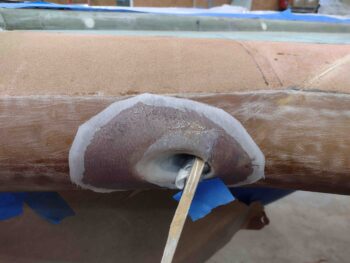
I the laid up a ply of BID around the RAM air scoop LE exterior on the contoured foam to just inside the opening of the scoop. The outboard side has a much tighter radius curve to navigate, so I stuffed a wad of duct tape around a paper towel to keep the glass and peel ply tight. In one spot I clearly needed another wedge so I used a taped stir stick to keep it all tight.
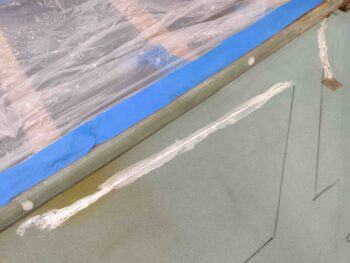
I then used the leftover epoxy from the RAM air scoop layup to whip up some micro and finish filling in the wire channels for both the fuel site gage and baggage area LED lights . . .
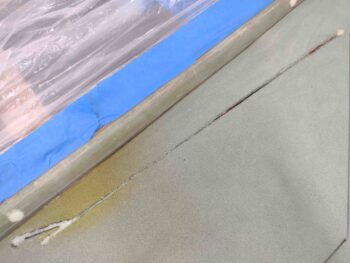
and also the fuel probe wire channel.
Note in the pic below, if you look closely you can spot just a dot of blue painters tape in the center of the fuel probe floxed square. This is where my strake foam core sanding exposed the top of the center probe of the fuel probe. Since I’m laying down more electrically conductive carbon fiber as my first ply, I covered the top of the fuel probe with a very small dab of tape to keep the fuel probe electrically separated from the carbon fiber.
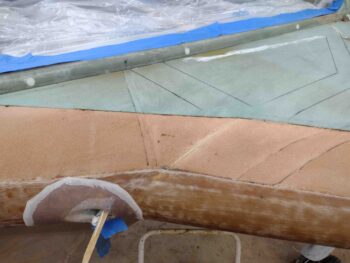
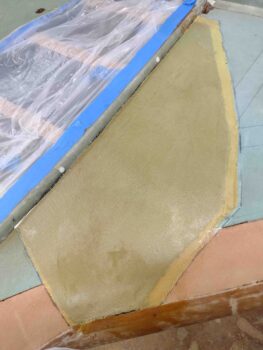
I then wet micro’d the foam and laid up my last big piece of carbon fiber BID I have left.
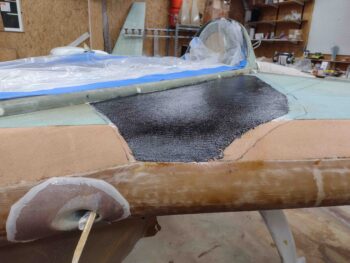
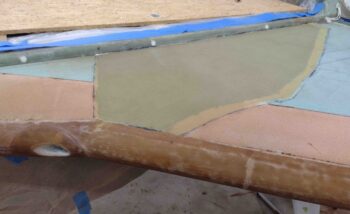
Here we have a wide angle shot of the left strake reinforcement ply of carbon fiber laid up. Again, this strengthens the left side strake for ingress and egress of passengers. I would actually prefer they go in by stepping on the pilot’s seat and swinging their leg over into the back seat, but I know not everyone will be able to do that… so it’s all about GIB comfort. <for some builders… ha!>
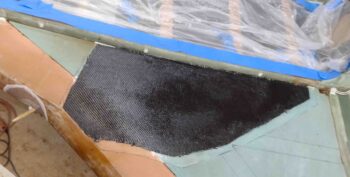
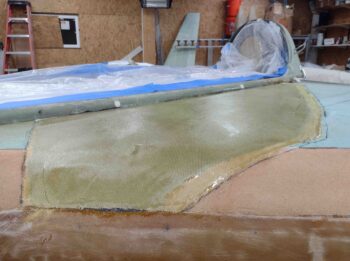
I then added and wetted out a ply of Kevlar atop and overlapping the ply of carbon fiber.
I’ll admit there’s a slight element of risk here not in safety or function, but in possibly subjecting myself to future pain in this build if my surface elevation of these plies are not in line with the rest of the strake when it comes time for the final UNI layups… or even the micro finish.
Nonetheless, I like these plies being “sub-surface” and replacing a scant bit of surface foam vs. being added on top and definitely being dealt with during the micro-finishing process. Again, I like Kevlar over the more brittle carbon fiber, but Kevlar as a top coat to be sanded and micro’d is not something to be trifled with… it gets fuzzy when sanded.
I then peel plied the Kevlar top ply of the left strake reinforcement layup.
I’ll note that I used fast hardener to layup these strake reinforcement plies to allow me to then layup the top UNI plies and finish off the left strake glassing tonight.
The same thing for the RAM air scoop. While the reinforcement plies cured, I then pulled the peel ply from the cured RAM air scoop layup and cleaned it up. Not bad. I’ll put some “makeup” on it with micro to refine its looks later on, but the bottom line is that it’s functional, doesn’t look horrific, and most importantly: done!
While my reinforcement plies cured, I ran out to Lowe’s hardware to grab some stuff from their aviation department. And grabbed a quick bite to eat.
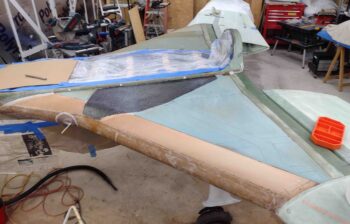
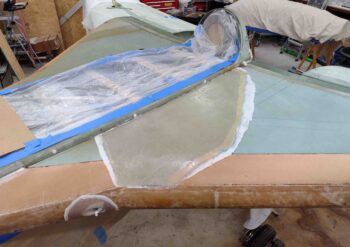
Upon my return the carbon fiber/Kevlar reinforcement layup had cured. I set about sanding the top of the left side CS spar, the outboard left longeron and the fuselage where the strake leading edge merges with it. I also cleaned up the existing leading edge glass in prep for added glass.
So after about 45 minutes of prep and a little extra cure time, I pulled the peel ply on the carbon fiber/Kevlar reinforcement plies. Not to brag, but very thankfully this layup turned out very nicely. It’s nice and smooth and the edge levels intersect very well with the surrounding foam. There should be minimal contour issues with micro later on, and laying up the strake top skin plies of UNI.
Speaking of UNI top skins… which I was fully prepared to knock out this evening. Uh, funny thing with that: I don’t have enough. Somewhere I simply lost track of how much I had on the roll (which is hard to tell, it always looks like a lot) and I only had enough for one full ply and a lot of the second ply… but not all.
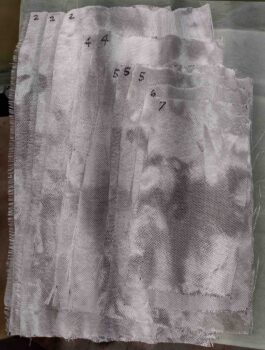
With one good ply on hand (out of 4), I spent the next couple of hours going through my UNI scrap bin and cutting pieces for the upcoming installs of the winglets.
When I got to a point where I had a good handle on my required vs actual UNI stock, I then called it a night and went inside to place an after-midnight order with Aircraft Spruce for another 14 yards (a fair bit extra added) of UNI. And because I didn’t realize how much BID actually goes onto the winglet layups, I ordered another 6 yards just for that.