
With the plane flipped upright I now need to knock out a laundry list of prerequisite tasks that need to be completed before closing out the strakes.
This pre-strake closeout list includes:
⇒ Outboard storage compartments on the top strake side initial tasks
⇒ O2 bottle mounting in composite sleeve
⇒ Installing main fuel tanks drain screens
⇒ Wiring and install prep main fuel tanks fuel probes
⇒ Installing/terminating main fuel tanks vent lines
⇒ Cleaning up fuel site gages edges (cosmetic)
⇒ Wiring fuel site gages LED lights
⇒ Installing/glassing GIB strake/baggage compartment windows
⇒ Installing/glassing right strake GIB NACA vent duct and eyeball vent
⇒ Installing/glassing GIB strake/baggage compartment cross support mini-bulkheads
⇒ Installing/glassing/wiring GIB map light
⇒ Designing/constructing/installing left/right fuel site gages video camera mounts
⇒ Wiring/installing fuel site gages video cameras
⇒ Constructing/glassing/installing left strake RAM air scoop/ducts for oil heat system
⇒ Prepping/priming/painting strake baggage and final cockpit areas
I started off with a good 15 minute look and assessment of the hinge configuration for the outboard strake storage compartments. I noted my initial plan and gave this mod the mental go-ahead.
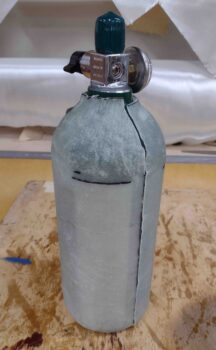
I then got to work on the Oxygen bottle composite mounting sleeve. I trimmed one side to nearly perfectly half of the bottle, then marked a Sharpie line on the underlying tape. I then set the other side (below) onto the bottle and marked the midpoint line that I could see through the fiberglass.

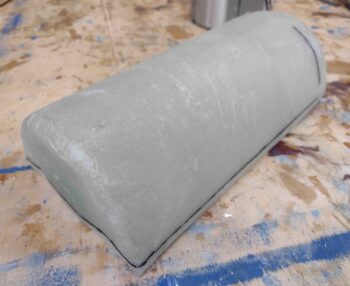
I then trimmed down the second side using my trusty Fein saw. Here we have the initial fit of the two halves that will make up the O2 bottle fiberglass mounting sleeve.
A few more rounds of judicious final trimming and I was ready to glass the two sides together.
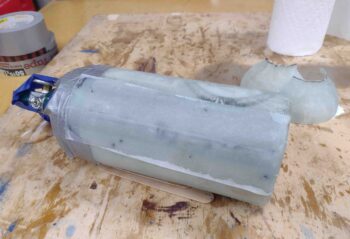
Which I did here, using a 2-ply BID tape on each side. I then peel plied the layups. I used MGS 335 here with fast hardener, so I could see the results and remove the bottle from the sleeve ASAP.
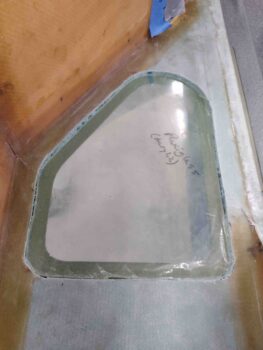
While the combined/glassed composite sleeve cured, I got to work on the right strake GIB window. Here’s a “before” shot of how it looked from my initial cut from the exterior side.
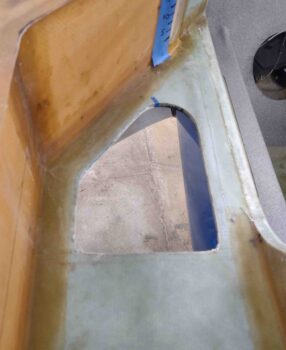
I then taped my template into place and marked the exterior perimeter edge for the inside-baggage compartment cut line.
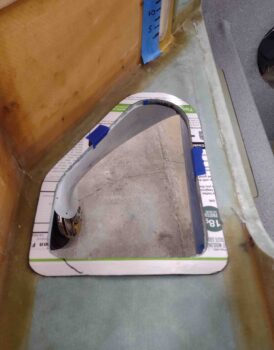
As you can see here.
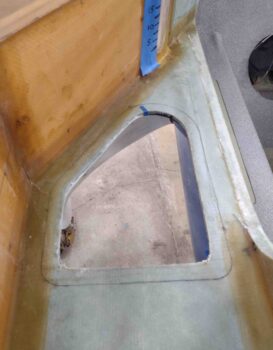
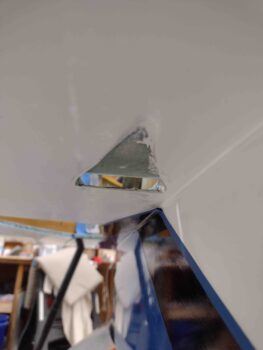
I also marked the cut lines for the GIB NACA scoop. These 2 separate lines are not mistakes: the inside curved line is for the flat area on the inside of the exterior skin. The aft cut line is for the angle from top skin to bottom skin, which I’ll carve into the foam and smooth out with micro.
Using the trusty Fein saw again, I carefully cut just the inside skin along the marked line to allow me to remove the glass and foam to emplace the plexiglass (acrylic) window piece.
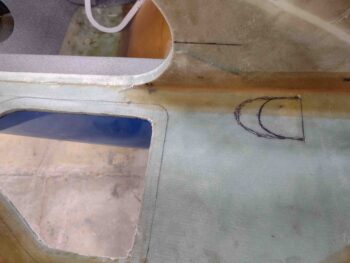
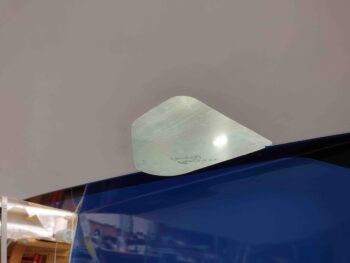
Which I did here, as a test fit.
Here’s what the GIB strake window looks like from the outside… I have to say I’m very pleased so far with the results!
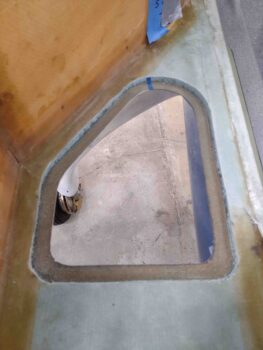
Here we have the NACA scoop initial cut line complete, with the foam and interior glass removed. Note how you can see through the NACA scoop opening.
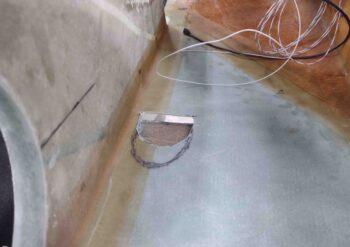
And a shot of the NACA scoop from the exterior side as well.
By this point my O2 bottle composite mounting sleeve layups had cured. As per usual, it was a bit of pain and struggle to get the bottle out, but I won the battle. Here we have the bottle inside its mounting sleeve, with a nice tolerance fit.
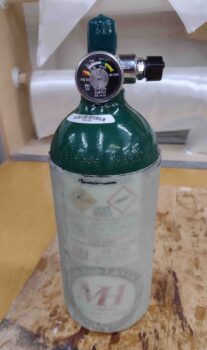
Here we have the O2 bottle composite mounting sleeve, ready to have G10 mounting tabs glassed onto the exterior and some lightening holes drilled into the sides and aft end. Once I mount the sleeve into the right strake baggage compartment, I’ll assess/test different options for securing the bottle into the sleeve. Right now I’m thinking criss-crossed velcro straps that will keep it in place.

I’ll be attending the Reno air races with friends and visiting family in California for the next 10 days, before I get back for a few days before then taking off again for Rough River. I’ll squeeze as much work as I can in those few days I’m back, but rest assure that when I return from RR I’ll be pulling out all the stops to get this bird completed ASAP!