
My first task of the day not only is a critical crosscheck, in my opinion, for dialing in the strake configuration in regards to how it aligns with the wing –specifically at the BL55 jutout– but also a big qualifier regarding if I plan to fly at least with some of my plane (eg strakes) in primer or not.
The task I’m referring to is checking the wing incidence of both wings and comparing to get a good idea how the wings are set to each other. In other words, how are my chances looking of not having to go back and tweak a wing incidence by adding or reducing washers as spacers at the wing bolts? Well, if Waiter at IflyEZ.com is correct in his method of ascertaining this very thing, then I have to say I’m looking pretty darn good.
If you’ll remember I did this exercise with the wings installed upright and the results were spot on. With that being the case I guess it’s not surprising that with the wings inverted I got the same excellent result. With the bubble in level smack dab in the middle, I measured 4.65″ from the top corner of the level to the trailing edge on each side. The key to this of course is that the level be positioned at 0° by using the wood block… the idea being that if one wing incidence is off from the other, its 0° “level” will result in a different measurement from level top aft corner to trailing edge: clearly either more or less depending which way the incidence is off.

With my incidence confirmed, I did one final check of my right strake outboard edge and leading edge intersection with the right wing. I did do a bit of final tweaking.
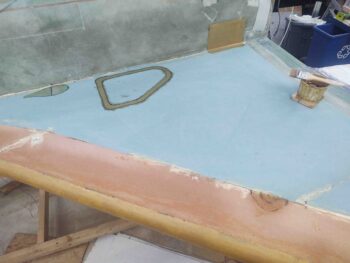
I then started on the right strake bottom skin layup by spending well over an hour laying up the 2 different Kevlar layups: leading edge 4″ strip and rectangular protective patch over tank fuel line feed in the sidewall. I then laid up the 1 ply of reinforcement BID for the GIB window lip (this time I added peel ply, but on both sides I used NO micro to make the glass cleanup a lot easier).
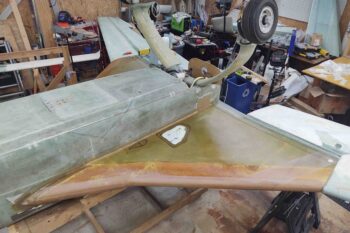
You can see I had also created a quick template for a NACA scoop just forward of the GIB window. For this I simply used the plans template for the NACA scoop that goes on the front canopy skirt. I added the teardrop section on the aft side for the in-strake air transition to the inside scoop-to-air tube that will need to take place.
Finally, you can see a small couple concentric half-circle plies of BID I laid up on the LE just forward of the blue foam. I had a pretty good depression here so I just put this in to minimize the amount of micro fill I would need later on. Speaking of micro, at this point I’ve slathered in drier micro into the seams so that it will cure as much as possible before the glass goes on. I actually prefer a bit wetter micro, but with the EZ-Poxy that I’m using up on the bottom strake layups (I’ll use MGS for the top strake skins), it just blows out wetter micro/flox and leaves me with a lot of air bubbles.
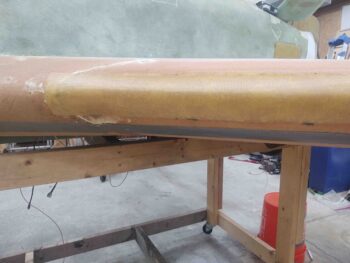
Here’s a closer up and wider angle shot of the 4″ Kevlar strip I laid up along the leading edge of the fuel tank… from the BL23 kink to the outboard strake edge.

With my prerequisite layups out of the way, I then whipped up a bunch more micro and applied it to all the bare foam surfaces. I also applied a small fillet down the inboard edge along the fuselage sidewall and used a bit more drier micro to fill some decent sized imperfections in the strake LE from the BL23 kink inboard. At this point of the layup I’m over 3 hours into it and haven’t laid up any of the actual strake skin!

I then laid up the first ply of UNI on the strake. This UNI ply bias is with its fibers running parallel to the fuel tank leading edge… in other words, not parallel to the strake LE at BL23 inboard.
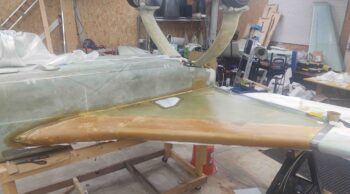
The first ply took about twice as long to glass than did UNI ply #2, which has its bias with fibers running parallel to the aircraft’s centerline.
I should not fail to note UNI layup #3 per plans, which is a 5″ wide strip of UNI that is laid up from the aft outboard corner coming inboard at an angle over what would be the OD rib. I don’t have a traditional OD rib, nor does this layup run along what in the plans has as the initial outboard edge of the strake before it gets filled in… still, I added this ply and simply estimated the angle inboard, aiming for the front of the R45 rib. To be clear, I did this layup on the left bottom strake skin as well.
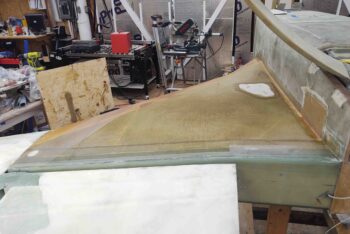
And another shot of the bottom right strake skin layup, completed and peel plied.
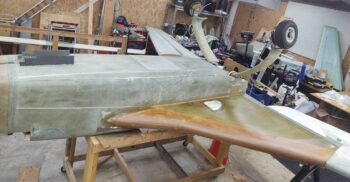
Tomorrow I’ll spend a bit of time cleaning up this layup, but most likely after I layup my last ply of Kevlar on this plane… on the bottom of the fuselage under the GIB thigh support sump tanks.