
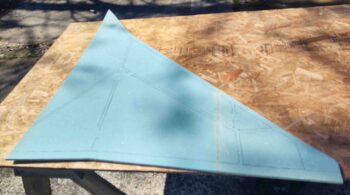
Today was all about the top left skin, although admittedly I had planned to do a whole lot more. Funny how these builds work out with getting much less done in a day than planned!
I started out by setting up a workbench outside since my shop is a bit crowded at the moment.
As per the Feather Light leading edge strake kit instructions that I have on hand, I marked a line 1.3″ aft of the aft line I had marked on the underside of the left strake skin foam core. The marked line follows the very front face of the CS spar, so that for the matching bevel angle to be made on this foam core aft edge, it must have a reference…. hence, the initial CS spar face line.
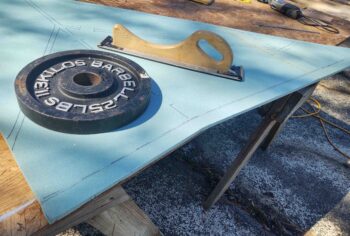
I trimmed the aft edge of the left strake top skin foam core at this 1.3″ line, and then flipped the top skin with the top side up. I then marked a line 0.3″ forward of the aft edge to use as yet another reference line. The actual aft edge bevel on the CS spar is 1″ from the lower edge moving aft, so this matching edge interface needs to be the same on the foam core. (Ok, so initial cut is 1.3″ but it needs to be just 1″ for actual fit).
I then flipped the foam core back upside down and used this new 0.3″ mark to match the top surface (facing down at this point) to the edge of my workbench.
I then used the Fein saw to get rid of a good bulk of foam and followed it up with my goto 32 grit hard sanding block. This last step I should have thought out better beforehand as I think 32 grit is a bit too harsh on that thin trailing edge. I had a few spots that broke out, but nothing that just a bit more flox (read: added weight) won’t cure. I’ll be more careful and judicious in my sanding practices on the remaining strake skin foam cores.

I then test-fitted my left strake top foam core. After a bit of minor sanding in the very inboard corner, it fit a treat.
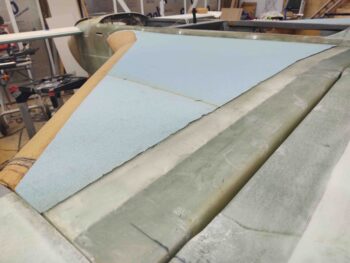
I then spent the next 4 hours glassing and peel plying the underside of the left strake top foam core. It’s been a while since I’ve done a larger layup and the sheer amount of epoxy used just to glass one ply of BID to a piece of foam is impressive.
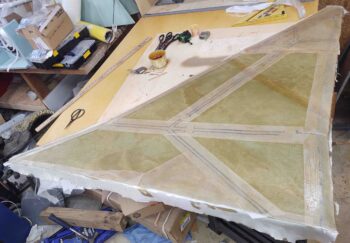
After today’s glassing experience, I’m re-setting/lowering my expectations and goals to finish one of these skin cores a day. With the shaping, glass and peel ply cutting all occurring pre-layup, it’s quite a production all simply to get a ply of BID onto a flat surface. As I told my buddy Marco, these layups are “simple in theory and a prolonged ass-whooping in reality.”
And I’m sticking to my story… ha!