
To be more specific, oil cooler decision round 2. Unfortunately, I didn’t get it right the first time. You see in my early thought processes I figured the Long-EZ was a well-developed design and folks had pretty much figured it out and it was all plug and play. Boy, was off there! Ask 12 Long-EZ builders how to do one thing and you’ll get 15 ways to do it…. with each one the exact right way to do it!
When it came time to acquire an oil cooler I just went with Mike Melvill’s choice –a 17-row cooler– because it was in fact his cowling that I was using. Makes sense, right?! WRONG! I ordered my Airflow Systems 17-row 2008X oil cooler based on this info, but then when my knowledge matured on how the internal configuration was inside the cowling, I realized the 17-row 2008X was way too big. In fact, I figure Mike M. must have turned it “sideways” (in comparison to it’s normal installation) to fit that monstrosity in there [I say “monstrosity” when in fact it’s only 1.6″ taller/longer than the 13-row 2006X… but of course we’re talking a Long-EZ here, and again, everything is TIGHT].
I had kept ahold of the 17-row 2008X because I had planned to run ECi’s tapered fin cylinders which, while cutting a few pounds off the engine, also, by their very design, had less cooling surface area. However, after some discussion with my engine builder I decided to go a more traditional route (for increased maintainability, cooling and building ease while reducing cost for future overhauls/emergency replacement if stuck in Podunk nowhere) and install standard cylinders with the higher compression pistons…. again, 9.3:1 compression.
With my new cylinders on the engine I decided once and for all to finalize my oil cooler selection… again, although I had the 17-row 2008X. I engaged Bill Genevro, Managing Director of Airflow Systems to go over my engine oil cooling requirements again (BTW, I’ve had fellow Canardians inquire why I went this route vs. the ever venerable Stewart-Warner cooler. Well, Air Systems was recommended to me by a couple different sources associated with the Red Bull racing team. That, and honestly… for half the price out the door, I just wasn’t yet prepared to bow down to the altar of Stewart-Warner).
I asked Bill the following:
A) If the 13-row would work in my configuration? (a bunch of spec emails ensued), then after the specs supported it (Bill said it would work fine, but he would have preferred that I still use a 15-row…. but I see so many O-320s using 9-rows, that I don’t think I’m off the mark. In fact, just for some perspective, the 2006X oil cooler is listed for -360 and -540 motors, so it’s not a wilting flower in its own right.)
B) If I could swap out the bigger oil cooler for one two sizes smaller? … he said I could.
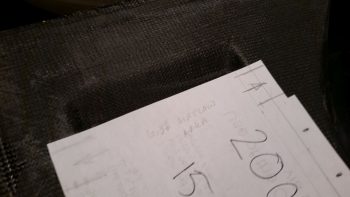
Before I fired off the 2008X out to Airflow Systems in California for a swap for the 2006X, I made up some paper cutouts of these 3 biggest oil coolers (17, 15, 13 rows) to test them out on my lower cowling, which has a nifty spot prepped and molded in it that just needs to be cut out for the oil cooler.
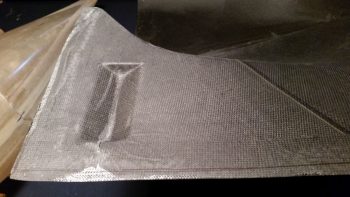
The smallest 13-row oil cooler, was –not surprisingly– a near-perfect fit.

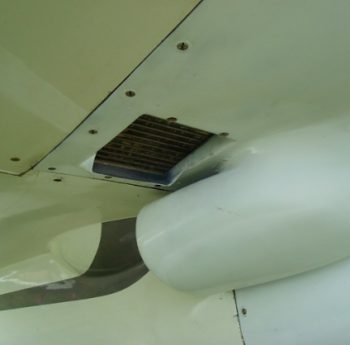
Here’s another shot so that you can better tell where I’m situated on the lower engine cowling: the forward left corner.

The 17-row 2007X wasn’t too bad, but it was starting to overhang out over what will be the air scoop for my Berkut-style armpit intakes.

I didn’t do a full separate paper cutout of the 17-row 2008X, just the center part which has the biggest footprint. As you can see it goes right up to the left edge of the lower cowling. This could present an issue in that I don’t know yet where the exact left edge of the cowling is located since it may very well need to be trimmed to fit properly.
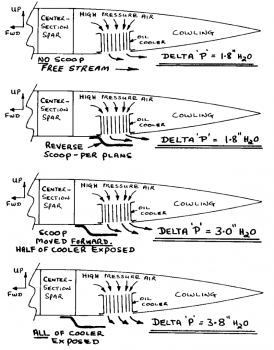
If you’re wondering, what is that indentation on the engine cowling? So did I for a couple years (remember, I bought my cowlings at the VERY beginning of my build). Mike Melvill was quite clever in adding this to his cowling plug in that it’s the air scoop that hangs down in the airstream at the front of the oil cooler opening in the cowling (see two pics below). As Dick Rutan found out in his tests for oil cooling on the Voyager, configuring the oil cooler opening in this fashion more than doubles the Delta ‘P’ from 1.8 H2O with just an opening to 3.8 H2O with this scoop preceding the oil cooler opening.
Now, I just had a lengthy and informative conversation with Joe Coraggio the other day, and something Joe said in regards to weight reduction really resonated with me. Joe relayed that he had in fact made his cowlings from scratch out of Carbon Fiber, but that in the ensuing mods and redos on the cowling construction, which then mandated a bit more filler here and there, that his cowlings actually turned out to be pretty much the same weight as stock E-glass cowlings. Not bad, and definitely better than if he had started with just E-glass, but it gave me a huge lesson learned: Don’t modify the cowlings unless absolutely necessary! I mention this because Mike Melvill was able to cut the weight of the original E-glass cowlings down by over half on his carbon fiber cowlings, which I now have a set of… the one last thing I want/need to do is start mucking around with them and end up in Joe’s situation (I thank Joe for being honest and frank about his build adventures, and sharing with me and others to allow us to optimize our own builds…. thanks Joe!)
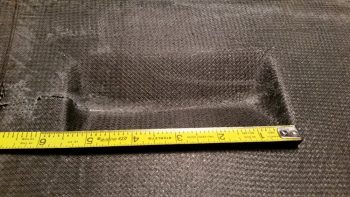
With all that in mind, I measured the width of the pre-molded oil cooler scoop on my lower cowling: 5.5 inches.
In addition to my discussion with Joe, I of course went back and reviewed my notes on oil cooling before spending any time, energy and money sending my 2008X oil cooler to be swapped out with a 2006X. The last thing I wanted to do was burn more time and money on something that I may have overlooked, or worse yet, discovered years ago and simply forgot in the present day only to revert back to a previous less-than-optimized decision (happens way too many times in an extended build like this… maddening!).
I reread that so many builders state that the place to put the oil cooler is simply just below the alternator and starter so that the air exits with the exiting engine cooling air. Probably not a bad place at all to put it, and it appears to have worked for many. However, the criticism of the “plans” position prior to these builders/owners swapping their oil cooler position is often unfounded or misplaced (IMO) since I’ve noted how in so many of these cases they simple disregarded the findings that Dick Rutan discovered in prepping his oil cooling system for an around-the-world flight in the Voyager aircraft. Yes, it may be a bit counterintuitive, and I’m sure there is some credence to the ever-present drag argument on this design, but personally I’m not going to argue with Mike Melvill or Dick Rutan, who both have flown this oil cooler design around the world . . . 3 times!! If you think I’m nearly name-dropping, check this out:
Here’s a real-world example of this oil cooler configuration on Mike Melvill’s Long-EZ. You can see here that Mike did in fact turn his oil cooler so that the oil lines enter in through the top of the oil cooler facing forward vs the top of the oil cooler facing inboard towards the engine (right), the latter being how I’ve seen this configuration on the majority of canards. My configuration –again, the latter– allows for significantly shorter oil lines. In addition, there’s no cooler body overhang above the air intake scoop. Of course final install will be mandated by the final configuration of the engine situated within the cowling, so at this point I’m still technically in the planning (e.g. prognostication) stage.
Ok, so with my overarching goal of get this bird in the air combined with my self-ascribed mandates to “do no damage” in not messing about with cowling redesigns… and don’t change a design that works (i.e. this oil cooler position/configuration), my final check was to assess the actual cooling area of each oil cooler in regards to the pre-molded oil cooler scoop.
By this point the 17-row 2008X was a clear No-Go. I then checked the 13-row 2006X and the actual airflow area width was spot-on with my pre-molded oil cooler scoop width of 5.5″.

As you can see, the 15-row 2007X’s (which honestly I was leaning towards “making it fit”) actual airflow area width was just too wide compared to my 5.5″ pre-molded oil cooler scoop width and would require a COWLING MODIFICATION which as I’ve stated above is in the just-say-no category.
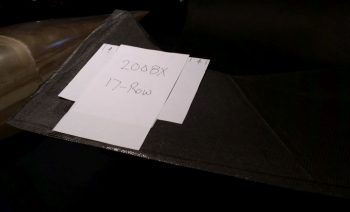
So, the 2006X was the clear winner, and with that I relabeled the box and sent the 2008X back to Airflow Systems this afternoon.
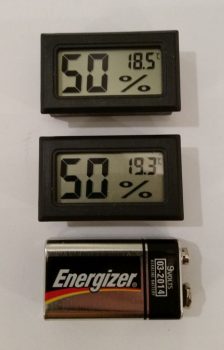
Upon returning home I checked my mail and lo & behold, the long lost humidity sensors/ meters for my engine dehydrator system finally arrived. They’re a bit off in temp reading –which I don’t really care about– but in the house they are spot-on regarding their humidity readings. As you can also see by the 9V battery that I included for size reference, these meters are quite small.
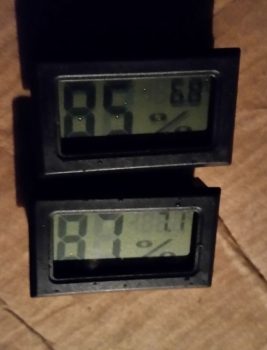
I checked the weather online and saw that the humidity was rated at 88% at Mount Vernon, a few miles from here. So, I took my humidity meters out on the deck and left them there for a good hour before remembering that they were out there. I snapped this pic an hour after the 88% report and again, a few miles away from the reported site (not expecting them to be exact either). These are fairly close and really in line with what I read about these meters (in that with high and low extremes they may stray more from the actual humidity vs midrange where the reading tends to be closer to actual).
Regardless, they’ll definitely do for what I need in my engine dehydrator. Good stuff!
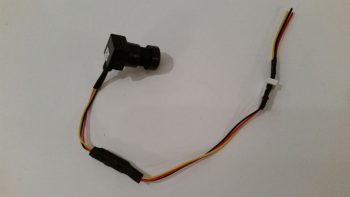
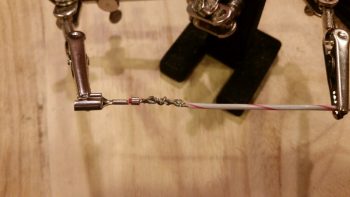
On my venture out this afternoon to mail off my 2008X oil cooler, I ran an errand for a friend of mine who asked if I could pick up a FitBit at a local vendor for her daughter and ship it to them. Well, the place I went to pick it up was a huge computer parts warehouse which serendipitously had the cable lead for my topside 5V video camera. Here I’ve cut the lead and will solder it onto the end of the 5x 22AWG-wire cable that I picked up from Stein.
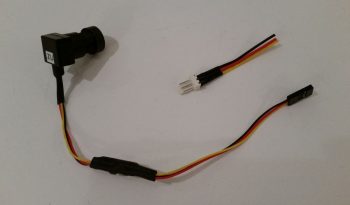
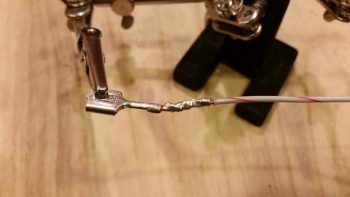
Here’s the lead terminals connected. Again, this is the topside camera that will be mounted in the pilot’s headrest and face aft towards the engine.
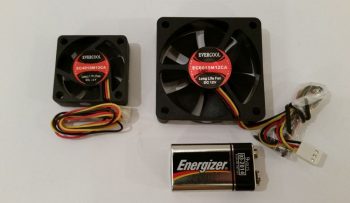
In addition, I kicked myself for having submitted an order to Mouser for the new SD-8 DPDT relay but once again forgetting to order the cooling/exhaust fans that B&C highly recommends for the SD-8 voltage regulator. Since the finned/air cooled Electroair EI control unit is mere inches away from the SD-8 voltage regulator, not to mention the heat sinked SD-8 bridge rectifier, I decided to kill 3 birds with one small cooling fan attached to the side of the D-Deck/GIB headrest housing.
As you probably surmised, the larger fan is for cooling with external air and the smaller fan is an exiting warmer air exhaust fan.
With all my assessing, shopping and shipping shenanigans completed, I then got busy on the GIB heated seat warmer (I should note that on my adventures I actually found some thin diameter Rosin-core electrical solder at Home Depot…. yeah!).
I started out by replacing the seat warmer unit’s ground wire by soldering in a length of Tefzel wire.
I then went down to the shop and measured out the distance from the heated seat warmer relay to the GIB seat “crease.” Obviously, this seat warmer will require much lengthier leads going aft than the front seat warmer. In fact, since the length of these 4 separate leads is over 6 feet long each, I upped the wire diameter for each lead to 18 AWG just to be on the safe side (20AWG would certainly have worked ok but since these leads are for heating elements with steady state current draw, I wanted to be on the “clearly safe” side of the equation, thus the rational for upping the gauge to 18AWG).
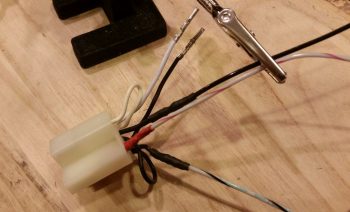
Again, just as on the front seat warmer I repurposed the locking PIDG Fast-ON tab by attaching the 18AWG power lead to it.
I then solder spliced the 18AWG power lead to the Fast-ON terminal.
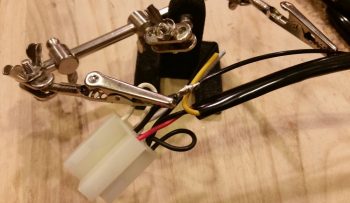
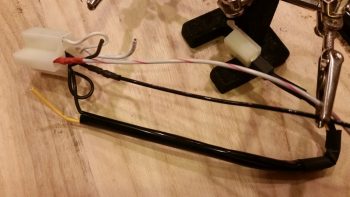
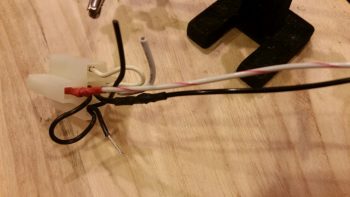
I then grabbed an interim shot of the GIB seat warmer wiring harness with the main ground lead and the seat warmer power feed wires replaced with new Tefzel wiring.
The thick black cable on the bottom is a feed to one of the 2 seat warming pads…
Which I then lopped off to leave just a stub of the black ground return wire remaining.
I then stripped the black ground return wire to prep it for splicing to the new 18AWG white with black stripe Tefzel replacement wire.
I then soldered the new 18AWG white with black stripe Tefzel replacement wire to the short length of the black ground return wire.

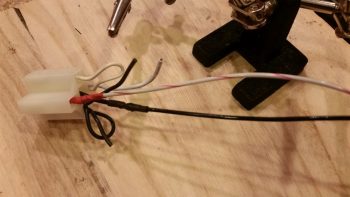
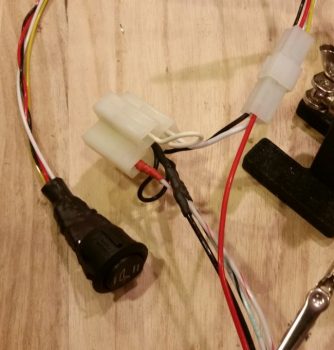
I then terminated the white and black switch wires with Mini-Molex sockets. Not sure if I mentioned this last night, but the connectors coming out of each relay for the switches are reversed between the front and aft seat warmers, so there’s no way to get the switches mixed up since they physically cannot connect to the wrong seat warmer relay.
I then terminated the main system power wire (red) with a Mini-Molex socket and snapped it into the switch connector block.
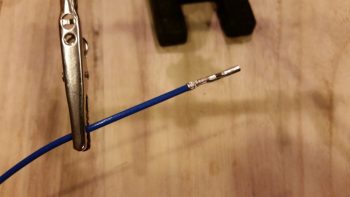
Again, I’m being a bit cautious here in my wiring selection, so knowing that 18AWG is a tad robust for the job, I only upped the wire size of the blue wire –that connects the yellow power leads together for a single lead into the switch connector block– to 16AWG. BTW, these yellow leads are the other side of the white/red and white/black seat warming pad power leads (situated in pairs, with lower seat warmer: white/red + yellow / upper seat warmer: white/black + yellow).

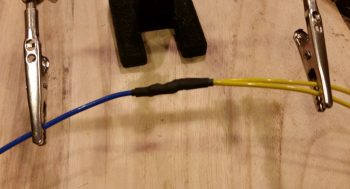
I then soldered the blue 16AWG lead to the 2 yellow 18AWG leads.
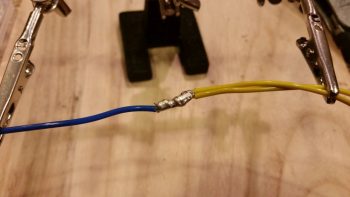
And then covered the solder splice with heat shrink.
I then terminated the end of the blue wire with a Mini-Molex connector.
Since I am once again out of wire labels, and for these long-run wire leads I need them to be labeled, I’m holding off on the last task of soldering in the seat warming pad connectors until I can get the wires labeled (Point of note: my somewhat new requirement on wire labeling is that if you can see the components with the wire clearly running between the two components, I’m not overly concerned about affixing a label on the wire since it’s clear what it goes to).
In addition, I weighed what is in the pic below and was actually pleased to find that even with these very long wire runs I am just a HAIR over the original wiring harness weight: 4.05 oz stock weight vs. 4.25 oz after Tefzel wire swap out. A slight Δ of 0.20 oz more for a lot more wire… not bad.

The weather is forecasted to be in the 40s tomorrow, and not overly warm for the next week or so. As you can imagine, I’m going to stick with these incredibly MUNDANE (read: UGH!) electrical system tasks until the weather seriously improves enough to allow for sustained shop work.