
I had an Instrument flying lesson this afternoon, so I knocked out a couple of things before the lesson and then a bit afterwards.
I started off by cleaning up something I forgot to mention yesterday: the Rivnut that I installed with flox into the lower frame of the instrument panel to mount an Adel clamp for the blue multi-wired Infinity stick control cable. I drilled the hole using my flexible drill bit adapter and a 1/4″ drill bit. Then when I laid up the 2 plies of BID on the top of the AMP CPC connector bracket, I floxed the Rivnut into place. As per usual, I used a small piece of duct tape on each end to keep the flox from gumming up the threads.
This morning I removed the outer piece of duct tape.
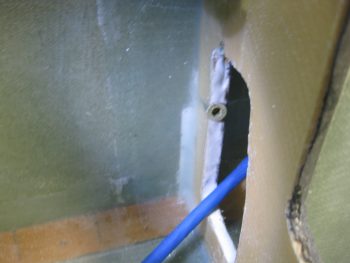
And then test fitted the Adel clamp. I’ll be installing one more of these Adel clamps for the control stick cable on the outboard/front edge of the instrument panel corner reinforcement wedge I installed a while back.
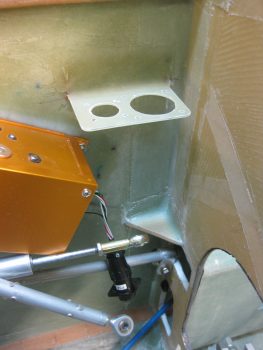
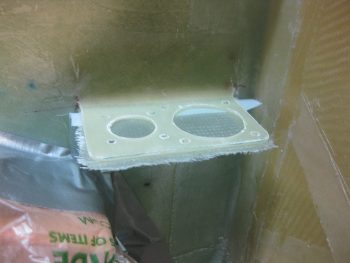
I then spent a good half hour redrilling the holes and cleaning up the 2-ply BID layup on the topside of the AMP CPC connector bracket. In the left pic below, besides the cleaned up connector bracket you can see the freshly mounted lower control stick cable Adel clamp, and the instrument panel corner reinforcement wedge where I’ll install the second control stick cable Adel clamp.
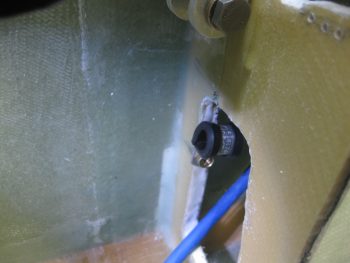
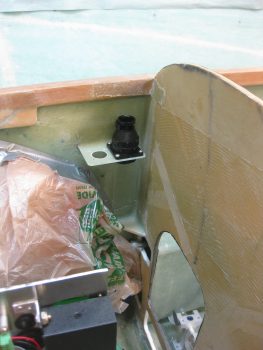
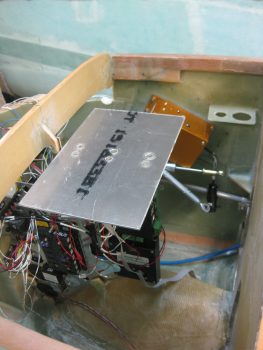
I then quickly test fitted the control stick cable AMP CPC connector (P5) after sanding the underside of the bracket in prep for glassing. You can also see I bagged up & taped the AP pitch servo to keep it epoxy free.
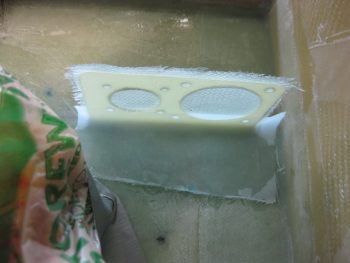
After adding a flox fillet at the corner of the bracket & the fuselage sidewall, I then laid up 2 plies of BID on the underside of the AMP CPC connector bracket.
I finished off the layup with a strip of peel ply, primarily focusing on having a good glass transition on the sidewall glass (read: no fiberglass barbs playing “gotcha” while working in the avionics bay!)
I then left for my flight lesson… [flew 3 instrument approaches under the hood… beautiful day for flying and the 30 seconds I saw here & there out from under the hood were an awesome sight! haha!]
Upon returning from flying, I spent another good half hour razor trimming the 2-ply BID layup on the underside of the AMP CPC connector (seen in last pic this post).
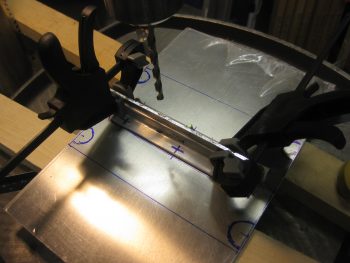
I then clamped the right side angled aluminum Triparagon shelf mounting bracket in place, with a scrap piece of 0.090″ aluminum as a spacer, to the screwed-in-place left side bracket. I used my drill press to drill the 3 screw holes through both the angled aluminum bracket and the Triparagon cross shelf.
I then riveted 3 each K1000-3 nutplates to the right side angled aluminum mounting bracket, and countersunk the 3 screw holes on the top side of the Triparagon cross shelf. As shown in the pic below the cross shelf weighs in at 0.6 lbs, so current total weight of the Triparagon structure is at 1.3 lbs gross. I’m certain I can knock half of the shelf weight off with lightening holes, so I expect the total weight for the installed Triparagon structure to be around a pound.
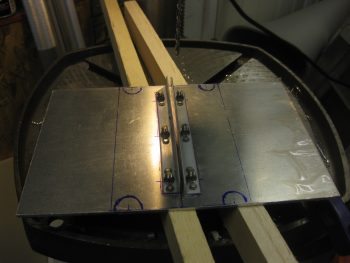
I then test mounted the Triparagon cross shelf to the installed Triparagon vertical plate. So far so good.
I then took the cross shelf upstairs & diagrammed out the installation location for the M760REM COM2 radio. To set up the following discussion below, I’ll point out that I plan on having a 1″ x 1″ piece of angled aluminum mounted to the bottom front edge of the Triparagon cross shelf, one on each side of the vertical plate, for mounting what I now call the “CrackerJack Parts” (small airspeed switch size components). To be clear, these angled aluminum pieces are NOT shown in the diagram below.
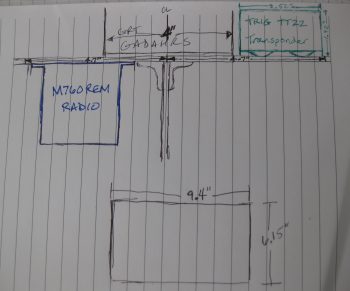
Now, to optimize the installation of the radio in relation to the GRT GADAHRS (see above), I decided that I need to trim the cross shelf’s front side angle brackets horizontal sides down by 0.4″. In other words, the vertical arm of each front angle bracket will be 1″ with the new trimmed horizontal arm (that mount to the the underside of the cross shelf) being 0.6″ wide. This will allow me to move the radio forward on the left underside of the Triparagon cross shelf, and provide better clearance between the mounting screws of the radio & GADAHRS. It will also allow for the aft edge of the Triparagon cross shelf to provide more of a protective overhang for the radio’s antenna & DB15 connectors.
I’ll work a bit on the cross shelf tomorrow, but for the most part I’ll be heading into Thanksgiving holiday mode over the next few days. It is simply imperative that I tend to my duties as the gregarious socialite! hahaha!