
I started out today by pulling the GIB duct transition for the upper vent off the tape form and marking it for trimming.
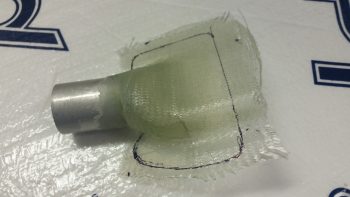
I then trimmed it with the Fein saw.
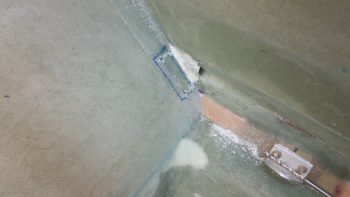
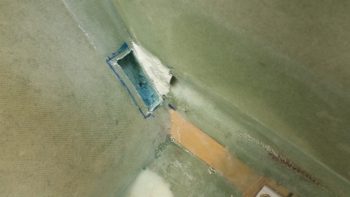
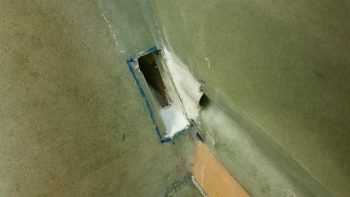
Here’s the underside of the GIB duct transition for the upper vent.
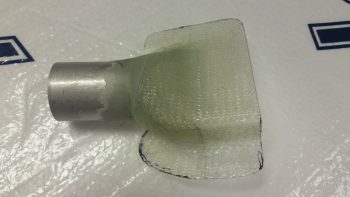
And the view from the rectangular sidewall duct heading into the vent tube transition.
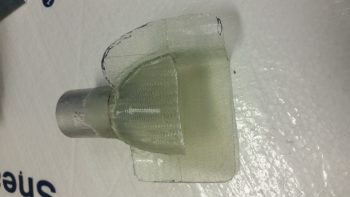
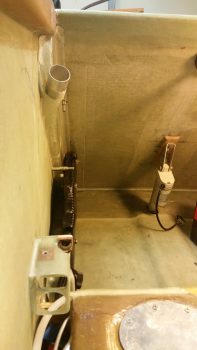
Here it is set in place on the sidewall duct. Again, I’ll be able to tweak its final position as I install the vent sidewall console.

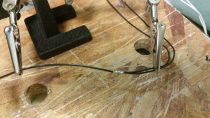
Keeping on the duct theme, I then marked the position of where the duct traverses the pilot seat back in the lower left corner. I then drilled 4 pilot holes for the corners of the rectangular duct hole.
I got the front side glass cut out using the Fein saw, then razor knife & then removed the foam.
I then cut out the aft side glass, cleaned up the hole and micro’d the edges.
As the micro on the duct pass-thru hole cured, I then got to work tying the respective left & right side GIB LED floor lighting wires together (white, red & ground pairs) into one lead. I used solder splices to take the 2 right & left leads into a single wire lead.
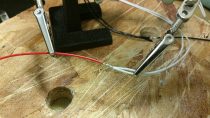
I then covered the solder splices with protective heat shrink tubing and labeled all the GIB LED floor lighting wires.
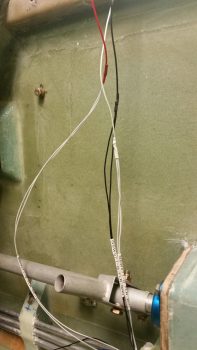
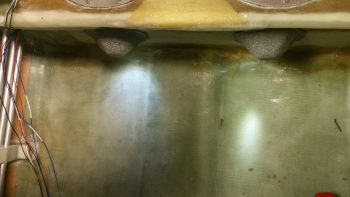
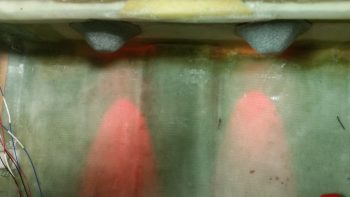
I then tested both the white and red LED light pairs. They may look quite dim with the lights on, but with the lights shut off –as in a dark cabin– these things give off plenty of light. And I should add: NOT blinding lighter either.
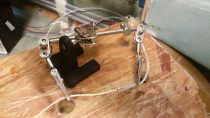
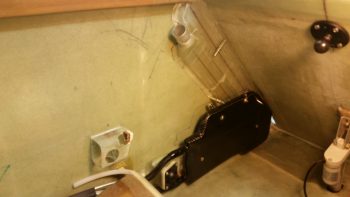
I then was finally able to get around to cutting the slot in the forward end of the Heat Exchanger inlet duct for the fresh-cool-air/heater-air valve control arm. I then mocked up the heat exchanger mounted inside the GIB area with the air ductwork in place. Also note that I have the upper GIB vent duct transition in place as well.
Here’s a closer shot of the oil heater heat exchanger.
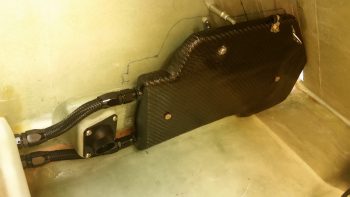
I then wanted to get a shot showing how thin my entire ductwork and heat exchanger mounting is. Of course, here I have to give a shout out to Nick Ugolini for R&D’ing the appropriate thin-line roll-your-own ducts.
Over the next few days I’ll be dealing with out-of-town visitors, then once I again I am heading to North Carolina until the end of next week. Once I return, it should be 100% all go on the plane build until RR 2017.
So . . . see you next week!
Seriously good work. Love the skinny heater system profile. These things don’t happen by accident.
Thanks Bro. Yes, amazing amount of time we have to spend to get everything installed in our planes nice & tight, eh?!