
Today was all about getting the bottom cowling left side shaped to its final contour and then the external 2 plies of carbon fiber laid up (with 2 edge reinforcement plies as well).
I started by spending a good little bit of time using the aft cowl opening template I had made up to figure out the final position of the left side bottom cowl skin, both in regards to the template and to the opposite/right side. I seemed to have removed just a tad more than I should have on the outboard side, especially when you take into account that I extended the top cowl aft edge a bit more aft, which lowers that edge and thus the top of the aft cowl opening overall.
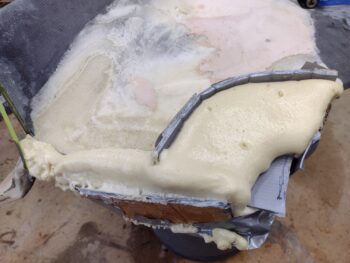
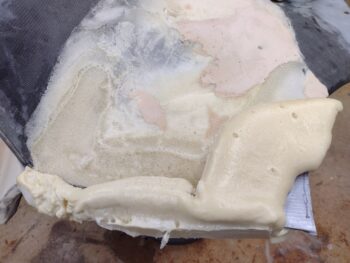
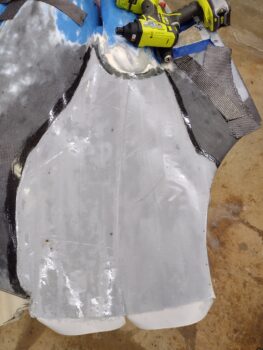
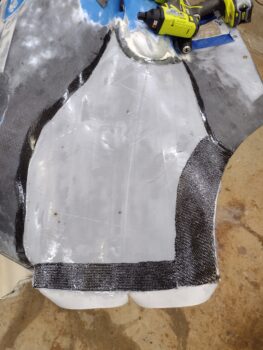
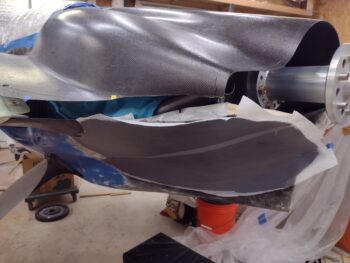
On the outboard corner on the left side, I needed to add about the thickness of a piece of cardboard back to the surface of the bottom cowl… so I used exactly that, a taped up piece of cardboard in the corner (that I hot-glued into place) as both the fill and the thickness gauge. I then added pour foam in and around it, while also adding pour foam to the very aft edge to extend that back a bit in order to match the extended top cowling aft edge (pic #1). A bit later I removed all the pour foam dams (pic #2).
I then spent a good little bit more dialing in the shape & contour of both the extended aft edge and the foam around the added corner cardboard piece.
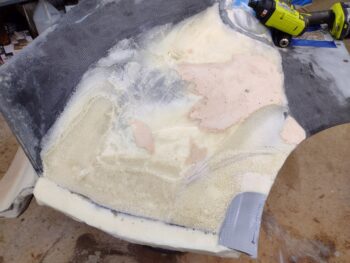
Once the contour was looking really good (not perfect, but really good) I taped up the foam surface with duct tape. I added some extra tape to some areas for better transitions, and even a few plies to fill a soft spot divot in the foam that I had missed previously.
I then spent a good hour cutting CF and peel ply for the left side bottom cowl new skin Phase I layups. I say “Phase I” because I’m only laying up 2 plies on the exterior of the bottom cowling. Later I’ll remove the old inner wall of the bottom cowling, the foam, tape and peel ply and then lay up a ply of CF on the inside of the bottom cowling that overlaps onto the inside of the cowling to better lock the new skin/surface into place.
First I had to do some quick research and a bit of math to figure out the exact epoxy-to-hardener ratio for the new Pro-Set epoxy I used here. I’m sure Pro-Set is great epoxy, but MGS is a little more user friendly for us ‘ol skool scale guys (vs “the pump”) in that it simply says for every 100g of epoxy use 40g of hardener … vs “Ratio 3.5:1” [think of a monkey scratching his head at first!]. Yep, it always makes perfect sense once you figure it out!
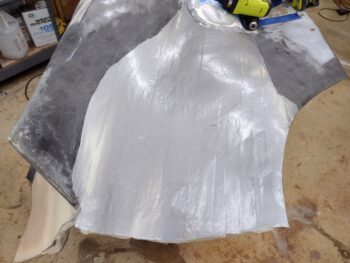
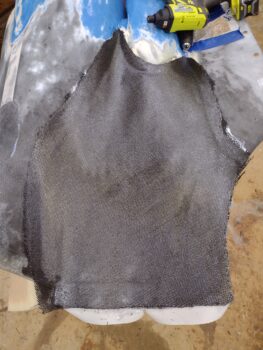
Anyway, my brain figured out the math and I proceeded with my first application of Pro-Set by wetting out the initial layer of peel ply (pic #1). I then laid up the initial reinforcement CF ply along the side and the aft edge (pic #2). These CF tapes are a little wider because both of these edges will get trimmed.
I then laid up my first big ply of CF. It went on well enough, but I had cut it a little wide so I had to spend a few minutes trimming down the edge along the bottom side of the cowling (left side of pic), and that of course led to the cleanup of the myriad of CF strands that jumped out everywhere.
But I got the first ply of CF wetted out in not too much time.
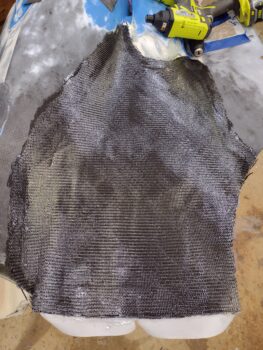
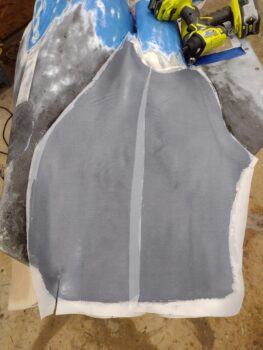
I then laid up the next and final round of singly ply CF edge reinforcements (pic #1). This will result in the aft opening edge and the side edge having a final tally of 5 plies of CF. Obviously you want a bit of rigidity at the opening edges, as well as enough meat/ strength on the side edges to secure CAMLOCs.
I then laid up the second & final external ply of CF (pic #2) . . .
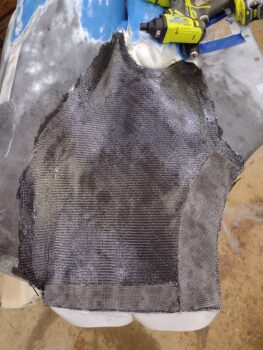

And thoroughly wet it out.
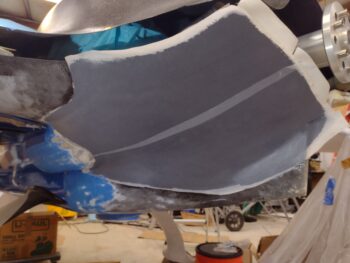
Again, the surface isn’t perfect but not too bad either. I’ll sand it aggressively before laying up the inside CF ply so that if I have any high points that I happen to sand through I can adjust accordingly on the inside. In addition, I may need to incur an extra ounce or two penalty with micro to clean up any rougher areas or transitions, although I really don’t think the surface is that bad.
I then peel plied the entire lower cowling left side new skin Phase I layup.
I gave the cowling a good 30 minute to allow the epoxy to setup a bit before then mounting it back in place on the bird.
With my experience with the pour foam additions, I certainly didn’t want 2 larger plies of CF to cure on me in an out-of-contour position as compared to how it will be when mounted on the plane. Read: as in I don’t want to be fighting the bottom cowling into position to get it mounted here on out for the life of this bird.
I have to say I’m happy with both the bottom cowling left side new skin layup as well as the Pro-Set Epoxy. Not surprisingly Pro-Set works a lot like West epoxy, even to the point of it coming in a gallon sized can. I much prefer a large gallon plastic bottle like MGS which allows for much easier pouring… yep, I was trying not to make a huge mess getting the first bit of epoxy out of the can and into the cup without it going everywhere. But these are minor first world problems, and Pro-Set seems like a great product.
My plan for tomorrow is to do pretty much the same thing on the right side and get that Bottom Cowling Phase I CF laid up as well.