
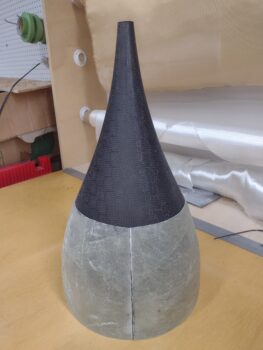
I started off today wanting to get the halves of the spinner prop install template trimmed to width and height. I began by leveling the spinner and then using the laser level to mark a vertical line on each side of the gray duct tape… these lines being 180° out from each other (pic #1).
I then taped each half of the template in place and transferred the cut line to each UNI spinner prop install position template.


Here’s one side of the spinner prop position template marked for trimming.

And here are both halves trimmed both on each side and also on the top. They’re ready to either be glassed or taped together to allow me to use it to create a working template for the actual spinner.
I finally got busy on the aft trailing edges of the cowling where the top and bottom cowlings intersect and interface one another. I marked the bottom cowling for trimming at this aft edge on each side… here is the right side.

And then trimmed the bottom cowling aft outside edges (obviously not the very aft at the opening) . . . both left and right sides.


The aft outboard side of top left cowling has a slight curve where it wants to come back inboard on the bottom. The right side doesn’t have this inboard curve and is straight.

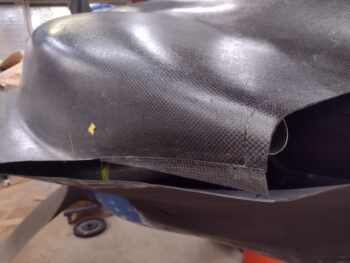
To mitigate this curve on the left side, bring the side downward and straighten it out a bit, I added a little strip of scrap carbon fiber that was close to razor thin on the top side of the strip and normal cowl thickness on the bottom edge of the strip (pic #2)… after I sanded and prepped the attachment area (pic #1).
Note that adjoining edges on both cowl and CF strip are very narrow. I drilled a small hole for a rivet as an alignment guide and to help secure the floxed-on (wet) strip. The spot where I placed the rivet was about the only place I had enough meat to secure the rivet, and even then the hole was right on the edge of the cowling CF. On the aft side I may have had 1/4″ overlap, where most of it was around 1/8″.


I then added the second clamp and left the attached (via wet flox) CF strip to cure [I used MGS with fast hardener].

After my cowl addition task on the left side, over on the right I did my first official layup to begin closing out the gap between the top and bottom cowls, and build the interface. I used a 3-ply prepregged CF layup on the aft 1/3+ of the cowlings right about where the vertical component of the cowlings turns horizontal (moving forward, transition at yellow tape).
The CF is laid up onto the inside of the top cowl almost 2″, transitions the current gap (I eyeballed the pleasing shape), and then rests on tape and peel ply on the inside of the bottom cowl to create about a 1.5″ (starting off at least) flange.

I then peel plied the inside of the 3-ply CF layup.

And the narrow exposed strip in the gap between top and bottom cowlings.

I’ll note that I have pondering these closeout/interface layups for a good little bit. I decided to do each side in 3 sections: vertical (aft/inboard), transition (middle), and horizontal (forward/outboard). I started with the aft vertical since it allows me the most control over the aft cowl opening in dialing in the shape and height of the outboard cowl walls.
To be certain, this entire task will be a very iterative process, with 3 distinct flange-creating layups on each side, then exterior-top cowl fill layups along the bottom edge to create/extend the actual top cowl wall down to meet the bottom cowling edge, and then an interior 2-ply CF tape that will get laid up along the entire inside surface of the 3-ply flange to create a 5-ply flange while also connecting the 3 individual flange layups together.
After my layup on the right side was complete, I then pulled the clamps off the small added CF strip on the left side. I also removed the alignment rivet. But alas, somewhere my well-crafted plan went awry and instead of straightening out the curve, for the most part this addition just continued it (the curve looks exaggerated in this pic because the back of the strip is angled). Oh well, I’m not going to worry about a slight curve and I’m pressing forward. This diminutive strip did serve its purpose in adding a bit more cowl wall outboard and extending the wall down as well.
After a good overnight cure, I’ll remove the top cowling and grind/sand/remove a good bit of the original bottom, inside cowl edge behind the added CF strip in prep for the left side’s aft 3-ply CF flange layup.