
I started off this morning (in part) with a quick phone call to Brad at E-Mag Air Ignitions with a question on optimized PMag spark plug configuration (top, bottom, mixed… he said it really doesn’t matter: user preference) and to confirm I was cleared hot in sending in my PMag. With clearance to land I finished packing up the box and sent out the ignition back to them.
Back in the shop I referred to my list of around a dozen major tasks that I need to knock out on the accessory case side… obviously the removal and sending back the PMag being the first one.
Next up was a very slight trim of the lower right engine mount arm to provide just a skooch more space for the titanium firewall cover with 1/16″ thick FiberFrax backing,
“I don’t normally highlight unfinished, free-handed cuts on an unsecured engine hanging from a hoist, but when I do I’m damn sure going to brag about it with a pic!” Ha!
I’ll note that before and during my phone call with E-Mag Air I kicked off a series of short 3D prints to test & confirm the thread pitch on the inside top (female) of the new oil level tube. With the final one printing while I ran into town to send off the PMag.
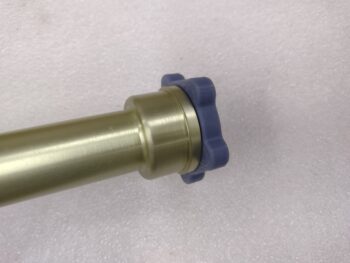
Upon returning home, I spent about 15 minutes finalizing the design for my dipstick cap and fired that up while I did my Dremel Tool work above. Here is the result: A low profile threaded oil level tube cap and dipstick rod holder (note the inside center hole in the subsequent pics).
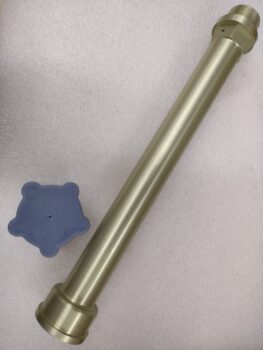
I incorporated the little roundish side nubs in a star pattern to of course allow for better gripping of the cap. I also designed a half-moon (side profile view) groove for a rubber O-ring to get a good seal.

I printed this in ABS plastic, which is good against heat but isn’t the best on details (in my experience) so the threads needed to be worked a bit to “cut” them in… almost as if I was using the oil level tube as a sort of tap. But once I worked the cap threaded on a good half dozen times it seated well. Here it is fully threaded in and sealed.
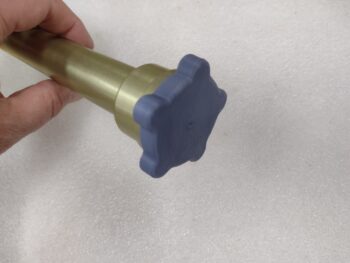
Again, this is just a prototype/proof-of-concept cap, but so far it looks very promising. I’ll see how it fits under the top cowling and may make up a metal version of it.

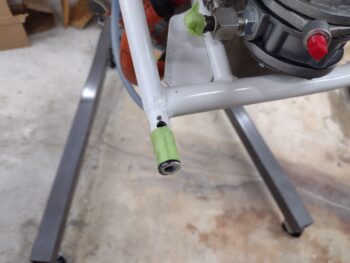
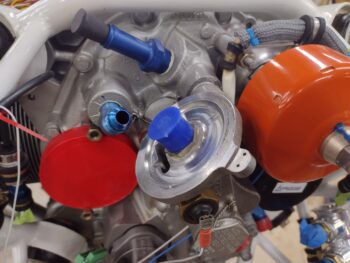
Moving on in my engine “cleanup” tasks, one item high on my list was the top oil fitting on the accessory case that was clocked almost exactly 180° out in the wrong position. I need it facing in the general direction that I’m pointing using the red zip tie.
Note the lower fitting at the end of the zip tie that is facing in the direction I want for the upper fitting…. which would allow the oil hose to snake between the oil filter and the PMag.
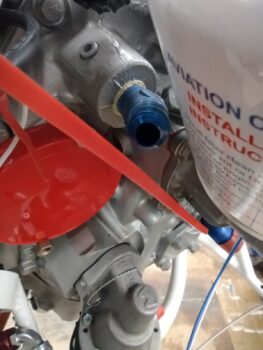
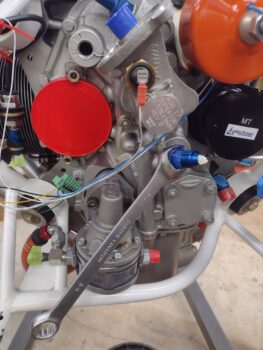
I’m again pointing with a red zip tie to the lower oil port fitting on the engine accessory case. In my initial assessment I had planned on swapping this out with a straight fitting, and since this one is clocked naturally with its final torque in about the same direction I need for the top port fitting, I’m going to swap this out and use it up top (plus it looks better!).
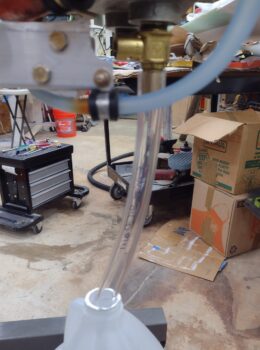
I’ll note that at this point one issue I had was that the engine was so full of oil that when I removed the red cap from this lower fitting, oil immediately began gushing out of the fitting… time to do some engine oil draining!
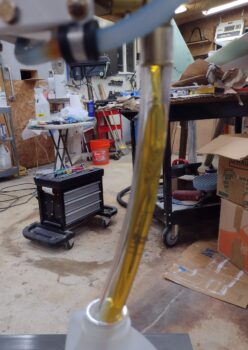
Which I did next. I don’t really have a good airplane worthy oil drain container yet so in my rush to get this done I simply used two clean plastic gallon jugs to drain the oil. And I needed 2 full gallon jugs because I had about 8 quarts of oil in this beast. The quick oil drain fitting worked as advertised and started flowing oil with just the flip of the lever.
In addition to draining the oil, to get the top oil port fitting off I needed to remove the oil filter… which is probably good practice anyway for me to do it at least once while I have decent access to it before I do it when the engine is mounted on the plane.
I got the top oil port fitting off with minimal drama, and with the oil drained I could then move on to removing the bottom oil port fitting.
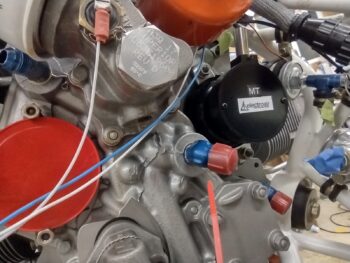
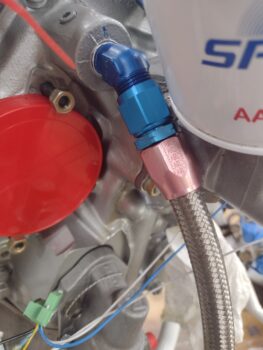
I then got the new top oil port fitting (the previous bottom fitting) installed. To finalize its clocked position I temporarily re-installed the oil filler. Yes, it’s a tight fit… but again, what isn’t a tight fit on these birds??
And yes, my hoses and fittings were in my back rec room and the end of this hose was peaking out from the box and got sun-faded a bit. This pink/formerly red part of the fitting will be 90% covered with fire-sleeve and I’m not chucking a $20 fitting simply because it has a little sun fade… cuz “I am not a rich man” (Forrest Gump voice).
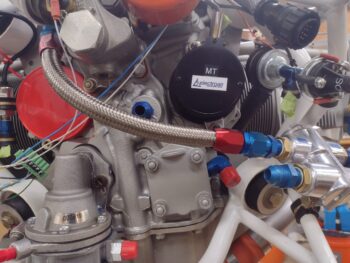
I then finalized the hose flow and configuration assessment before terminating the other end with a straight fitting into the external vernatherm.
Since it has been awhile in discussing this: the external vernatherm is currently being used by Nick Ugolini to eliminate the need for any type of airflow control device on or around the oil cooler, to include taping off or covering part of it when flying during the cold winter months (for us “normal” people in the northern hemisphere <wink!>). The external vernatherm is a “set it and forget it” component that simple keeps your oil temp at 180° all the time, all year round, with no further fuss or shenanigans.
Also in this pic below note my pre-staged/uninstalled straight fitting that I had planned on installing in the lower oil port.
Ahhh, but the best laid plans of mice and men! Nope, after spending a good 45 minutes working the tight and odd configuration that is the norm on this bird: creative geometric machinations… and ready to have to pull the trigger on yet another esoteric 127.18473° fitting —or whatever!— component to make this thing work, ironically I circled right back around to…? Yep, you guessed it! The top 45° fitting (LOL as I write this). You can’t make this stuff up.
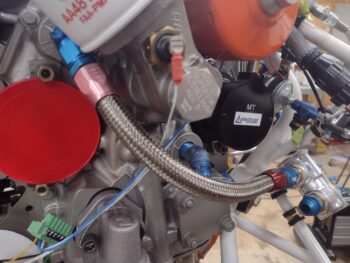
The last bit of effort apparently was merely for aesthetics sake to swap out the top 45° fitting for the better looking bottom 45° fitting… ha! At least their naturally clocking positions seemed better suited for hitting much closer to the torque specs.
Regardless, here is the end result.
The geometric gymnastics I was involved in was how to get the clearance between the crossing hoses while still simply just being able to make a minimal-stress hose connection between the engine accessory case lower oil port fitting and the lower external vernatherm fitting. Apparently a 45° fitting combined with a 90° did the trick… and with NO sharp 90° fittings to boot! (let it be known however that if that had been the answer, I would have slapped a sharp 90° fitting onto this thing in a nanosecond if that would have solved this 5D chess problem… which I’ll note always looks simple enough after it’s successfully configured/installed!).
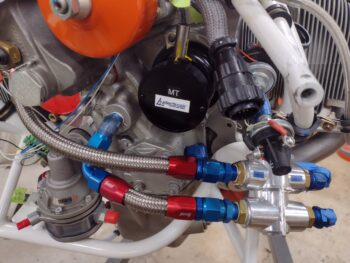
Here’s a slightly lower angle shot to better show the clearance between the 2 accessory case oil hoses.
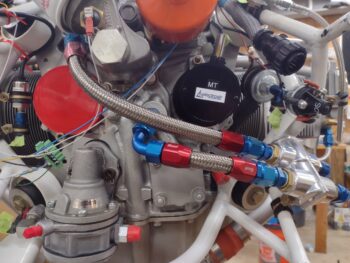
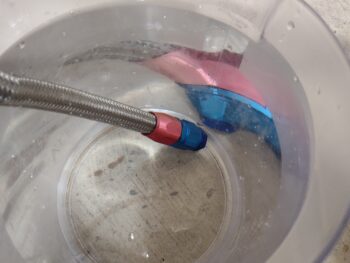
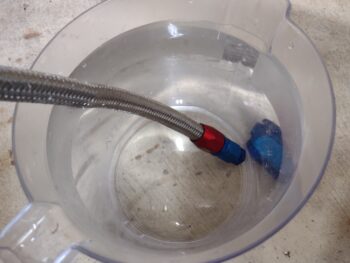
With my oil hose configurations good to go, I then took them off the accessory case to pressure test each hose at 140 psi. Thankfully they both passed the pressure test.
Here is the shorter oil OUT hose that connects to the lower oil port fitting.
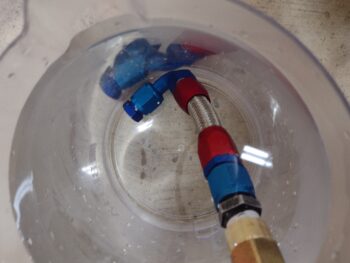
And both ends of the oil IN fitting that goes to the upper oil port fitting.
And with that, I called it a night on this very long build day. Tomorrow I plan to continue working the forward engine tasks to include hooking up all the hoses to the engine sensors. I’ll also fire sleeve these 2 oil hoses after they’ve air dried overnight.