
Today was all about working to get the bottom cowling final configuration dialed in for laying up the new CF cowl skin.
However, there are a few prerequisites that needed, and still need, to be worked before I can start reskinning the bottom cowling… all of them interlinked.
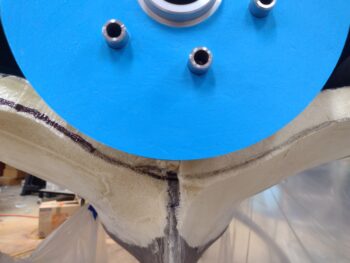
First up is the top center of the bottom cowling: this includes left and right sides of the bottom cowling coming together and meeting in a symmetrical way at the top of the fin. Also, it includes the gap and interface with the prop spinner flow guide.
Here’s how that area looked after some minor tweaking when I started out this morning.
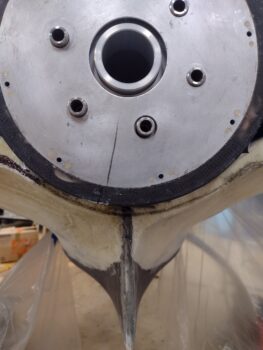
I then cut away the top edge of the bottom cowling enough to allow me to slip in the “real” prop spinner flow guide. To do this I of course had to undo most of the CAMLOCs on the top cowl to slide the flow guide in place.
I’ll highlight that this is the first time the flow guide has been in place with the bottom cowl mounted.
That being said, you can see by the prop extension studs that the flow guide was not on all the way… this is the initial fitting and I still needed another few rounds of trimming the bottom cowl to get it to fit all the way in.
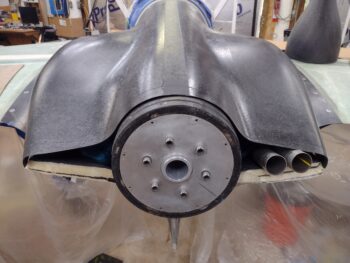
Here’s a shot of the cleaned up top cowl after reattaching the aft edge. You can see it covers significantly more of the spinner flow guide. I plan on trimming the top cowl aft edge just enough to allow good clearance between top cowl and flow guide, about 3/8″.

I also took the flow guide outside and sanded the front edge where it butts up against the flywheel, taking off about 0.06″. I’ll assess further, as it may need another 0.01″ to 0.02″ trimmed down to really fit flush to the front face of the prop extension. It is fairly close now.
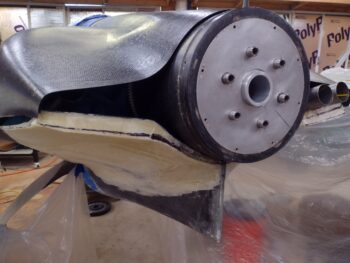
With the flow guide set in place my focus was on the bottom cowl clearance with the bottom of the flow guide.

My first task will be trimming the top cowling aft edge to provide clearance between it and the top side of the flow guide. The top cowl aft edge trimming will include the entire aft edge, to straighten it as much as possible.
Before I create the new bottom cowl skin, I need to work the sides of the cowling and the interface as well. To have a build plan worked out as a minimum, although I’m leaning towards constructing the top cowl sides first to have them in place when I glass the bottom cowling.
As an aside: since I’m heading out to Rough River with Marco next week, via a stopover at Mike Beasley’s in Georgia for the night prior to RR, I wanted to get my truck inspected that is required to get it re-registered. So I did that and another round of errands out and about today for a good bit of the afternoon.
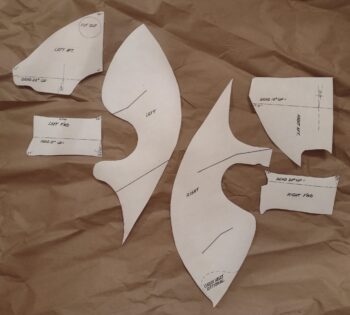
Before heading out I finally got around to loading up the PDF of Mike Melvill’s Bottom Cowling Baffle Templates onto a thumb drive to have it printed out at Staples. I had the original on thick blue card stock that came with the cowlings but I’m fairly certain it went MIA after my original hangar got hit by a tornado ala Hurricane Dorian.

I cut these out late in the evening, but I’ll fast forward and show them here. I think the front and aft smaller baffles that go into the armpit scoops should work fairly well starting out, but I know that due to my cold air induction pipes that I’ll have to tweak the inboard walls (the large center templates) considerably as compared to what Mike had when I make those up. [Hard to explain these here… they’ll make more sense when I install them]
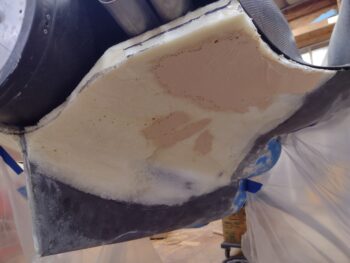
After returning back home from my out and about errands, I then assessed my low areas and rough spots on the right and left added foam slabs on the bottom cowling. If you’ve worked with pour foam then you know the seams can often create a bit of an issue since they’re usually much harder than the middle foam area… much like a loaf of bread with the soft inside vs the harder crust.
I decided to use West 410 “micro” with fast hardener and a splash of alcohol which makes the micro easier to sand. It’s not structural, but then again I just need it to hold a good form while I layup the CF, and then —again— the vast majority of the foam will be removed along with the original inner/old skin of the bottom cowling.
I first applied the West 410 micro concoction on the left side.

Then did the same thing on the right.
I’ll assess tomorrow and if need be, I may hot glue or micro blue foam or Urethane foam in places that need a larger fill (i.e. the outboard trailing edge on the left side)… but that is determinant on the final configuration that will be dictated by the top cowl aft edge position.
Working it!