
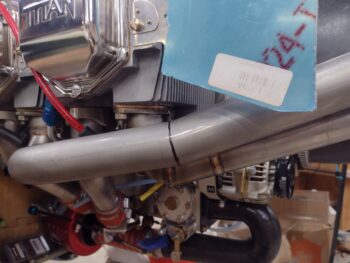
I started out today by removing the bottom cowling, then spending a fair bit of time assessing and evaluating just how and where I needed to cut the left outboard exhaust pipe to get the aft half into its proper position.
After finally deciding where I needed to cut it and on what angle, I marked the cut line.
I then removed the left outboard exhaust pipe and ran a piece of tape with the edge at the center of the cut. I then marked the angle on each side of the center cut line that in my estimation would bring the aft end of the pipe down close to level with the front end, and allow it to pair up decently with the inboard exhaust pipe.
As you can see below, I then carefully cut the pipe on the angled lines off the marked center cut line.
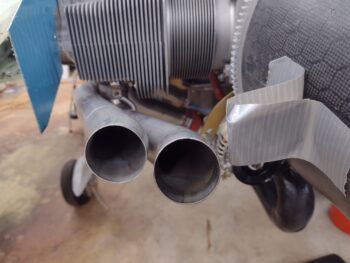
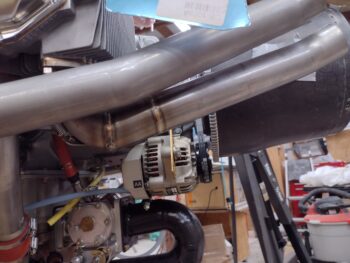
I then taped the left outboard exhaust pipe pieces tightly together at the cut… Voila! Pretty darn close to where I wanted it! To be fair, I was trying to get it about an 1/8″ higher so this pair of pipes would be angled more like the right side pipes. But no worries, this will work!
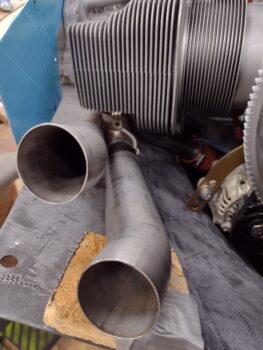
As a reminder, this is close to what it looked like when I started.
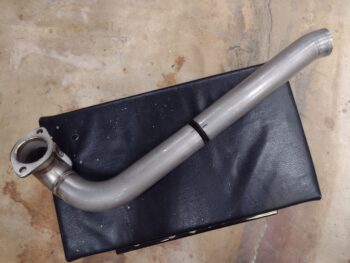
And a side shot of the cut and tape re-joined left outboard exhaust pipe. This definitely meets my overarching goal of getting the pair of left exhaust pipes positioned at the correct elevation inside the cowlings and somewhat closely nested together.
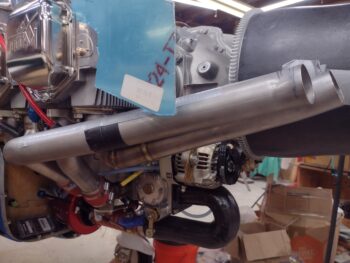
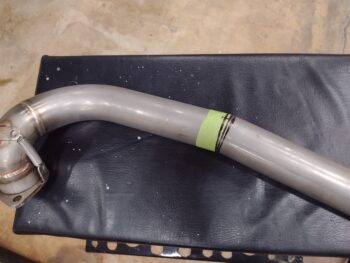
And again, this is what the pipes looked like just before I made this cut.
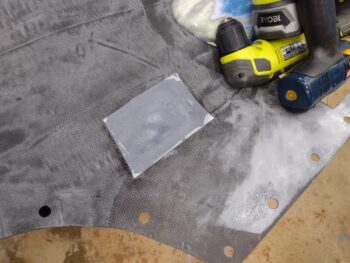
I also took the opportunity tonight to add a little depth to the bottom cowling at the point where the left outboard exhaust pipe first major bend is closer to the cowling… at the hash-marked area.
I cut out the hash-marked area with the Fein saw.
Now, the key to understanding what I’m doing here —very hard to show in pictures— is that there is an upward indention from the outside of the bottom cowling from where I reworked the aft half of the bottom cowling. This creates a bit of ridge on the inside of the cowling, which is right beneath the initial bend of the left outboard exhaust pipe. I’m essentially removing that inside cowl skin ridge and flattening it to get a good 0.1″ minimum added clearance for this area of the exhaust pipe…. probably a hair more than 1/8″ in total clearance.
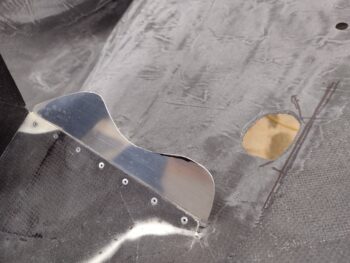
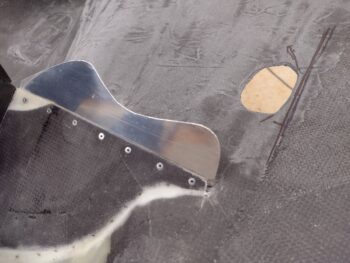
Also, if you look closely on the aft aluminum vane outboard edge you’ll see a Sharpie mark (pic 1)… this is the edge that needs to be trimmed just a hair (also for clearance with the left outboard exhaust pipe), which I did with the Dremel tool and then cleaned up the edge with some files (pic 2).
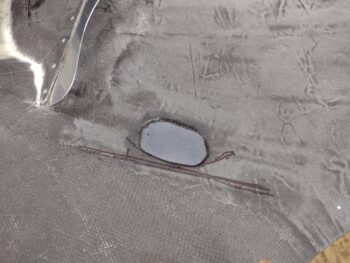
I then prepped the exhaust pipe clearance hole in the bottom cowling for a layup. I measured and cut 2 plies of CF, prepregged them, and then laid them up with some MGS epoxy.

I then peel plied the exterior side of this 2-ply CF layup.
And also the exposed CF layup on the inside of the exhaust pipe clearance hole.
Tomorrow I’ll pull the peel ply, smooth out the edges of the existing cowling surface around the new CF layup, and then layup a ply of CF on the inside of this bottom cowl exhaust pipe clearance layup.
I’ll most likely get the outboard exhaust pipe welded up either Monday or Tuesday, so between now and then I’ll get to work on some other stuff! Pressing forward . . .