
Today was another exhaust pipe welding day. I loaded up my vehicle and made the hour trek to James’ shop to the get the inboard left exhaust pipe for cylinder #1 welded up.
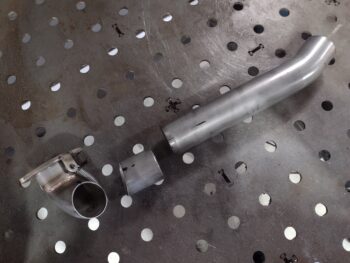
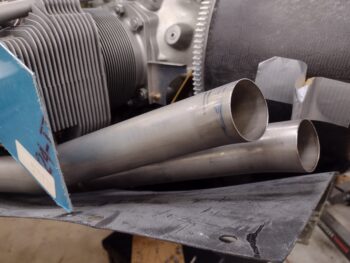
As I said in yesterday’s blog post, this was a 2-weld job since the exhaust pipe at this point was in 3 segments. Here’s a shot of these segments on James’ workbench ready to be welded up.
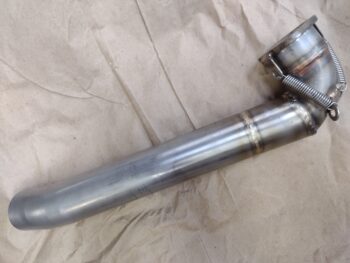
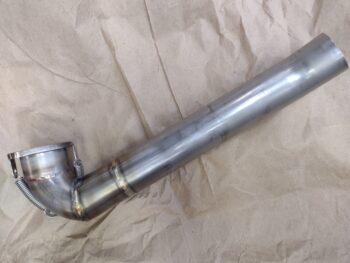
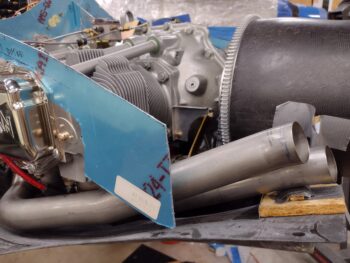
And here is the inboard left exhaust pipe —both sides shown— many hours later back in my shop after James’ excellent job of welding it up.
The sharper initial curve angle, that I had discussed with both James and Clinton from Custom Aircraft Parts (original builder of these exhaust pipes), is required for clearance of the pipe off the bottom cowl. It looks even sharper because the curve on the original exhaust pipe continued downward for a good 1/4″ or more before coming back up level… that’s why that small segment of straight pipe had to be welded into place at a sharper angle: to replace the downward curved section. The angle will have negligible, if any, negative impact on the exhaust flow.
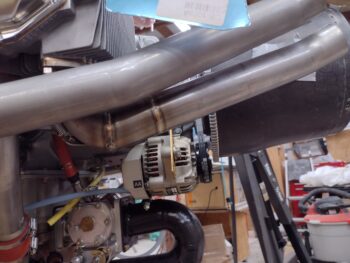
Here is the freshly welded left inboard cylinder #1 exhaust pipe mounted in place on the engine.
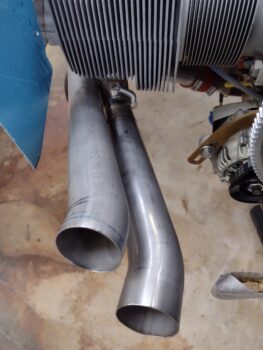
And here’s a shot of that pipe from below… the sharp bend now being the low point vs the pipe segment 2-3″ aft of that bend.
I then put the bottom cowling back on to check the elevation of the welded left inboard exhaust pipe compared to what I was looking for. As you can see, the pipe is just kissing the wood spacers that I had taped in place for where I wanted the aft pipe edge to be (pic 1). I then removed the wood spacers to show the gap without them (pic 2).
I then spent another hour assessing both the clearances between all the pipes and the bottom cowling and EGT probe positions. In addition, I also assessed what needs to happen now with left outboard pipe to angle it down and inboard to nestle it in with the inboard exhaust pipe.
On clearances: I decided I won’t need the significant bump out or divot in the bottom cowling for the outboard left exhaust pipe as I thought, since it sits right on the seam from the old cowl surface to the new cowl CF that I reworked. By just reworking the seam I should get about another 0.1″ of clearance without have to make any notable bump on the exterior side of the cowl. However, the initial elbow on the right inboard exhaust pipe is even closer than this cylinder #3 pipe, so I will need to flush that out and assess further.
At this point my brain was hurting from so much thinking, so I called it a night.