Today’s focus was primarily on creating the oil check door in the top cowling.
I’ve been doing as much research on this seemingly benign topic, specifically in regards to pusher canard aircraft, but honestly didn’t find a whole lot of info. I think a lot of this apparent lack of chatter on this topic has to do with so many of the early Long-EZs simply used Task cowlings, et al, that seemed to have an oil check door baked into the mold. There wasn’t a lot of thought required in producing an oil door.
As a quick aside, one interesting school of thought not surprisingly coming from Klaus Savier is to simply NOT have an oil door. Clearly that saves weight and minimizes any pressure loss from air escaping through the door. I attempt to consider things without just passing judgment on them and seriously thought this through. Perhaps it’s my old school mentality showing through, but I saw myself out at say Rough River or just flying around visiting friends… do I really want to take the cowl off every time I want check the oil? The answer is a resounding no.
In fact, I don’t want to have a tool (e.g. screwdriver) at all required to open the oil check door to gain access to the oil dipstick. I realize that a CAMLOC or two is one of the easier solutions to crack open the oil door, but besides a quick round of fuel checking in the mini-cup (I hate the old school “test tube” that invariably puts as much fuel on your hands as in the tube) I just want to be checking stuff and pulling “Remove Before Flight” pins. Moreover, a slip of your finger on a latch doesn’t scratch the paint quite like a good slip of the ‘ol screwdriver!
As I’ve mentioned previously, in my former job as a communications project manager, the focus was always on requirements. And that’s where the rub occurred for me in this endeavor of picking how this oil door was going to get created. I have a spring loaded hinge on hand (more on that in a bit) and lightweight Hartwell 2-button latch that I would like to incorporate into this design. BTW, the latch is less than an ounce heavier than a single CAMLOC setup (you can’t forget the receptacle weight).
Thus, the ensuing conflict became one of EASE OF INSTALL vs OPTIMIZED OPERATION. You can throw safety in there too.
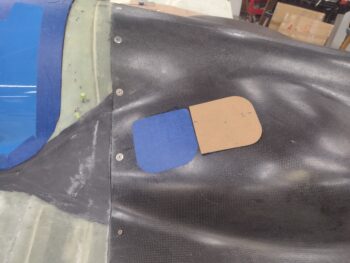
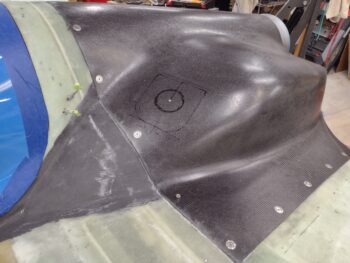
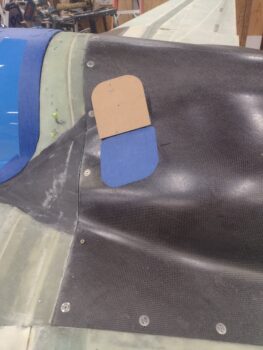
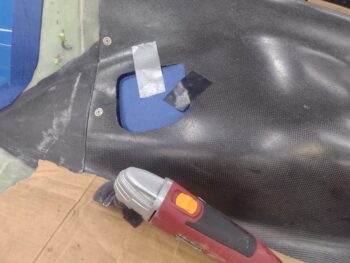
With the contour of the top cowling over the fuel level dipstick, the clear winner for ease of install was to have the oil check door open up aft, at an angle to A/C CL, as in the 2 pics above. The aft edge is straight and allows for an EZ install of a hinge. The forward edge of the door is fairly straight and would allow for an EZ install of the latch. Ok, done right?
Uh, no.
First, in any endeavor that involves a breathing tank (SCUBA, Firefighting, Chem/Bio Ops, etc.) you’re always taught to have the tank fully open or fully closed. No guessing from your buddy as to what state the breathing tank is in. The same goes for any valve: have it fully opened or fully closed. And thus hatches on aircraft, IMO, should be fully open or fully closed. In the most obvious state. Although I prefer an oil door that just pops up a little, if it’s open I want it known that it is not locked and secured and not rely just on my memory. We all know about accident cases where someone gets interrupted and then fails to complete the task. Thus my decision to go with a spring loaded door: safety.
Sorry for the diatribe, but that explains my primary issue with have the door open aft. With the spring loaded door, if the latch were to ever fail, the door would spring up straight into the wind —as a mini-sail or speed brake— and could conceivably be ripped off and sent into the prop. The PRO is that with some high-vis tape or paint, I would clearly see that it was open from the front of the plane. Accessibility and reach wasn’t really an issue, until you counted that our birds are typically in the grazing attitude with tail higher than as it sits in my shop right now. So reach with the aft opening oil hatch is more in the con category as well.
Sorry for my tome on the oil door. Almost done.
I notice a lot of builders made their oil doors open forward. Personally I consider this great for checking the oil and for safety of flight if the latch fails. However, unless the door swings all the way over, which mine won’t be, it’s not a good configuration for putting oil into the filler neck. So front is a no-go.
Clearly the oil door swinging outboard is the worst of all cases: visibility hampered, dipstick removal hampered, oil filling hampered…. just not good.
Which leads us to the optimized oil door opening position: inboard. This gets us the best of all worlds in regards to this diminutive little hatch: best visibility, best dipstick access, best oil filling access (both physically and due to visibility too).
So what’s the downside of this latter position? Well, the hinge side is on a slight curve. Not horrible, but significant enough it will have to be contended with. Worse than that is the latch side… it sits on a compound curve —not surprisingly with the obvious curves of the top cowling— and putting any type latch here, even just a CAMLOC, will to any degree and in a word: suck.
But after literally a few hours of testing every configuration, reading whatever I could find, and spending way too much time pondering future ops… I chose the operationally optimized configuration, and the one that would not present any significant potential risk to safety of flight.
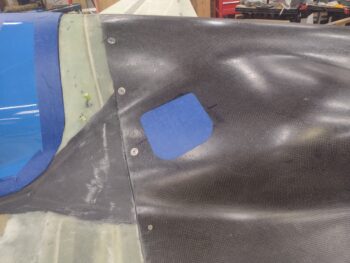
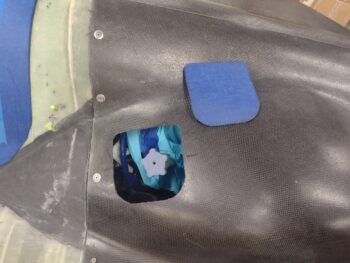
Here it is… all 5.1″ wide x 5.2″ tall of it.
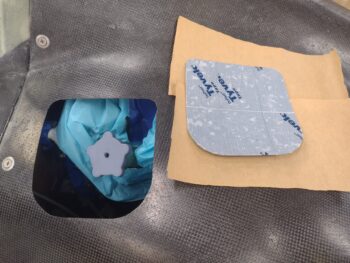
After making my decision and deciding to just deal with the mounting of it when that time came, I grabbed my trusty Fein saw and carefully freed the oil door from the top cowling. Obviously seeing the gray dipstick cap staring me in the face when I removed the oil door piece was super swell as well.
I then cleaned up the edges of both the oil door opening and the oil door itself.
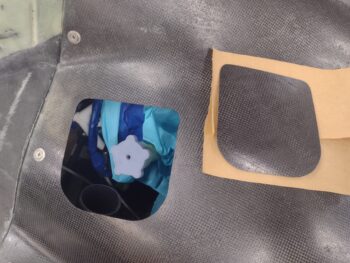
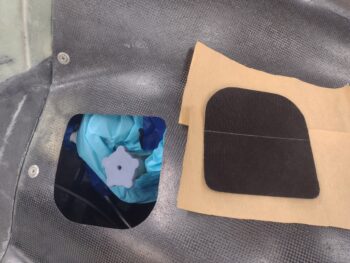
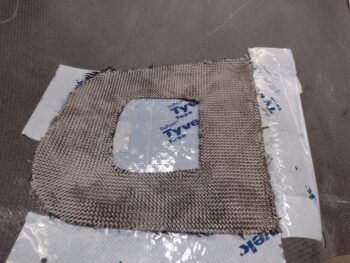
I could definitely tell I was cutting in the center 3-ply area of the cowling because as far as cutting it with the Fein saw it felt almost paper thin. I knew I would need to add a ply or 2 of carbon fiber to the oil door itself to stiffen it up a bit more, so I added a ply of thick Gorilla duct tape to the inside of the door before then adding the Tyvek “mold release” tape for laying up the oil door opening perimeter flange.
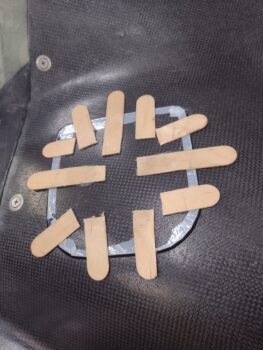
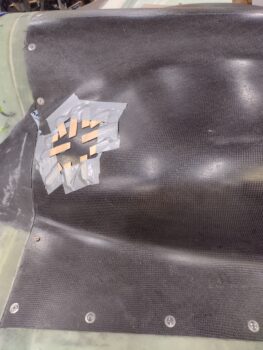
I recycled the pieces of popsicle sticks I had used for mounting the top cowling by hot gluing them to the external face of the oil check door. Here I’m simply doing a test fit with it back into place on the top cowling.
I then added a small dab of hot glue on each wood piece before setting the oil check door back into place into the top cowling. I then taped the wood tabs to ensure they were pressed firmly against the surface.
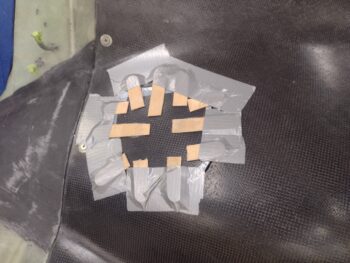
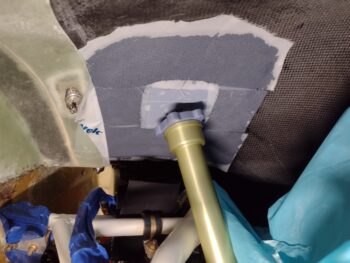
Here’s how that looked from the inside of the top cowling.
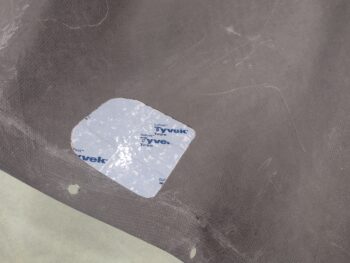
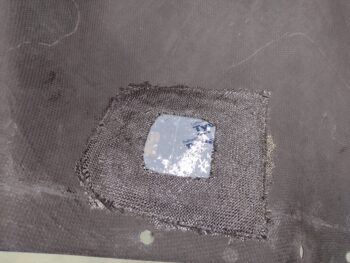
I placed scrap pieces of the Tyvek tape around the edge to show my glassing “boundaries” and then proceeded to use up all my CF scraps in creating the oil check door flange on the top cowling. I grabbed my roll of CF and cut out one nice “top” piece and laid that up as well… in actuality I wanted 3 plies to ensure good flange strength to ensure as tight a seal I can get to thwart the air pressure coming in from the armpit scoops trying to blow this door off the cowling.
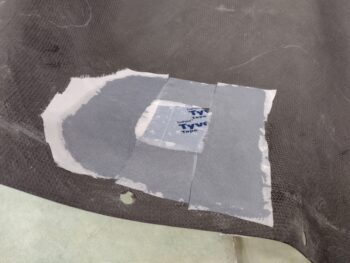
I then peel plied the oil check door CF flange layup.
I let the layup cure for well over an hour to set up a bit before remounting the top cowling onto the plane. I didn’t use fast hardener here but rather MGS 285 with a 60/40 mix of slow/fast hardener to give me a medium cure time.
With the decent size of the flange layup I didn’t want it curing with the cowling off and upside down with the sides splayed out a bit… I wanted it to final cure with the cowl set in position.
Here’s how that looked from the inside.
I had run out of epoxy about half way through laying up that last ply of CF on the flange, so I mixed up a bit more for that and the subsequent peel ply. Well, I overshot my target by a few grams so had some epoxy left over.
As to not waste the epoxy, I went into hyperdrive in prepping the next phase of my oil cooler left wing mounting flange. I trimmed the topside layup, and then removed any flox that had seeped out from under the G10 flange on the bottom side.
I then measured the thickness of the left wing bottom flange and it came out to 0.066″.
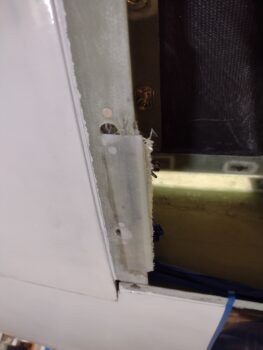
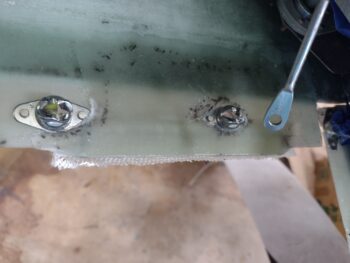
I needed to continue my flange extension inboard and with a flange thickness of 0.066″ it allowed me to simply add in another strip of 1/16″ thick G10 on the inboard EDGE of the wing flange, just below the G10 I had added yesterday. I found a scrap piece of G10 about 3/16″ wide and trimmed it to length, sanded it up and then used my epoxy from the Oil check door flange layup to attach the G10 strip in place with flox.
Before adding the G10 strip above, I used my sanding board to aggressively sand the area on the bottom wing flange that would receive glass. I then added a nearly 1″ wide by 5.5″ ply of BID on the bottom inboard face of the wing flange, overlapping onto the narrow strip of G10 that I had just floxed to both the inside edge of the wing flange and also to the G10 above it.
Again, this is all to create a strong mounting lip, 0.2″ inboard than previously, to allow mounting the oil cooler to the buttressed left wing flange with 3x CS SS #10 screws.
Here’s a shot from above, which really doesn’t show much other than the ply of BID peeking out from underneath. It does show that I pulled the peel ply and the previous layup is looking healthy.
We’re due to get a good bit of rain all next week, and it was starting to get dark… and with the past couple days slightly cooler than the crazy heat we’ve been having lately, I wanted to get a good sanding session in on the bottom cowling.
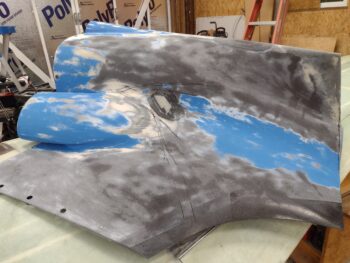
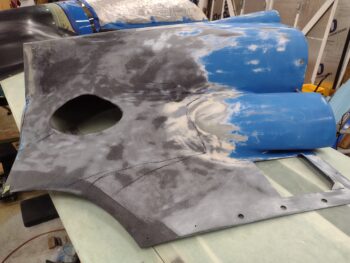
I sanded the bottom cowling outside the shop for a good 25 minutes straight, focusing mainly on the lower aft fin portion of the cowling. After the fin was paint free, I moved forward and out in my sanding to continue to remove as much of the old blue paint as possible in prep for future painting, and obviously upcoming glassing.
As I mentioned last Friday, I ordered a gallon of Pro-Set epoxy with medium hardener and will use that for the bottom cowling reconstructive surgery. While I wait for that order to be delivered I obviously wanted to get both the oil cooler and oil check door installed and off the to-do list. That being said, I expect to start working on the bottom cowling full stop in another 2-3 days.

Pingback: Oil and Coolant Check Door 1 - A Long Way Round the World
Yeah, a million monkeys on typewriters over a million years and eventually they’ll inadvertently write up ‘War and Peace’ …. it was bound to happen eventually! haha