
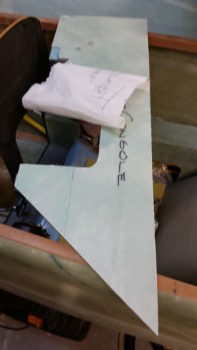
Today I started out by prepping the vertical wall and the narrow top piece of the left arm rest to micro & glass together. I glassed one side of these these pieces, along with my other armrests, back in the 2012 timeframe. I of course peel plied them and now it was time to remove the peel ply, which wasn’t too bad once I finally got a corner piece to grab ahold of.

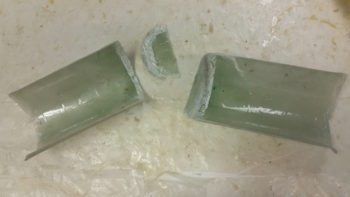
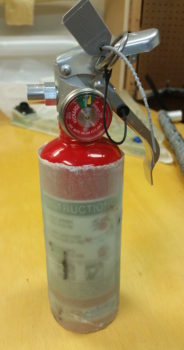
I’m going to digress a bit from the armrest –which is really a basic micro together and secure with 2-ply BID tape deal– to do discuss a dire situation: my cup holder! I have to tell you, I’m kicking myself for not grabbing a shot of the cured product before I pulled it off of its rather odd form: a kitchen fire extinguisher. But I was looking for a 2.9″ diameter form and that was the only thing I could find. Well, I didn’t follow protocol and take the time to tape up the very bottom with packing tape. I did grease it down with a light coat of WD-40, but apparently that didn’t hold up to hours of cooking under a heat lamp.
Thus, I paid for my sin with quite a hassle getting the last 1/4″ of the bottom off the form… and man was it stuck! As you can see I had to resort to slicing the layup in half all the way around. And I did NOT remove the bottom piece as you see in the pic below, it came off all on its own as a result of the brute force required to get these parts separated from the form.
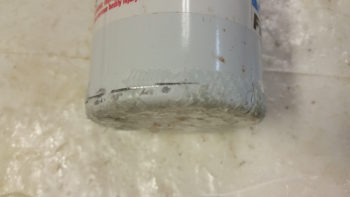
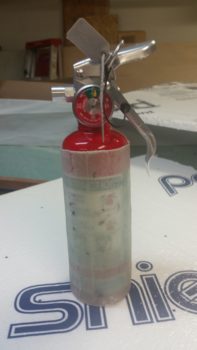
Here’s the bottom of the fire extinguisher, replete with remnants of glass painfully extracted from my poor cup holder. What’s a guy gotta do just to be able to have a cool beverage within reach while flying?!
Ok, so I micro’d and glassed the left side arm rest pieces together, and put it under the heat lamps. Then after the initial repair layup on my sad cup holder, I put it under the heat lamps as well.
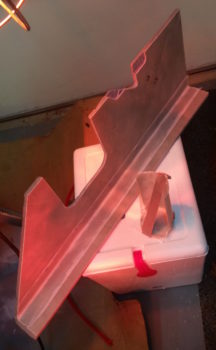
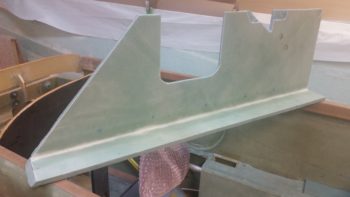
With my 2 layups curing under the heat lamps, I then got to work on the fire extinguisher. I don’t plan on having the fire extinguisher sitting so deeply in its fiberglass mount (as I glassed it so high up), it’s just that since the fire extinguisher will be mounted on the same angle as the pilot seat, I’ll have to cut the mounting tube at an angle to be flush with the top of the armrest (see mockup below). In short, I needed a longer mounting tube to allow for the mounting angle when I cut it.
As you can see, this layup extraction from its form –the actual fire extinguisher– went much, much easier (thank goodness!).
Here’s a peek into the inside of the fire extinguisher mounting tube.
Cleaned up extinguisher and its mounting tube.
Ahh, nice tight fit!
Here’s a basic idea where the fire extinguisher will get mounted. Once the strake baggage area is cut out, I’ll turn the extinguisher 90° so that the gauge is facing forward and the handle overhangs just inside the baggage compartment. This configuration may seem like it will get in the way of my elbow, but unless I push my arm back to a point that is uncomfortable, I won’t even feel it. In addition and as I noted earlier, most importantly I’ll be able to reach it IN FLIGHT.

This may seem like the same shot as before, but this is showing the seam the I had to cut on the fire extinguisher mounting tube to remove it from its “form” resealed together by a cured 1-ply layer of BID.
By this point my 2 pieces of the left armrest were now just the left armrest. I then pulled the peel ply and cleaned up the glass overhanging on each end.
I then spent a few hours (yeah, it doesn’t seem like it should take that long!) first building a glassing stand, mounting the left armrest to the stand and then actually glassing the external surface of the left armrest. Again, since I have a TON of spare UNI pieces I actually used 2 plies of UNI on this armrest vs the 1 ply of BID I used on the others to glass the top skin [Remember, since these armrests are now all removable, I’m not adding an extra layer of BID as per plans since the current structural strength is only for the armrest itself].
I wasn’t planning on peel plying the left armrest layup, but I accidentally poured way too much epoxy into the cup. So, ended peel plying the layup and also glassing another couple of open areas on the seams of my now much happier cup holder.

Tomorrow I will continue working on getting the left side armrest installed, along with its ancillary components.