
If you’ve been following my build blog you probably have noted a lack of build progress over the past couple of weeks. I didn’t really report the last few days of my massive shop cleanup, which I’m still on the tail end of, when I then took a few days off to go see the fall foliage rolling in over on the west side of North Carolina in the mountains.
A few days after that I headed out to Kentucky, just a few hours from Rough River actually, to visit my daughter, son-in-law and grandkids for nearly a week.
With a nice respite and a good family visit under my belt, I’m now ready to hop back into the build full bore.
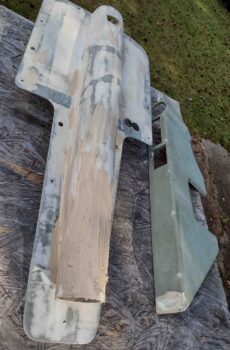
I started off by sanding down the first round of thick “micro” I had applied to the front half of the RAM air scoop to thicken up the front edge to create a nice rounded opening for smoother air flow… think airline engine intake. I had originally planned on attempting some type of Bell Mouth intake, but realized it would just be too complicated. Thus, I’m following in the footsteps of fellow builders James Redmon, Dave Berenholtz and Dave Anderson in how they all pretty much constructed their respective RAM air intakes.
After sanding down the first round of filler, I then fine tuned the current filler with yet another round of straight West 410 filler, as you can see below. I then used some of the leftover West 410 to fill in some of the edges of the glass divot I created on the aft top end of the left pilot armrest that will allow clearance for the fire extinguisher to be mounted on the front side of the pilot seat back just above it.
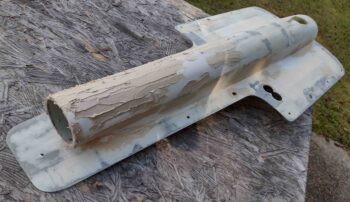
Another shot of the belly RAM air scoop West 410 refill on the front side of the scoop to thicken it up to allow me to create a thicker, rounder scoop inlet.
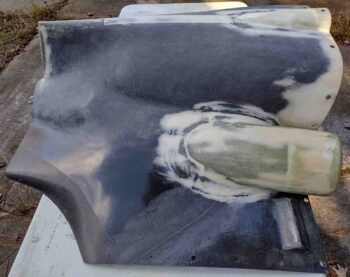
I then spent about 3 hours wet sanding the epoxy wiped bottom cowling. Grant it, I should have done this a few weeks ago since I’m now dealing with a very hard cured West epoxy shell… albeit it’s nice to know how durable this shell actually becomes after a nice bit of cure time.
Note the un-epoxy wiped aft edge of the bottom cowling where I will work the interface with the upper cowling. After which, I’ll then blend in the finishing and finalize it for the bottom cowling.
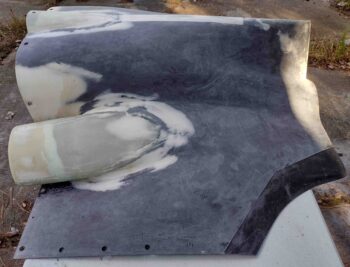
The real challenge with the armpit air intake scoops is getting down in between the scoops and the cowling to knock down the cured epoxy. As you can see, I did a good bit of “damage” to the West epoxy wipe, but didn’t get the entire cowling sanded. I figure I still have another 2-3 hours left to get this thing sanded in prep for primer… I’ll make another good attempt at it tomorrow.
I will also note that I would sand for a good bit, then take a break to clean up some of the shop before resuming sanding again. All in all I probably put in a good hour and a half of shop clean-up during these sanding efforts. Tomorrow looks to be a good deal of rinse and repeat.