
Today I started out by knocking out yet another task and getting it off the to-do list before flipping the plane back upright: the final addition of sound-deadening foam on the back wall of the center section spar.
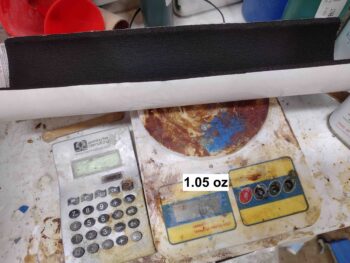
After cutting the final piece of sound-deadening foam, I weighed it in at 1.05 ounces.
I then cleaned and prepped the aft wall of the center section spar. I had painted it previously before my final decision to add in sound-deadening foam.
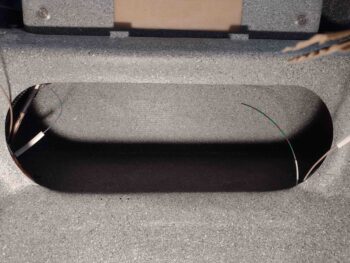
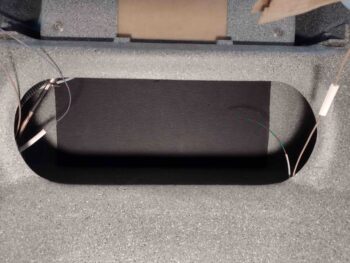
I then peeled the paper off the sticky backing of the sound-deadening foam and applied it to the aft wall of the CS spar, as you can see here:
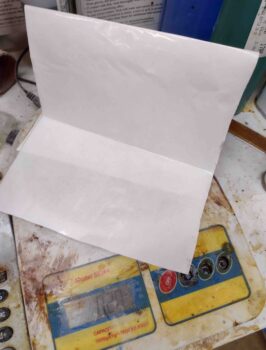
I noted the foam backing paper had a bit of weight to it, so I decided to weigh it as well. It came in at 0.2 oz, making the actual weight of the installed foam at about 0.85 ounce.
I then got to work on the milling machine CNC control box. First, I drilled 3 holes at the bottom left corner and then installed grommets into the holes. These grommeted holes are for the axes home/limit switches, E-stop emergency switch, and spindle direction/speed control cables.
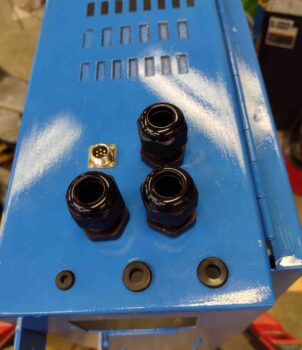
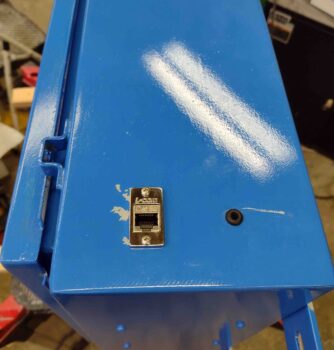
On the lower right side of the milling machine CNC control box I installed an Ethernet port (to connect the Acorn board to the Acorn-controlling computer). In addition, I drilled yet another hole and installed a grommet. This grommeted hole is for the Fog Buster cooling and lubrication sprayer control cable, which will allow the Acorn CNC control board to control the Fog Buster sprayer.
Finally, I drilled a hole and then installed the ON/OFF switch for the milling machine CNC control system on the front of the door of the control box.

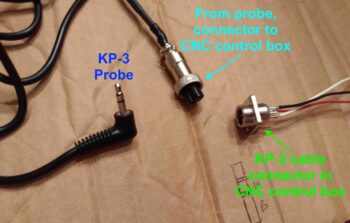
I then went into the house and fired up the soldering iron to create the CNC control box side connector for the KP-3 touch probe (right side of pic). In addition, I soldered up the wires to the mating mini 5-DIN connector onto the end of the cable that connects to the KP-3 probe itself (middle & left side of pic). This completes the cable side connector, whereas I still need to install the actual control box side connector and terminate the wires at the Acorn control board.
Tomorrow I plan to install the milling machine CNC control box component back plate, and then install all the components onto the back plate. Once these components are installed, I then plan on finishing up the wiring for the entire CNC control box.