
In transit from Virginia to Germany, the fuselage bottom had separated from the 1/4″ plywood sled to which I had it attached. The sled held the shape of the fuselage bottom to that of the shape of the bottom contour of the sides of the fuselage. Since I would have to remount the fuselage bottom to its sled so it would be shaped correctly, it follows that I would have to remove it first. So that’s exactly what I did. However . . .
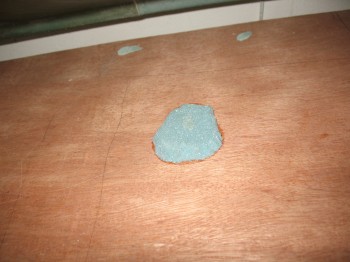
When I pulled the fuselage bottom off of the sled (it took a lot of convincing!) about a 2″ x 3″ sized chunk of foam ripped off of the bottom side of the fuselage and remained on the sled. This foam came off the fuselage right under the pilot’s seat pan where the foam is at one of its thinnest points. It looks as though a fair amount of epoxy soaked through the foam, maybe through a hole, and bonded the foam to the plywood sled underneath. I tried to pull the foam off and reuse it to plug the divot, but it wasn’t coming off without a fight. So I simply cut the hole rectangular and made the same shaped plug to fill it in.
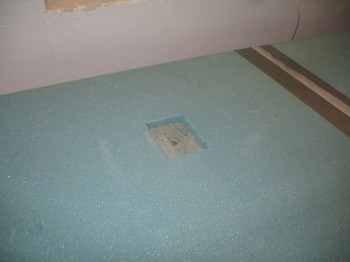
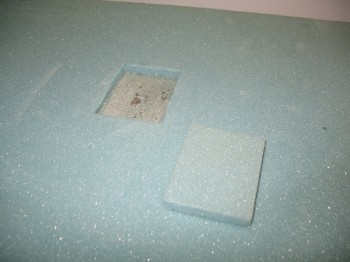
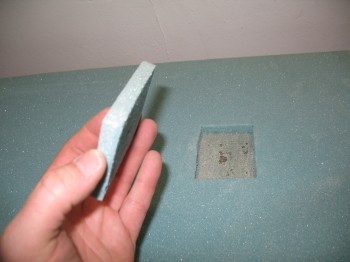
Once I had shaped the plug to fit the now rectangular divot, I prepped the glass by removing as much of the dead foam, epoxy and micro that I could. I then sanded the showing fiberglass, taking care not to damage the edge of the foam.
Now that the fiberglass was crud-free, I whipped up a batch of micro with just a little flox to add some strength since it’s at such a thin spot of the fuselage. I lathered up both sides with the micro and set the plug in the hole, carefully removing the excess micro that was squeezing out of the seams.
After it was set fairly good, I added some weight to compress the plug, drive out excess micro, and get as lightweight of a repair as possible.
As I mentioned before, micro cures to a bright white. Thus, when you look at the repair from the inside of the fuselage bottom, you can see quite a bright rectangular patch of micro.
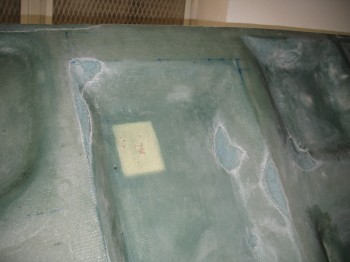
You can also see where I cut out the multiple areas of delaminated glass. This will all eventually get covered with more glass to repair, then even another ply or two added over the entire front and back ends (inside) of the fuselage bottom. I also thoroughly sanded the entire front glassed area of the fuselage bottom.
After the plug dried and I performed another round of epoxy injections using a syringe into some small air pockets, I taped the fuselage back down to the sled and prepped the back half of the fuselage bottom for its second “initial” layup!