
Having just returned from my North Carolina “hangar” trip, and needing a couple of days R&R from multiple trailer loadouts from my storage units to my hangar, I decided to focus on my upcoming machining CNC conversions before dropping them like a hot potato as I begin my renewed focus on instrument flight training and prepping my house for sale.
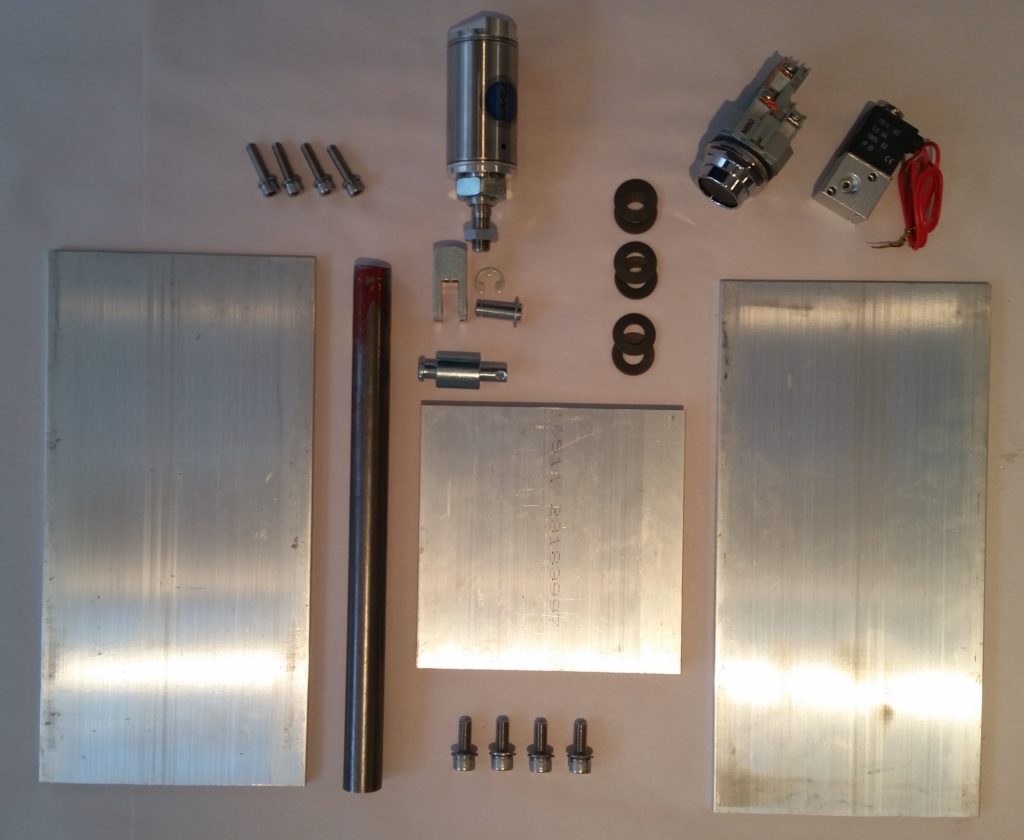
Below are the major components, both in material and components, that I’ll need to construct a power drawbar for my milling machine (side & top plates; pneumatic cylinder, air valve and switch; Belleville washers; steel stock for new drawbar, etc.). This will allow me –with just a touch of a button– to quickly swap out the milling tools during a CNC operation. Quite a handy capability to have since it allows tool changes within literally seconds versus having to swap out a tool manually… which on a milling machine requires 3 hands and is much more laborious than swapping out bits on your standard drill press. Also, there is more raw material and other bits coming soon for the power drawbar “kit” that I will include in an upcoming order to Aircraft Spruce.
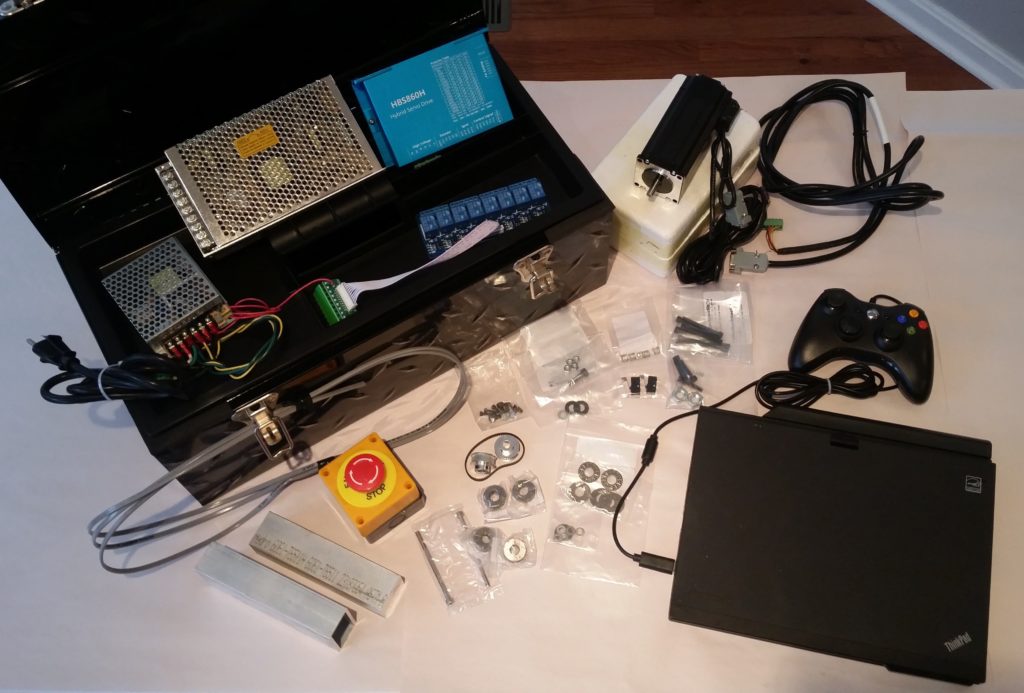
Here’s a quick update on my lathe CNC conversion project as well. Although converting the milling machine to CNC is the priority, I am slowing collecting bits ‘n pieces for the lathe CNC conversion. As you can see below, I have the housing for the lathe CNC system (a converted tool box ala YouTube ‘CNC guru’ Franco); Z-axis closed-loop stepper motor, drive, power supply; Emergency stop switch & cable; copious amounts of hardware; aluminum stock; CNC touchscreen laptop that meets Acorn’s stringent specs; and a control pendant (XBox controller) with buttons/joysticks remapped to drive the Acorn CNC12 software.
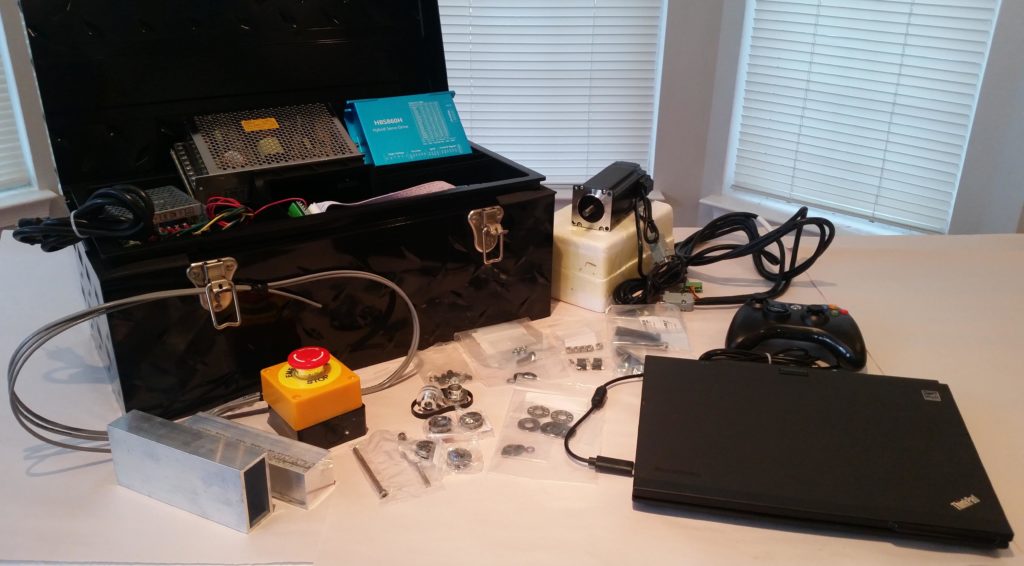
And a more head-on view . . . additional hardware is on order, and as with the drawbar above I will be ordering some raw aluminum stock from Aircraft Spruce. The Z-axis motor shown is a 3 Nm (425 oz/in) Nema 23 and I’ll pick up a 2.2 Nm (310 oz/in) for the X axis.
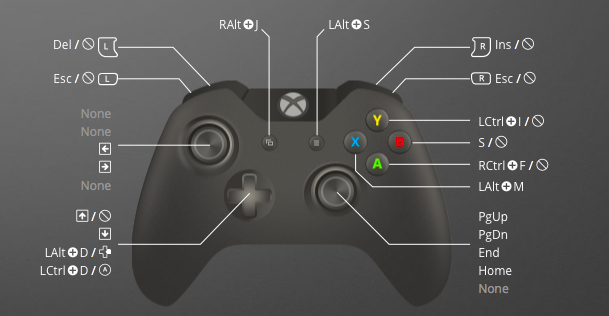
Here’s a screenshot –although not exactly as I have mine– of the XBox controller’s buttons and joysticks reassignment through the reWASD app. After downloading reWASD & hooking up my XBox controller to my laptop via USB, I was then able to remap my XBox controller to use assigned keystrokes as I would if controlling the Acorn CNC12 software with the computer’s keyboard. Moreover, on the reWASD site there are 3 preprogrammed Acorn CNC configuration profiles that you can download and use to be quickly up & running. I downloaded Rick Sparber’s configuration (below) but then tweaked it a bit more to my personal liking. I’m sure as I actually use it more tweaks will ensue.
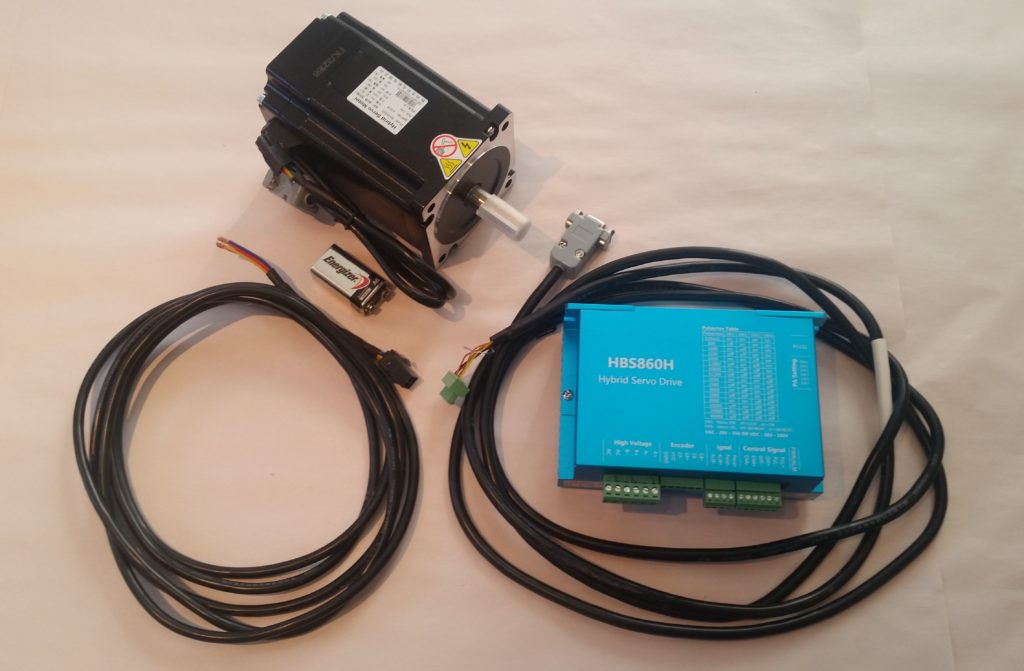
Next, here’s a shot of the Milling Machine’s massive 8.5 Nm (1200 oz/in) Nema 34 Z-Axis closed loop stepper motor and cables, along with its HBS860H motor drive. MIA here is the 60V unregulated power supply which is on backorder. In addition, the X-Axis 4.5Nm (637 oz/in) Nema 34 closed loop stepper motor, drive and power supply is on order and in transit. This leaves just the Y-Axis motor left to buy. Also, I placed the 9V battery in the pic simply for size reference.
Finally, I did a power ops test of the Centroid Acorn CNC Board and power supply before then doing an Acorn CNC12 milling software Bench Test after getting the CNC laptop (CNCPC) to communicate with the Acorn board. Part of the Bench Test is of course getting a good software install on the computer. With a good Bench Test under my belt, I can now move onto the next step of connecting motors (which will be a bit down the road).
The only glitch I had is that during the initial connection between the Acorn CNC board and the CNC12 software I got a message notification onscreen to cycle the Acorn Board’s power. However, literally everything I’ve read and every video I’ve watched all strongly warn that power should not be removed from the Acorn CNC board during initial connection with the computer. I did some quick research, then as a safety measure I powered down the laptop before cycling power on the Acorn board. It worked out fine and I was then able to proceed with the CNC12 software load, initialization and Bench Test.
Besides a future pic or two of some components, this will most likely be my last discussion for a while on my machining CNC conversion endeavors. I’m sure a lot of you experimental purists may feel relieved by that, wanting to simply see more of mainstream airplane building . . . so I’ll leave it at that!
Yes this is all voodoo and magic for us purest airplane builders. Hats off for going the extra mile to make bits!
Ha! Thanks Dave!