
As I detailed in a previous post, the shop air compressor I got is a beast. Moreover, although it is an upright 80 gal compressor it takes up a good amount of space. And even though I’ll have a fairly large workshop now, I still want to optimize as much space as I can.
In addition, with this gargantuan compressor I want to minimize noise and keep what little hearing I have… so my idea was to simply build an enclosure on the back side of the shop to house the air compressor.
To do this, the plan is to extend the concrete shop floor on the backside with approximately a 5 ft x 5 ft pad. I’ll then frame out walls and tie it into the existing shop to create essentially an air compressor closet. I’m also using 2×6’s for the walls to allow for plenty of insulation thickness to reduce noise.
I calculated that I would need about 24 x 80-pound bags of concrete… 22 actually but I had a couple extra just in case.
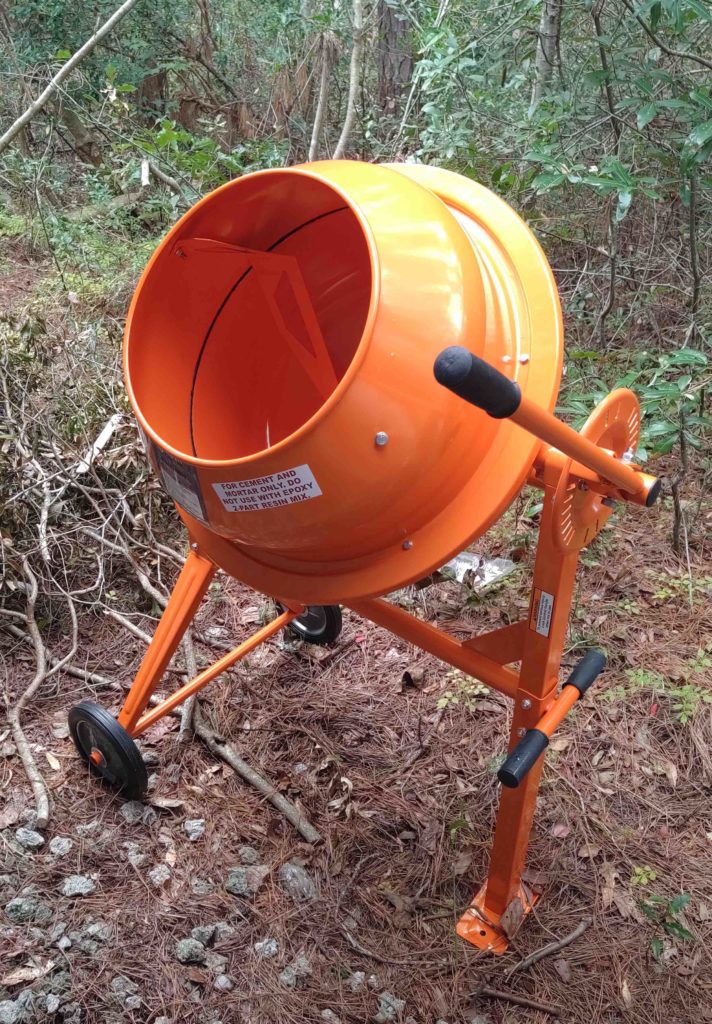
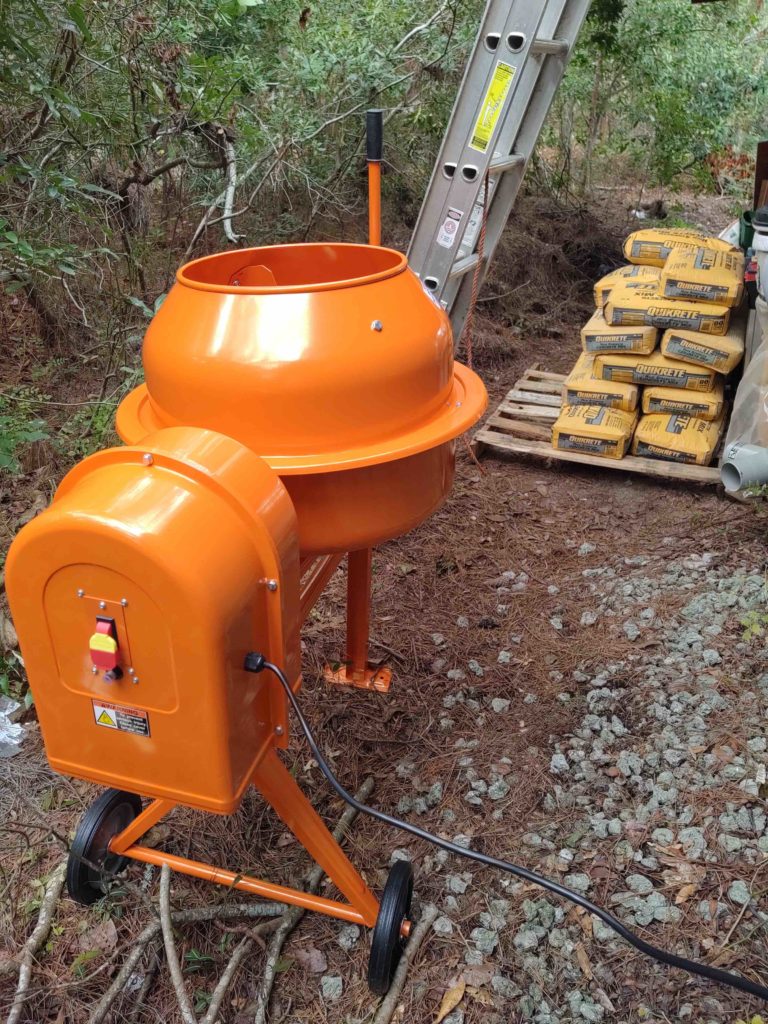
I then used a coupon to purchase a cheap Harbor Freight cement mixer since it was the cheapest I could find while still getting good reviews. Below are a couple of shots of the compressor after I spent about 3 hours putting it together out of the box.
I then prepped the compressor pad area by digging out all dirt and gravel (a herculean task unto itself) and then framing out the form.
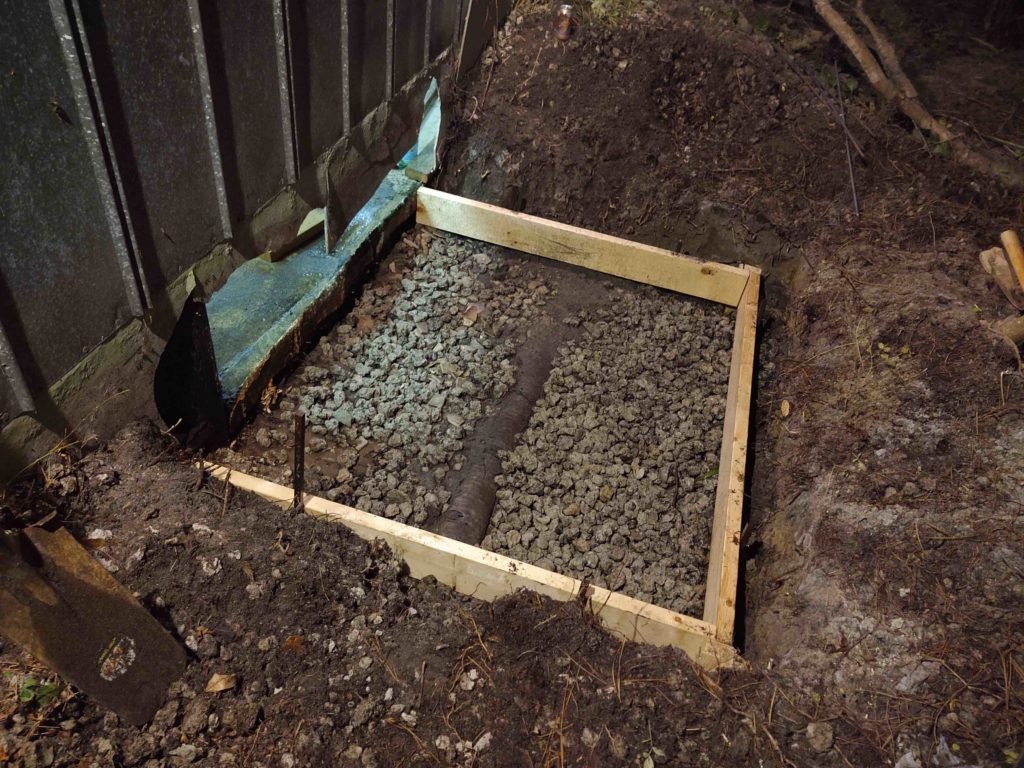
I then set the rebar reinforcement rods in place and added a steel mesh grid for added strength.
To get a good angle on pouring out the mixed concrete into the form, I bought 2 big pieces of lumber to act as a bridge (or catwalk, if you will) to allow for concentrating the concrete pretty much where I wanted it.
Below we have the final troweled surface of the air compressor concrete pad.
The protrusion on the left is a bolt to secure the bottom plate of the wall. I had planned on doing these along the edge, but the first one was such a pain that I left the others out. The larger protrusion in the RH corner is a plastic pipe for the water drain used in conjunction with an auto-timer tank drain to remove water from the compressor tank.
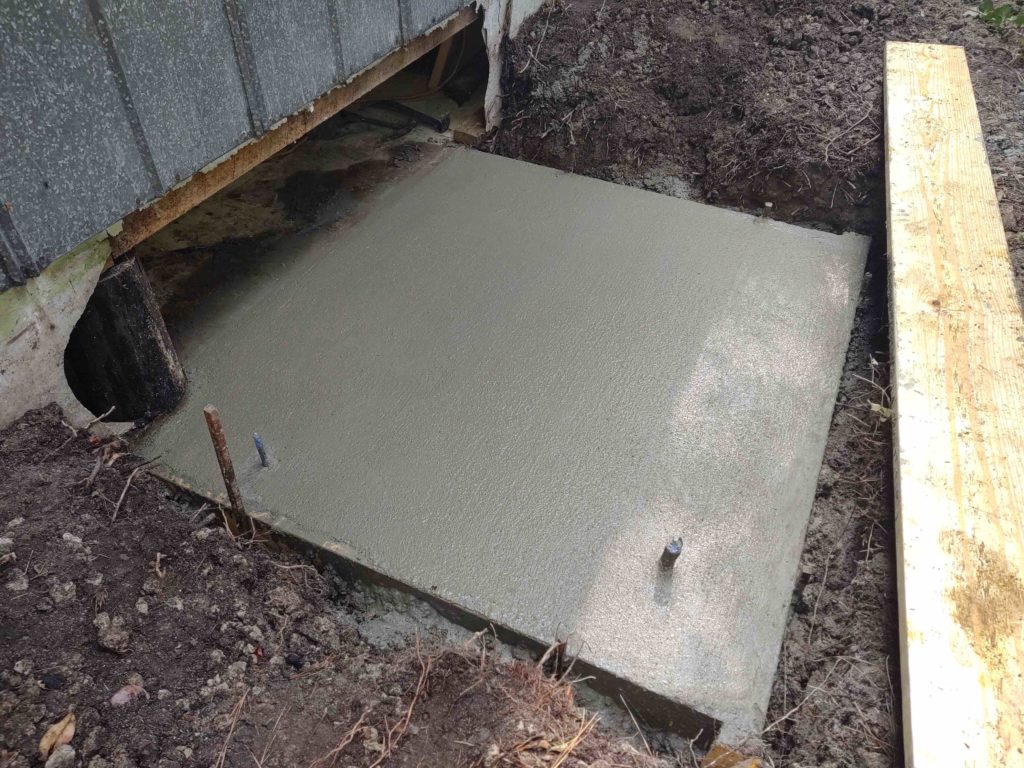
I’m very happy with how the compressor concrete pad turned out. As it’s curing, I’ll get to work on removing a center post in my workshop and installing new, longer-spanning beams that will then enable me to have the entire Long-EZ in the shop: fuselage with wings installed…. which should really enhance and accelerate the build flow!