
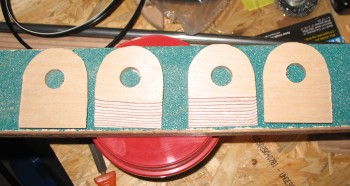
I spent about 2-1/2 hours at the wood shop on Ramstein today. Not nearly as bad as last time… I cut 4 each Main Landing Gear Mount jigs with 5/8″ holes and tapered edges. These will be used to temporarily “mount” the gear to the fuselage gear mounts with bondo and then also serve as the form to create the gear tabs that will eventually hold the gear to the fuselage.
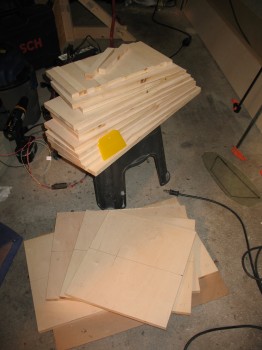
 I then cut out all the wing jig segments from 3/4″ plywood (the plans call for 1/2″ plywood but their’s was REALLY warped, so I went with nearly the only plywood left in Germany: 3/4″). I then cut 17 each 1″ x 8″ connector pieces that will eventually get mounted to each segment of the jig. In building the jigs, I’m making every attempt to get the wing jig outline to match exactly per the outline of the paper template. To do this, I’ve taken into account the blade kerf width on each saw I use.
Back at the shop, I glued all the forward pieces of the jigs together and clamped them.

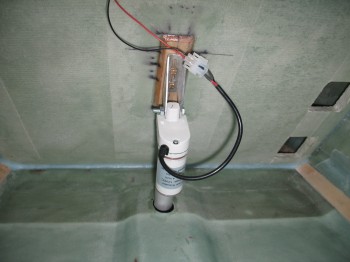
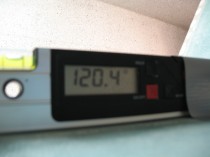
 As for the landing brake, I extended the landing brake actuator hole aft by about 3/16″. I then readjusted the topside metal mounting bracket–on the rear side of the front seat–up by 1/8″. This locked in the landing brake door/flap opening angle to 59.6°.
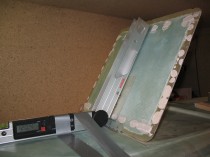
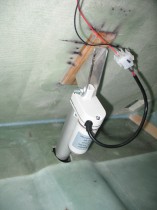
And here’s a look at this guy in action!
Although there is some finishing steps that need to be completed to form the edge of the landing brake even with the fuselage, I am declaring Section VI complete!
After I finished messing about with the landing brake, I turned my attention back to the main landing gear. I spent over an hour and half sanding and prepping it for it’s final glassing.