
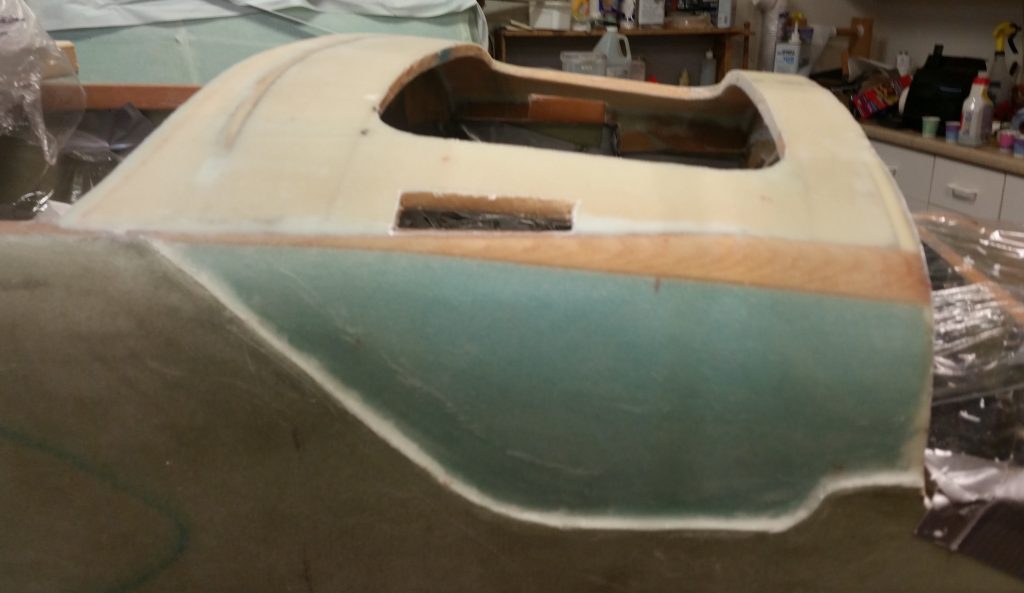
As a reminder of my aft nose cover shenanigans, part of the collective securing of this aft cover includes hinge plates attached to the movable/removable aft nose cover itself that are locked in place to longeron-mounted receiving hinge plates… one on each side of the avionics access opening. To be clear, this avionics access opening sits just forward of the instrument panel.
Below you can clearly see the near side and barely see the far side opening slit that allows the aft nose cover hinge plates to traverse through the nose structure to lock the aft nose cover into place to the longerons.
Below is a couple of shots of the mounted hinge plate assembly on the nose/longeron side of the aircraft. The hinge segment with the part # marking on it gets attached to the aft nose cover which obviously allows for the two hinge segments to interlock together.
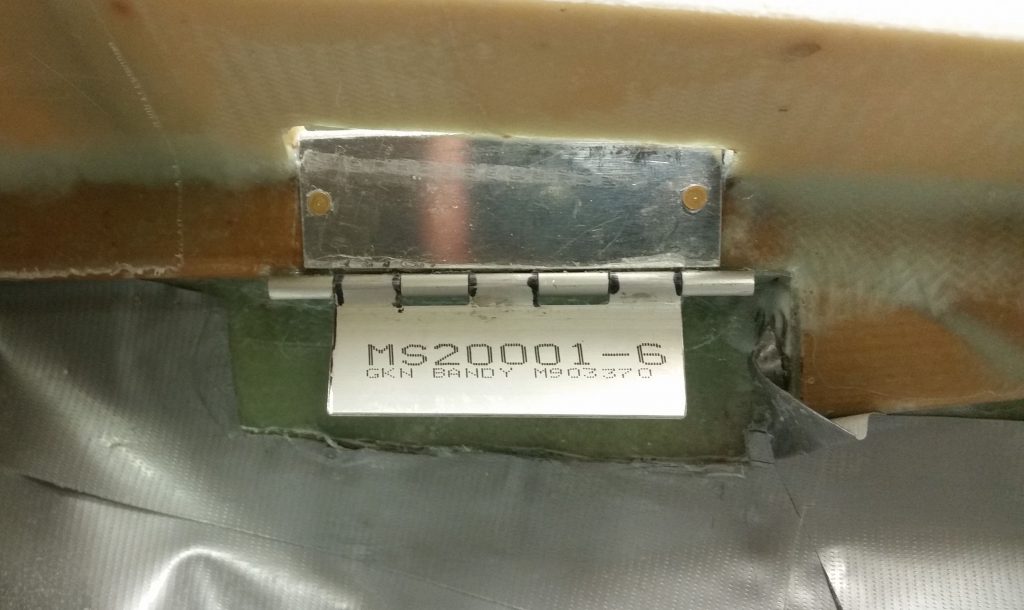
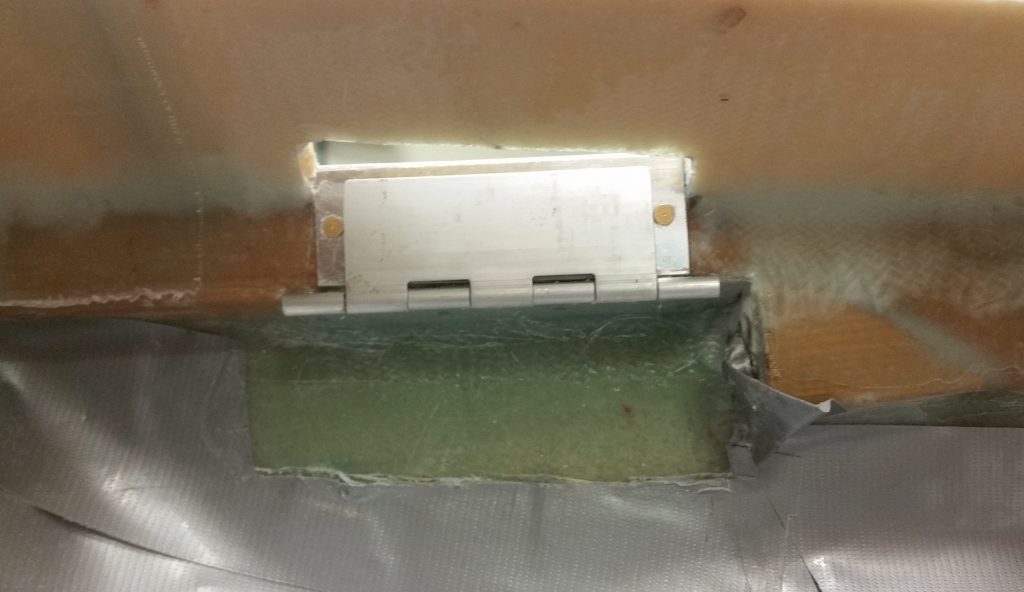
Again, as just one part of a system [that also consists of CAMLOCs and screws] to secure the aft nose cover to the aft nose substructure, these hinge plates are secured to each other via a removable brass hinge pin that replaces the original hinge pin. This brass hinge pin –one per left & right side– traverses through the instrument panel and is held in place itself by a threaded bung floxed into the instrument panel.
This is my initial CAD-rendered drawing of the aft nose cover hinge pin.
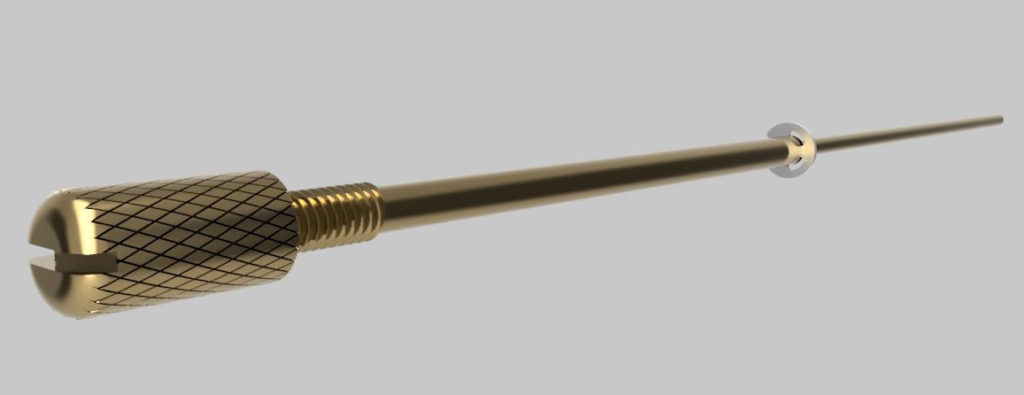
Part of the process to remove the aft nose cover is to unscrew the hinge pin from the instrument panel side and then slide the entire hinge pin assembly aft. The hinge pin assembly is retained both within the instrument panel and the longeron-side hinge plate (the very aft rung) via an E-style retaining ring (visible in both renderings above & below).
Just forward of the E-style retaining ring (to the right in pic below) the pin tapers down to the diameter required to lock the two hinge plates together (0.089 in.).
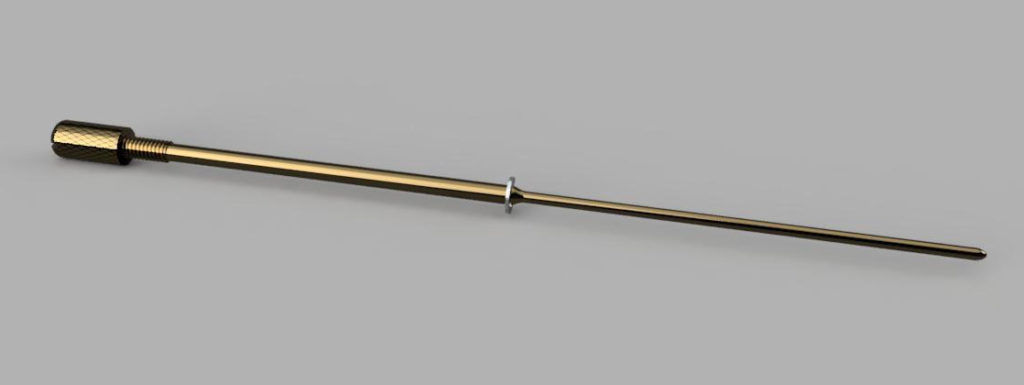
I drew up these hinge pins based off the best information I had available, and again, by using CAD I can fairly easily tweak any of the dimensions if need be.
Finally, I had planned on making the throttle handle lever my next CAD drawing task, but due to my being sick and then yet another trip to North Carolina, I had to rearrange my drawing jobs.