
And when I say “Fire,” I’m not kidding . . . read on below!
Today I started out doing some planning and inventorying for my fuel system. Since I’m going to make my new work demarcation line at the pilot’s seat bulkhead, going forward, then I needed to figure out my fuel system in real terms, not just in my head. I drew out the fuel system on a white board and then did an inventory to see what I had on hand and to see what I needed to order. I was fairly pleased that I had the majority of stuff I needed on hand, but will need to order about $35 in fittings from ACS.
I also did some research on the exact installation requirements for each fuel system component. For example, on the Andair fuel valve I could clearly see that the big red selector handle needed to come off to install it, but I hadn’t even truly read the install manual until today to find out how to remove the handle, and install the unit. I also had some questions on the FT-60 Red Cube fuel flow sensor that I eventually got answered on the VAF site. In addition, I wanted to double check some info on the fuel pump.
After a few hours I was happy with my progress on the fuel system and was satisfied that I actually knew the direction I was headed with that system once again.
I then my sights back onto the Atkinson pitch trim system. Having received my reamers via UPS this AM, I was ready to drill and ream a nice round 1/4″ hole in the elevator tube to mount the control arm of the pitch trim actuator.
First, I spent a good 45 min dialing in the new configuration and physical mounting of the pitch trim actuator by redrilling the 2 mounting holes in the mounting bracket. Not only was I moving the entire unit aft a hair, I was also rotating the front of bracket down a bit more while the aft side dropped down some as well, but not as much as the front.
Once I got the pitch trim actuator assembly newly aligned, and the mounting hole in the elevator tube was ready to be drilled, I set up the control system within the plan’s specs with the elevators at neutral and the control stick at ailerons level, which is actually about a 5° stick grip lean to the left — again, as per plans. I then drilled out the hole in the elevator tube and mounted the control arm of the pitch trim actuator.
Once I tested the newly realigned pitch trim system, the up trim worked fine but the down trim didn’t work at all. Apparently, if you’re prone to moments of just being dumb, then you can expect issues like this! Apparently, in my haste to get this pitch trim actuator in this bird, I forgot to double check its current position. Since the actuator arm was all the way in, then when I threw the switch for it to push the elevators up, it did so with no issue. But then when I went the other way, well, by the time the actuator throw ended the elevators were merely back at level . . . and didn’t go down below the level line at all.

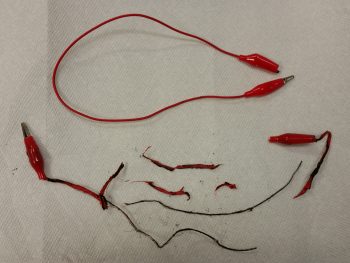
Another issue I had was just a little battery fire, or so I thought –after I removed the actuator to set it at its midpoint position– as I was coming around the nose and had moved the actuator power wires. Well, as I rounded the nose I could see a bit of fire right on top of the battery. Not sure what was actually burning, I yanked the wires off the battery and kicked it across the floor so if it decided to do something violent I had the fuselage between me and it.
Well, the fire went out immediately, but there was a good bit of smoke. Apparently one of my patch cords shorted out and literally blew apart and started burning. It’s interesting that none of the mil spec wires had any issues, but a couple of the cheaper leads were destroyed. A few minutes later I felt the battery to see if it was warm, and it wasn’t. I then checked voltage on it and it was a bit low at 12.59 volts. But then again, I haven’t charged it in a few weeks and I have been using it a lot. An exciting little sideshow to be certain, but with that out of the way, I got back to the task at hand.
After about 10 minutes of having the garage open and a fan turned on to clear out the smoke and smell from the burning battery wires, I went to work to fix the actuator configuration by simply taking the actuator out of the nose and extending it until it was half out (1.5″ out, with a 3″ total extension). I then remounted it, verified and reset the control system to specs, and the drilled the new hole. When I tested it the second time around it worked like a champ (see video below).
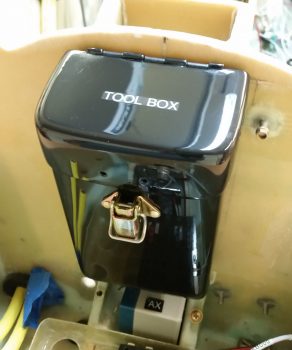
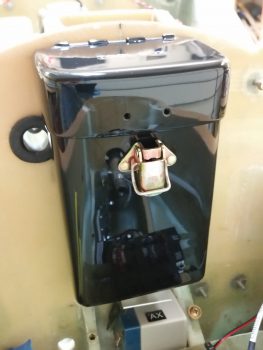
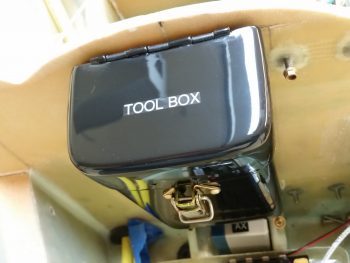
With the pitch trim actuator install taken care of for the most part, I then turned my sights back onto getting some of these painted parts knocked out. I wet sanded the tool box lid lightly with 500 grit sandpaper, then 1000 grit and finally 1200 grit.
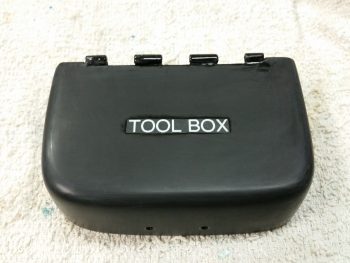
As I buffed out the tool box lid I was also uploading the lengthy video above. It took a little over an hour total to buff out the tool box lid by hand.
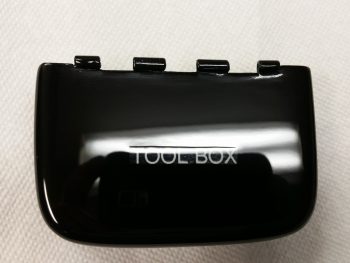
Again, after the Ultimate cutting compound application, I then wrapped up the tool box lid by hitting it with 3 rounds of Meguiar’s Ultimate Polish.
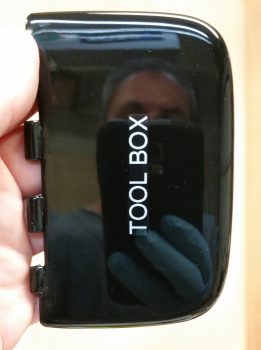
I then set it on top of the tool box body.
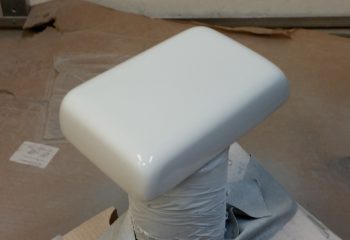
Finally, my last task of the evening was to wet sand & Simple Green wash the GPS antenna cover.
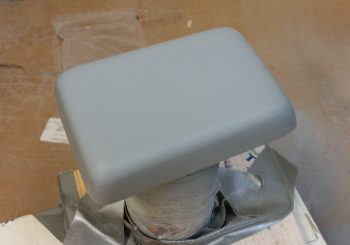
After I prepped it for more paint, I hit with 3 coats of white primer/paint to cure overnight. This antenna cover will not be a gloss color, but rather either semi-gloss or even flat.
I’m heading into the weekend tomorrow and have plans tomorrow afternoon on, but I will continue to try at get all the nose components installed –including the now prerequisite pilot cockpit area– to allow me to build the nose top.