
Today I finalized all the prep for glassing the headrest. While I’ll still need to glass the GPS antenna puck cover, once I finish this next layup the majority of the glassing on the headrest will be complete.
I had deformed the blue foam a bit at the top of the headrest when I was using the heat gun to better align the headrest. The heat gun worked but, as often is the case, not without collateral damage. No worries. That’s the great thing about composites: with just a little more time, you can fix nearly every mishap that may occur along the build process.
So to fill in the significant imperfections I used a page out of Chrissi & Randi’s (aka “The Cozy Girrls”) build book and employed some Super Build Micro! I actually don’t know what they call it, but I needed a catchy name to set it apart from just plain-Jane micro.
First off, be forewarned that this micro is nothing more than filler & is merely used as very light matter to occupy space. It is NOT meant for anything requiring structural strength. If done correctly (and mine was just so-so) it is reportedly really easy to SAND, so you don’t tear up sensitive foam whilst sanding hard cured micro.
How is it made? What’s the secret ingredient you ask? Well . . . it’s . . . ALCOHOL. I mixed up a batch of really thick micro, then I add a little bit of rubbing alcohol, then that re-liquefies the micro paste into micro slurry, whereupon I added more micro until it was really thick paste again. Then a little bit more alcohol, then some more micro, etc.
Obviously what you get is a product analogous to auto paint in that it is laced with a reducing agent. As the paint cures, the reducer evaporates and lets the paint solids cure into a hard shell. In reality, this is more along the lines of what happened with this micro. The build micro is supposed to be easy to sand, but although it did sand easily enough to keep me from tearing up the foam, it was still a bit of a chore. It probably took about an hour total to sand all the micro to the shapes and levels I wanted.
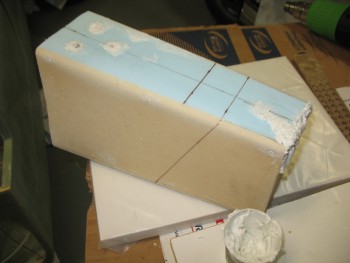
Here’s a pic of the build micro applied to the areas needing it on my headrest.
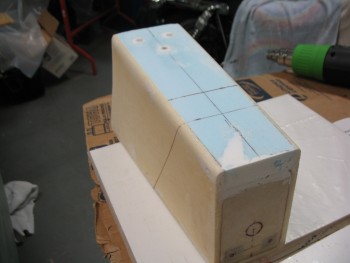
And here’s a picture after I sanded the excess micro and shaped it to match the shape of the headrest.
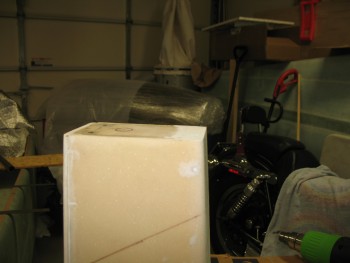
Here’s a side profile view of the top aft corner that was in such a bad way before I started.
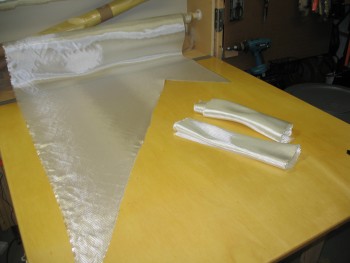
With all the holes & dings filled and sanded, I finally had the headrest ready to glass. I had used only BID scraps up to this point, but I wanted a nice finish for the headrest tower with no overtly noticeable glass seams, so I used my new glass cutting table for the first time to cut 2 pieces of BID out.

My plan is to glass 2-plies of BID on the front & sides, and then have all the overlap/extra plies ending at back of the headrest.
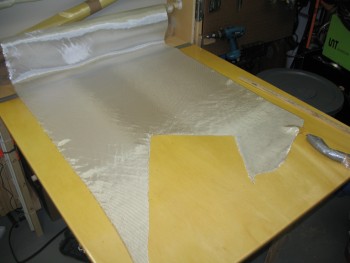
I cut 2 BID pieces 13″ x 23″ in the ballpark of a 45° bias for strength.
With the headrest ready for glassing and the BID waiting to be applied, I’ll tackle this decent-sized layup tomorrow since it’s getting late.