
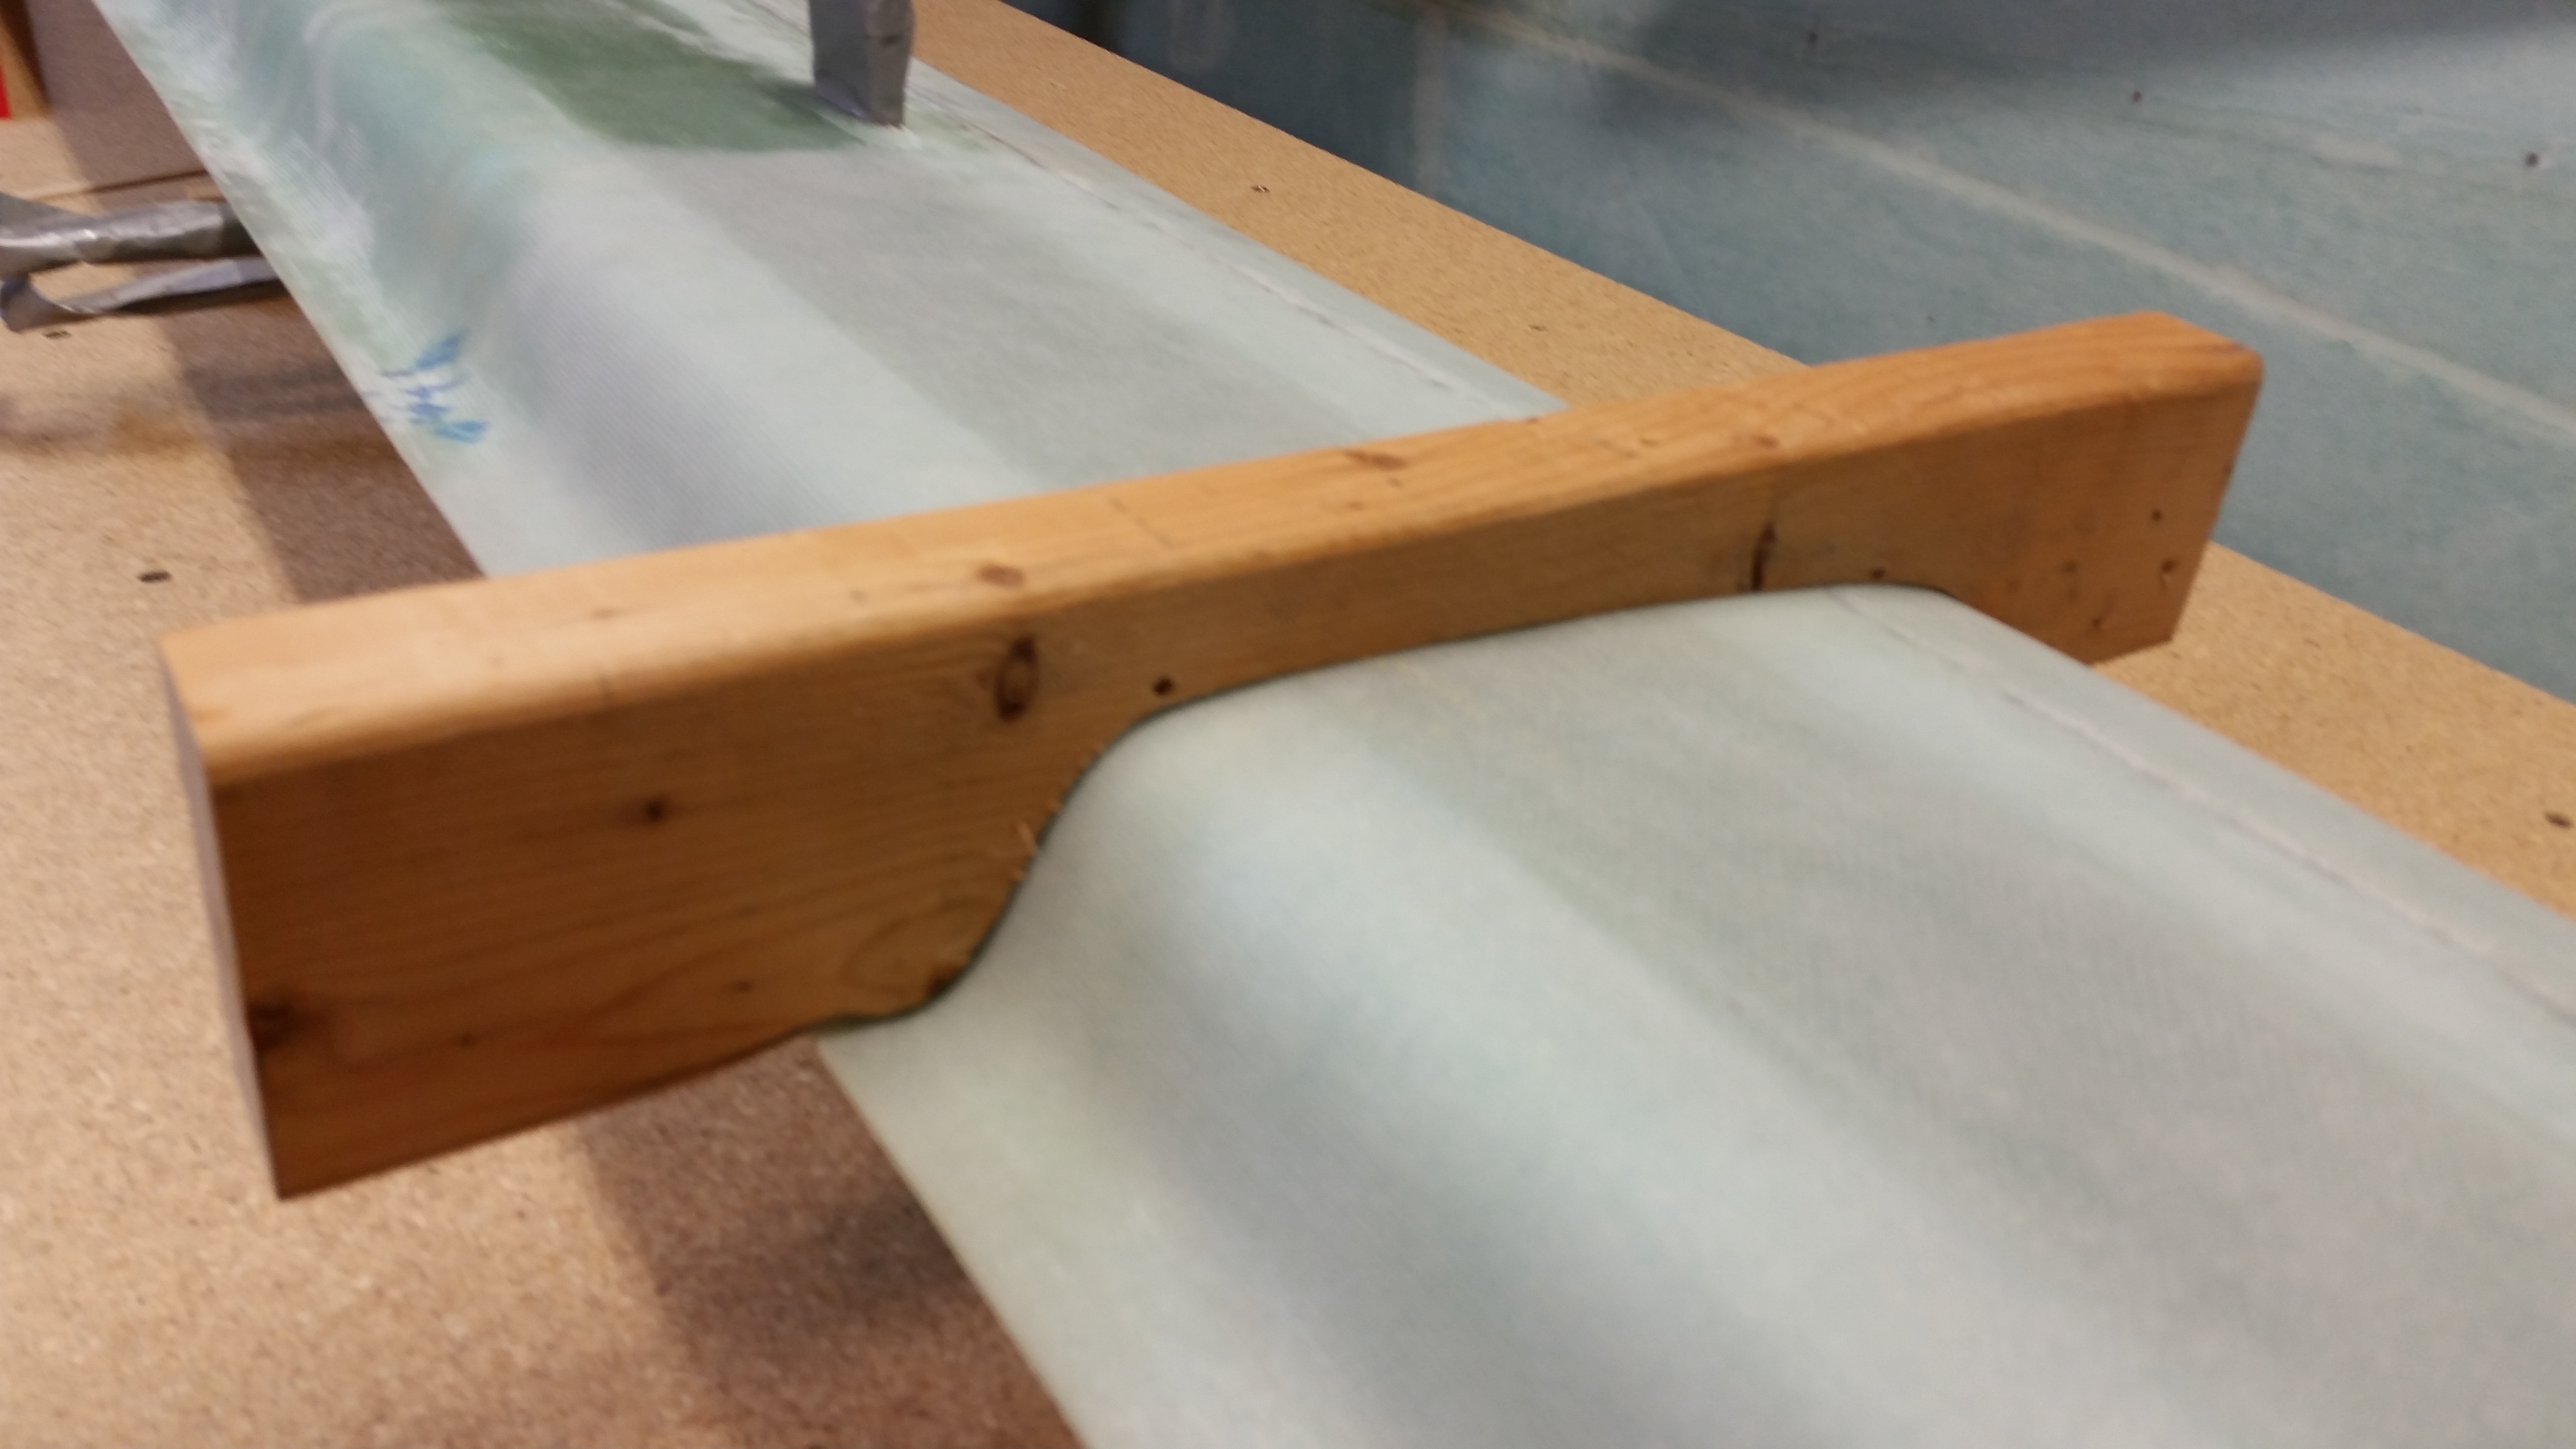
This afternoon was all about making the sanding block for finishing the underside of the canard. As I described before, this sanding block is nothing more than a 2-3/4″ thick version of the “E” contour template for the Roncz canard.
Yesterday I showed a quick pic of the results of my grabbing a 2×4 out of my scrap pile and tracing the “E” contour template on it. Once the outline was traced, I used a dull pencil to retrace the line to allow for the actual thickness of the sandpaper once attached to the contour sanding block. BTW, Wayne Hicks used wider sandpaper than I will be using, but since all my 4″ wide sandpaper is attached via velcro, and my narrower 2-3/4″ sandpaper strips are attached via peel ‘n stick, I figured I would go with the cheaper/narrower peel ‘n stick to start out. If need be, I’ll change this later on.
Again, yesterday I cut two pieces of a scrap 2×4 to length, and then ripped one of them lengthwise to get the correct width, once the two 2×4’s are joined, to match the sandpaper width.
Today I clamped the 2×4 pieces to my “new” table saw as a work bench and used my jig saw to cut the contour profile. [SIDE NOTE: A friend of mine called me up & asked me if I wanted this table saw as she was getting rid of it because sadly her dad passed away. I was wanting a cheaper table saw to use to rip the metal engine mount extrusions since I was really not comfortable doing this on my nicer table saw. I tested this table saw on these 2×4’s, and so far it works like a champ.]


Here’s the result on 2×4 piece #1:
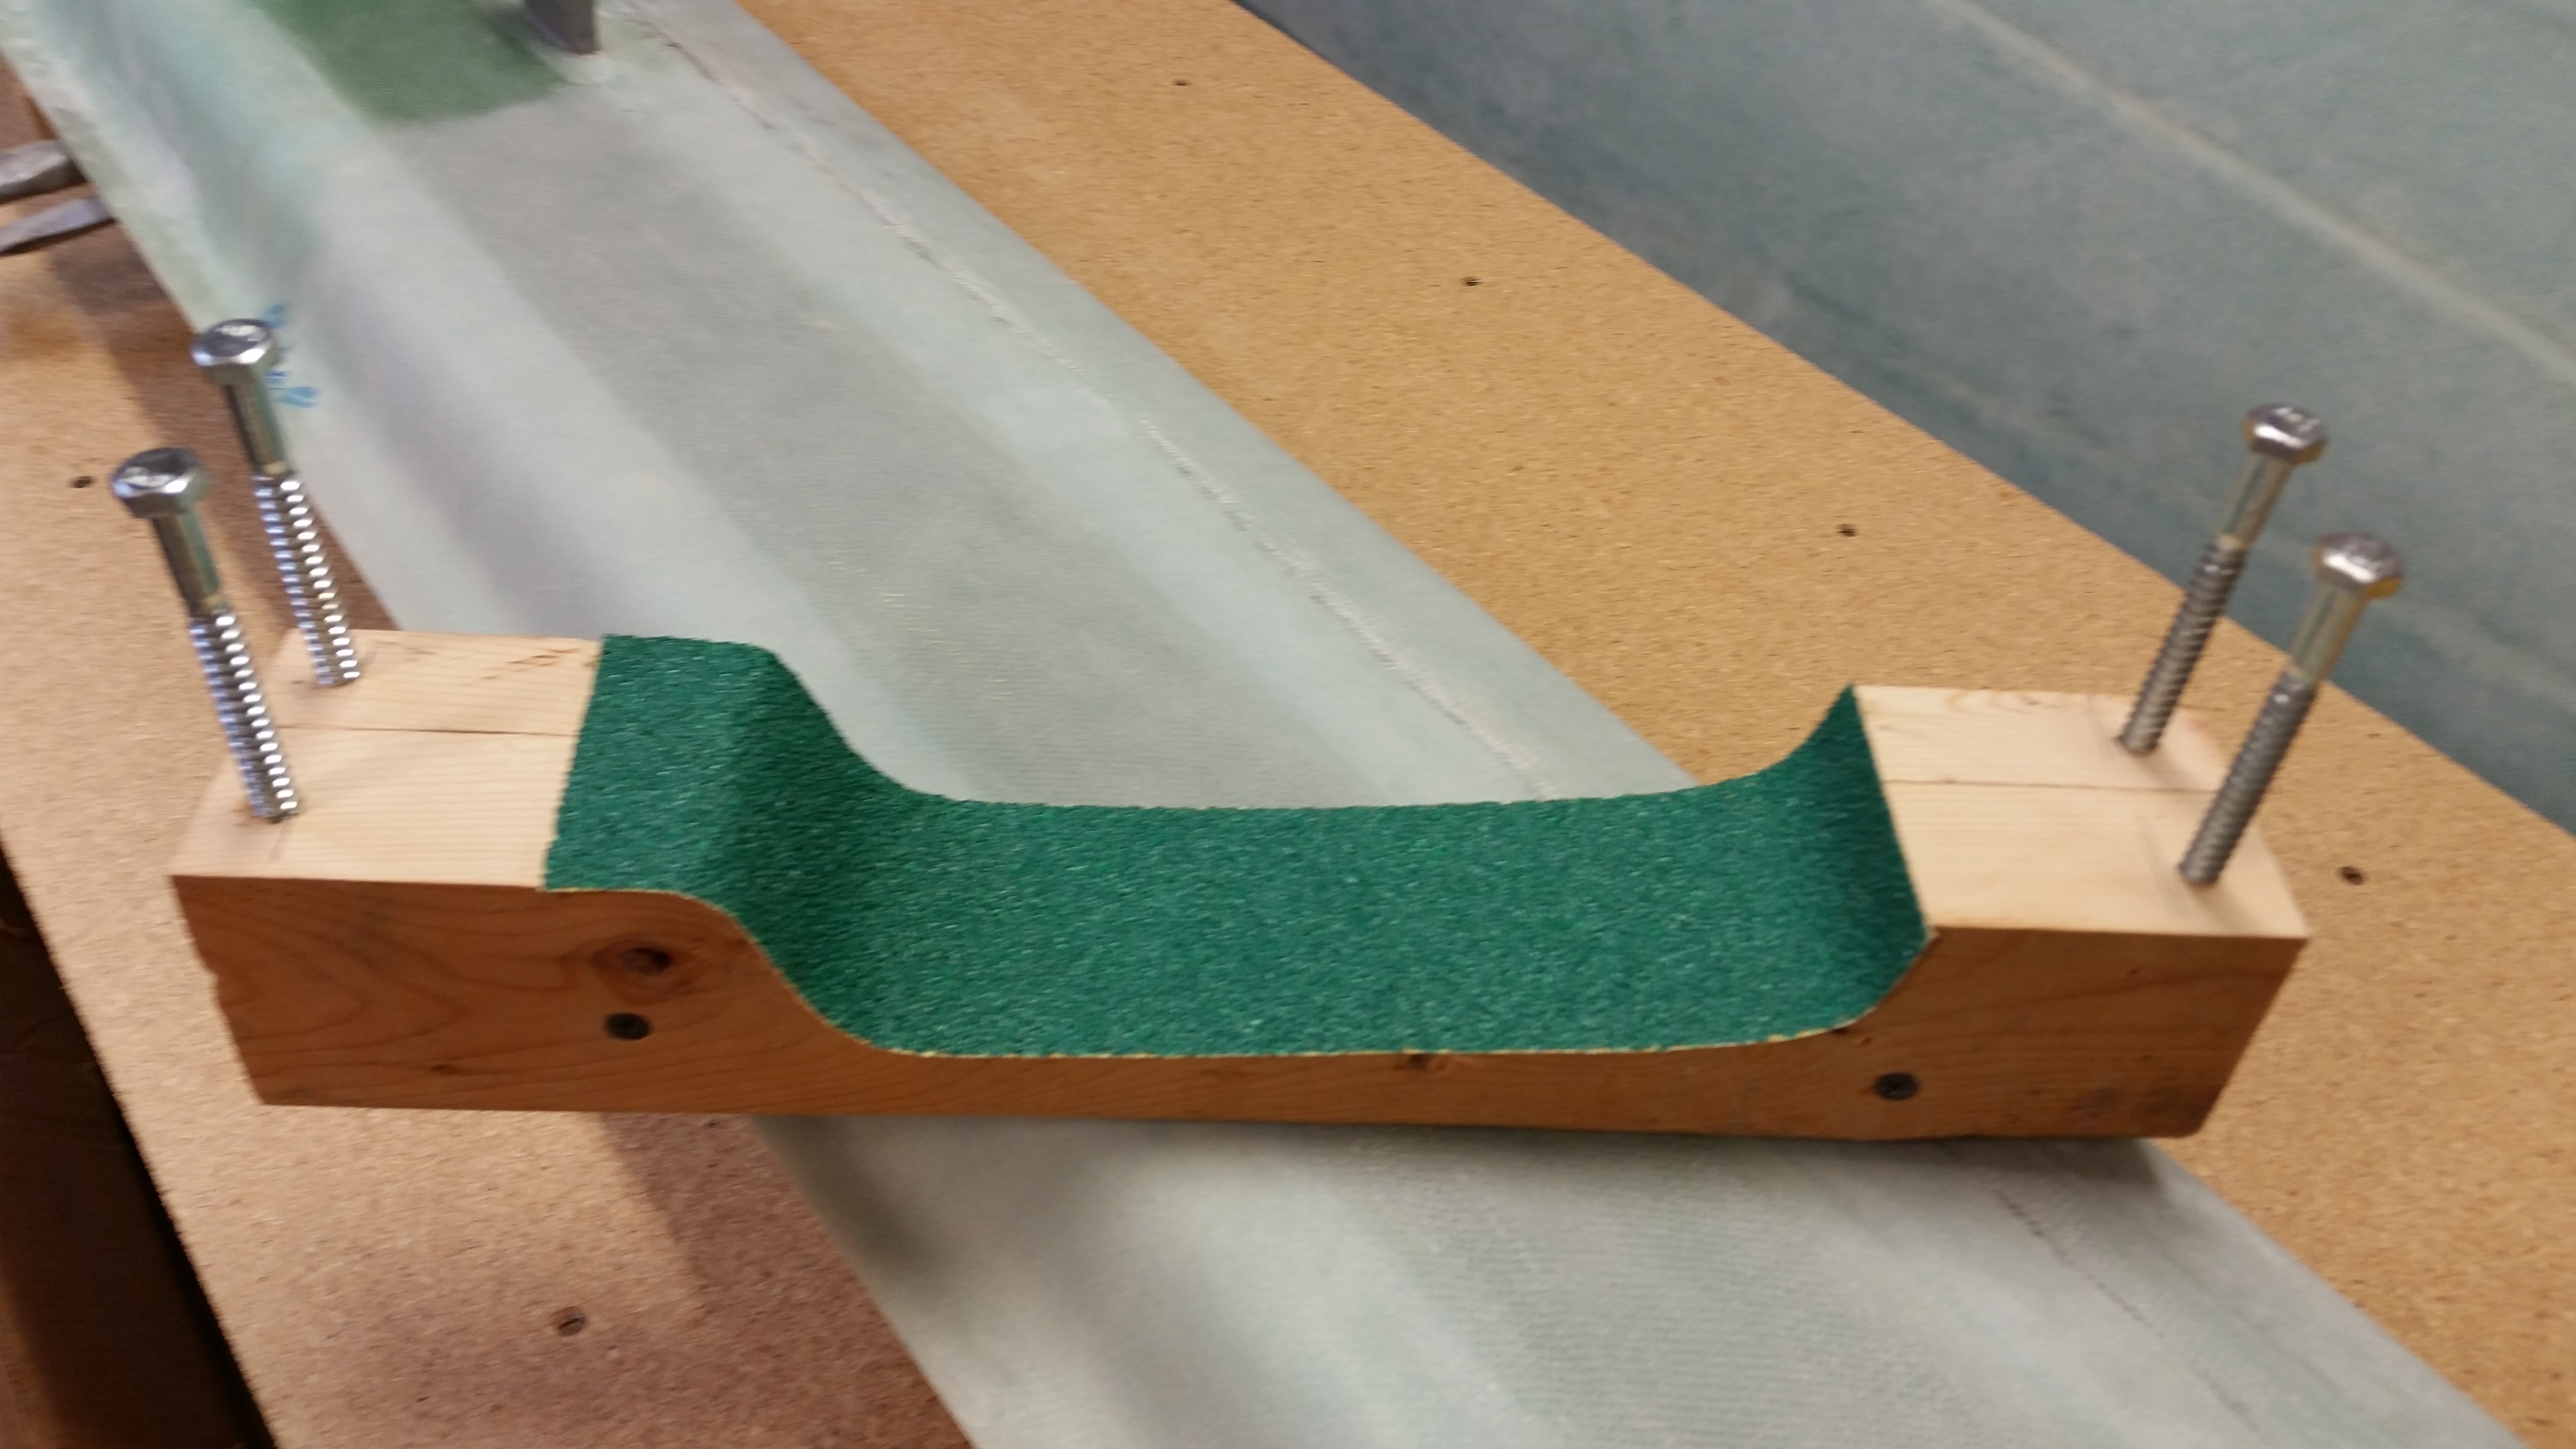
I then transferred the outline of the first (narrower) 2×4 piece to the second 2×4.

After the profile shape was cut into 2×4 #2 I then clamped the two sides and screwed them together. I then cut and attached a piece of sandpaper to the contour of the sanding block. With the shop at about 70 deg F, I noted the sandpaper was having trouble sticking to the more curvy parts of the contour. I used the heat gun to warm up the sandpaper’s adhesive backing a little, but even after that I’ve come to the conclusion that I will probably have to use 3M 77 adhesive spray to really get it to stick.
Hmm, maybe a good argument for using the velcro-backed sandpaper?

Here’s a shot of the finished product sans “legs”.

To give this project some legs (yuk, yuk), I drilled a pilot hole in each corner and screwed in a 5/16″ lag screw (I think… don’t quote me on actual size since they were merely sitting there conveniently in my tool bin). Each lag screw is 3-1/2″ long which will be good for the starting height I’ll need once the canard is mounted.
And here’s a quick shot of the finished contour profile sanding block for the underside of the Roncz canard. Tomorrow, I plan on hard mounting the canard to the table and “K” mounting blocks and then getting to work on finishing the bottom of the canard.
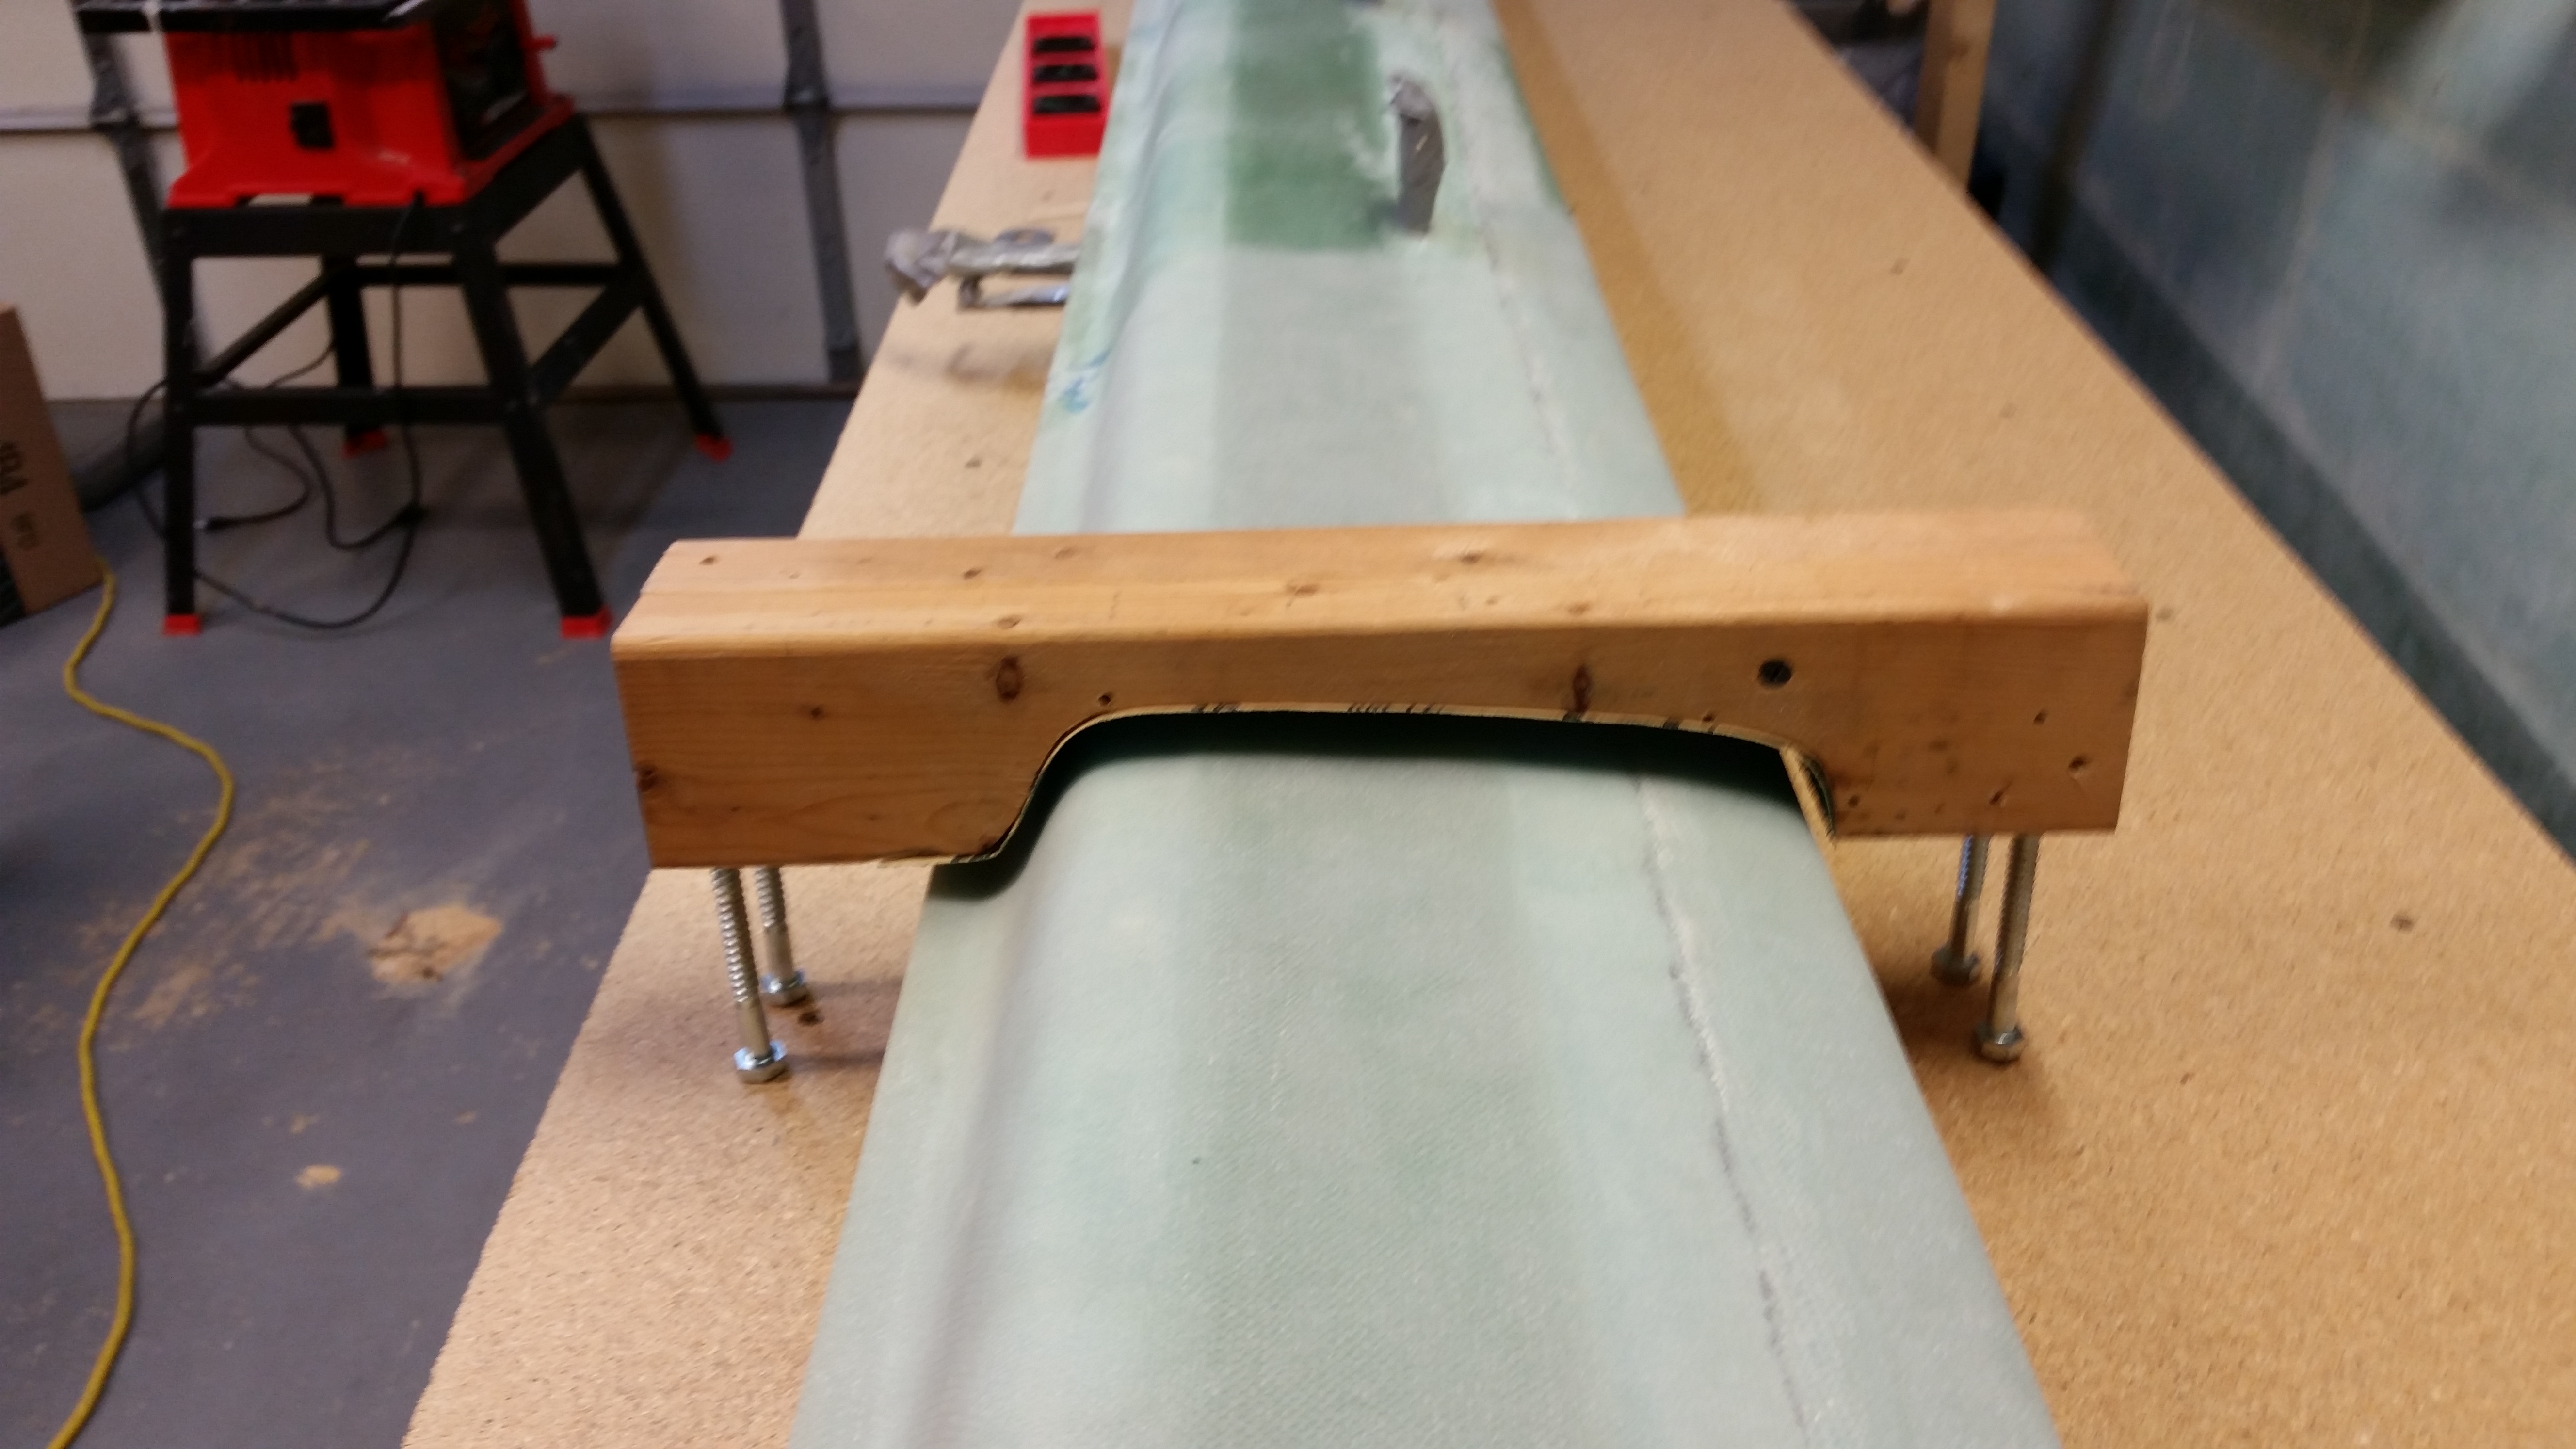
In prep for finishing the bottom of the canard, I marked the canard about 1.2″ inboard of each end to show me the point where I need to stop the micro finish on the lower canard surface. The reason for this of course is that the Roncz canard swoosh tips require 1″ of glass overlap onto the canard ensure that they’re solidly attached.

Ahhh, so tomorrow the games begin in earnest!