
Today I spent a lot of time ensuring the canard was straight and level. I used strings, I used the aluminum straight ‘board’, I used the contour checker, I used the 6 ft carpenter’s level and I used a laser level kit. I checked, leveled, shimmed, re-checked, re-leveled and re-shimmed countless times. Obviously this is my final time for ensuring the canard is straight, twist-free & level before the spar cap and especially the top skin is glassed (this warning is explicitly spelled out in the plans as well).
There was a very slight twist to the canard which I remedied through shimming. One thing that kept perplexing me, until I finally cracked the code was that the top middle of the canard dipped down a bit, but then the bottom of the canard was slightly crowned. I realized after finally working the problem with both sides together, that my canard was slightly hourglass shaped. Well, at least it was symmetrical! I took a long look at it, and concluded that a good amount of the narrowest part of the hourglass shape will be stuffed away in the middle of the fuselage. Apparently this was the shape as it came out of the hotwire cutting process. There would be some narrowing (thickness, not width) towards the Inboard canard area to contend with, but it wasn’t extreme enough to start over or panic. It looked like there will just be less micro filler towards the Outboard canard ends and just a tad thicker micro fill towards the Inboard areas.
I moved on to getting the spar cap layup knocked out. I sanded the shear web/spar cap trough. I did also sanded down and shaved a little off the Outboard 11″ canard tips to match the rest of the canard shape. I taped the edge & added plastic around the entire perimeter of the spar cap trough.
I micro’d the edges of the spar cap trough. I cut & laid up the 3″ UNI tape, and ended up using 9 pieces in the following order: 108″, 92″, 103″, 70″, 81″, 50″, 60″, 30″, 18″. I then peel plied the entire spar cap layup.
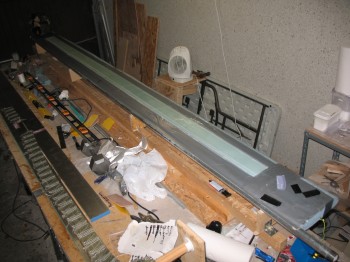 About an hour after I finished, I removed the tape & plastic from around the newly glassed spar cap.