
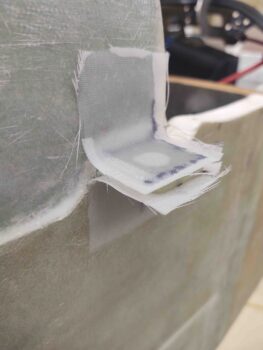
I started off first thing today by laying up glass on both the upper and lower sides of the elevator fairing securing nubs. The tops got 2 plies of glass with a ply of BID atop a ply of UNI. The bottom side got 3 plies of glass, with a ply of UNI sandwiched by a single ply of BID each side. I then peel plied the layups.
I then got to work on a serendipitous discovery I had last night… and not potentially a good one . . .
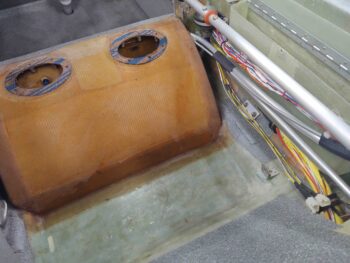
Although I failed to get a shot of it as I was in somewhat of a hurry to get out the door last night, while recovering a Korey Light that had fallen down into the back seat area through one of the control tube pass-through holes in the front seat bulkhead, I happened to notice a small pond of the water in the GIB seat pan… just aft of the GIB thigh support sump tanks.
“Uh-oh!” I thought to myself, as I wondered if I had a leak in the right sump tank… as that is where I had let the water drain from the main tank to then exit out the hole on the bottom of the sump tank –where normally a drain valve would be mounted. The only other area that could be leaking I hypothesized is the area around the 1/2″ aluminum tube between the main tank and the sump tank. So I figured I would test both the right sump tank itself, and the fuel tube that transits the fuel from the main tank to the sump tank.
However, after cleaning out the water in my GIB seat pan, and climbing in to take a look, I realized that I had at some point —that I clearly didn’t remember— taped across the sump tank drain hole on the bottom floor of the sump tank to keep out dust, debris and critters until the drain valve was installed.
Moreover, when I had pulled the drain plug on the main tank the taped hole in the sump tank was letting just enough water through that I thought it was draining as it should… but clearly it was restricting the exit flow.
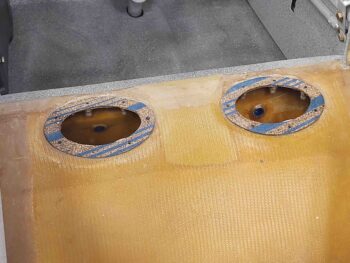
My initial test last night consisted of mimicking the previous process, so I filled the right sump tank via the main tank’s corner fuel exit drain. The only difference was I had pulled the internal tape and installed the drain valve. I also pulled the armrest off to check for any signs of leakage, and there were none. Now, I should note that in prep for eventually configuring the sump tanks post-strakes, a while back I had taken all but 3 screws out of the top access plates.
Fast forward to this morning… after a whole night of holding water in the right sump tank with no leaks, my conclusion was that the exit flow from the sump tank, having been restricted by tape, caused the the water to overflow the top access port —which was secured only by 3 loosened screws— and simply flow down into the GIB seat pan. There was zero signs of any leaks.
One thing this test also allowed me to do was drain all the water into a bucket and determine that the right sump tank holds 1.25 gal as collected, and by adding a minimal pint into the mix due to the unfilled area left forward of the access port (I expect it will hold closer to another quart) I’m calling the right sump tank fuel quantity at 1.35 gallons.
Moving on.
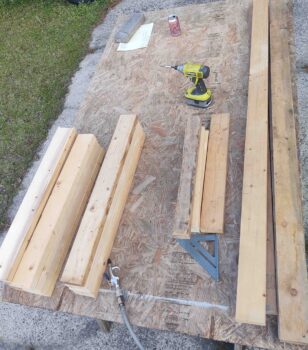
After checking my layups on the elevator fairing nubs to find that they still needed a bit more cure time, I decided to knock out the design and initial wood cutting for the fuselage dolly I’ll need to support the inverted fuselage after I flip it for shaping and skinning the bottom strakes.
I rounded up a bunch of scrap wood and cut it to length as I had annotated on my cut sheet. Step 1 of the inverted fuselage dolly complete.
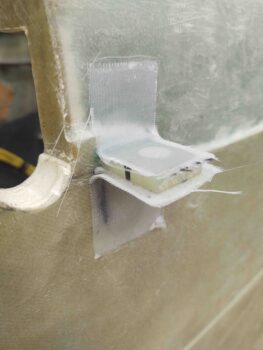
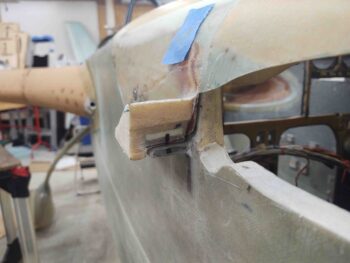
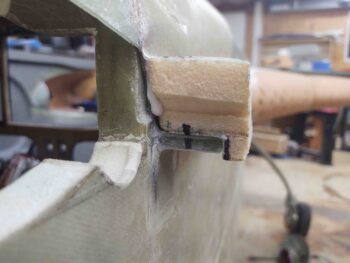
By this point the glass layups on the nubs had cured, and I proceeded to pull the peel ply, razor trim the excess, and redrill the CAMLOC stud holes.
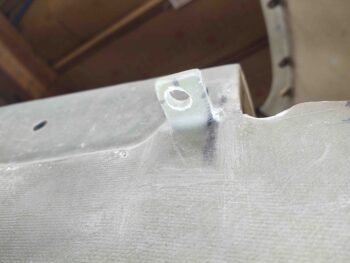

I then remounted the aft nose/avionics cover to verify the fit between the glassed nubs and the elevator fairings. I had to do a couple of iterative tweaks on the right side, but it seemed to finally settle in.
I then took all the water I had previously drained out of the right sump tank and repeated the entire test on the left sump tank. I saw no leak issues from the main tank to sump tank fuel line, and although I only had the water in the left sump tank for about an hour before I left the shop, there were no evident leaks.
I left the water in the left sump tank to sit overnight and will check for any leaks tomorrow. And as per my current usual, tomorrow I’ll continue work on both the aft nose/avionics cover elevator fairings and the instrument panel to get those knocked out pre-fuselage flip.