
I started off today by sanding the internal front edge of the outboard elevator weight pocket to allow the clearance required for the weight to move freely within the pocket.
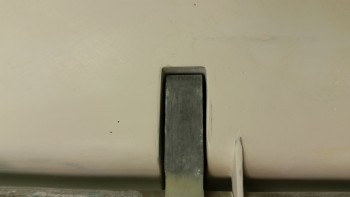
I then taped up each aft outboard elevator corner to protect it from the glazing putty I would apply to the swoosh tips to level up the TE between both sides.
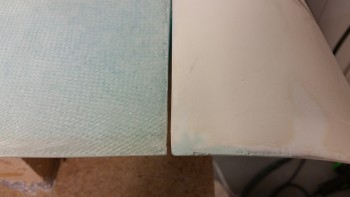
I was planning on waiting until I applied the high build primer to do any surface patching on the canard, but since I was mixing up some glazing putty anyway, I went ahead and applied it to a number of spots on the bottom side of the canard.
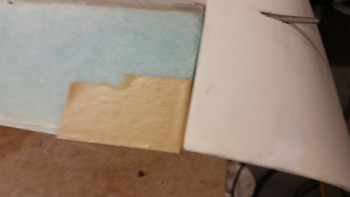
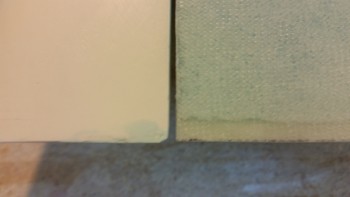
I then spent a good 2 hours sanding the bottom of the canard and finished up with the swoosh TE edges to get them to match the TE of the elevators. The putty on the TE is still a bit rough and will need another round of putty & sanding, but I’m waiting until I do the finishing of the elevators to finalize the swoosh tip TE finishing.
You may note in the pic below that I’ll have to add some micro to the right elevator swoosh tip/elevator intersection gap to even it out when I do the final finishing of the elevators & canard.
I decided to hold off on the finishing of the elevators at this time. I do strongly feel that getting the parts finished as they’re completed is a good way to go, but since I’m most likely heading back to school in early February to take the Commercial Rating ground school and flight instruction, I want to focus on getting the main gear and associated components installed as a completed milestone before I start back spending a fair amount of time flying.
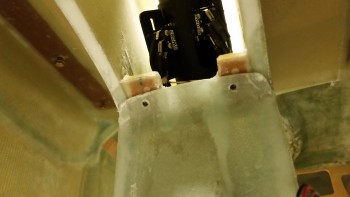
Now, I had a major brain fart when I glassed the underside of the NG30 cover nutplates. Let me explain. While working on the strut fairing I accidentally dropped a bolt & nut down into the NG30 cover. I tried to fish it out with a telescoping magnetic fetcher, but couldn’t get the stray nut & bolt out. So I put it on the list of tasks that needed to be done.
Well, I decided before moving on from the nose build that I would get that bolt out of there before I forgot about it. When I unscrewed the NG30 cover I realized when I got to the front mounting screws that I had GLASSED THE NUTPLATE ASSEMBLIES TO THE NG30 COVER! DOH!
And when I say I glass them, I’m not talking about some errant glassing. This was intentional with micro fillets and everything. Don’t ask me why… like I said, total brain fart in thinking those layups through.
Ok, anyway, after nearly half an hour of carefully razor cutting the incorrectly glassed pieces, I was then able to carefully pry the NG30 cover off the nutplate assemblies.
After all that it, it took me about 10 seconds to fish out that bolt & nut! But I guess if that hardware hadn’t fallen into the NG30 cover, it would have been quite a while before I found out about it. So, better to find it now & fix it rather than later.
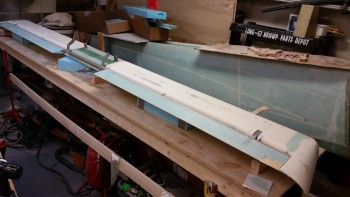
Switching gears: In prep for remounting the canard back onto the wall, I lowered the mounts a few inches to allow for the added swoosh tip ends & elevators that weren’t on the canard when I originally had it mounted up there.
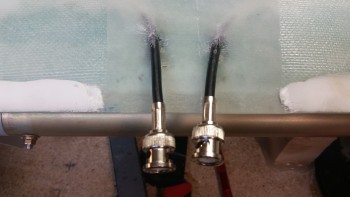
But before the canard went back up on the wall, I wanted to terminate the canard VOR/LOC & glide slope antenna cables with connectors and check the VSWR.
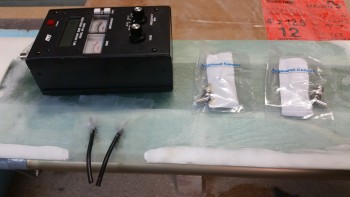
The first step in terminating the antenna connectors was to get down to the center conductor of the RG-58 cable by removing 1/8″ off the end of each cable.
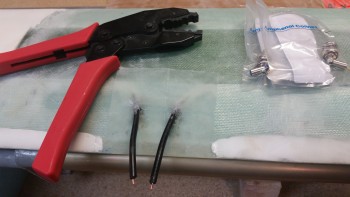
I then crimped on the center coax pins using the RCT-2 crimper (B&C) shown above.
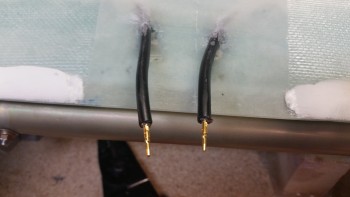
I then slipped on the ferrules.
I then stripped away another 1/2″ of the outer jacket using a coax cable stripper. This exposed the cable shield braiding.
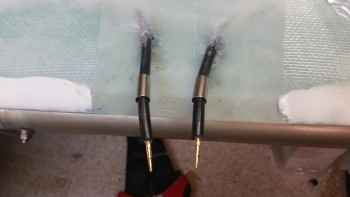
I then slid the main connectors into place, slid the ferrules forward over the braiding and then crimped the connector assemblies into place.
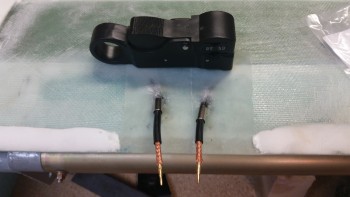
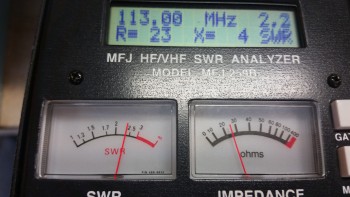
I then checked the VSWR of the VOR/LOC antenna using the MFJ-259B Antenna Analyzer, which read 2.2. A VSWR value of 3 or under is acceptable, so I’m very pleased with 2.2 VSWR value. Unfortunately, since the frequency of the glide slope antenna is in the 330 MHz range I couldn’t check the VSWR for that antenna on this meter, so I’ll test that later.
[Note: If you’re wondering what the heck VSWR is, check out Jim Weir’s article in the Dec 2013 issue of “Kitplanes”… where he explains it very well. Basically, Voltage Standing Wave Ratio (VSWR) shows how much energy that is sent to the antenna that’s off-resonance to the frequency actually returns back up the transmission line to the transmitter (radio) inhibiting efficient transmitting power usage. A theoretical VSWR of 1 would mean 100% of the radio’s power is being transmitted. A 2.2 VSWR means that on my VOR/LOC antenna I could theoretically transmit out with only 14% of the power reflected back to the transmitter (bad) while 86% of the power would get transmitted (good). A 3 VSWR means 75% of the transmitted power is good (meaning a 6 watt radio would only realize 4.5 watts out). Obviously the efficiency of your antennas directly effects the actual wattage available for transmitting. Although the VOR/LOC antenna only receives, I wanted to check its VSWR to get a general idea of the state of my embedded antenna connections, and brush up on my VSWR testing capabilities.]
With the antenna cables terminated, I then remounted the canard with attached elevators back onto the upper shop wall.
Tomorrow I’ll break down the canard work bench for some much needed space, and then reorganize & clean the shop. Once I get these preliminary tasks out of the way, I’ll try to get some of the initial steps knocked out for getting the main gear installed.