
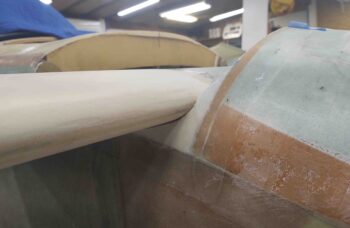
I started off today pulling the peel ply and cleaning up the layups both on the underside “nose bridge” and the fuselage corners just forward of the canard LE.
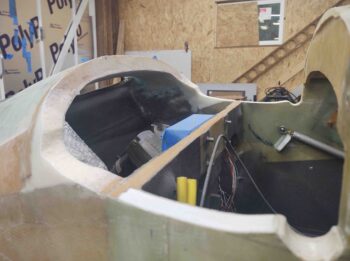

I then set the canard in place to test the fit and look of the new “fuselage corners.” I think these will work!

A shot of the whole shebang from a canard surface view.
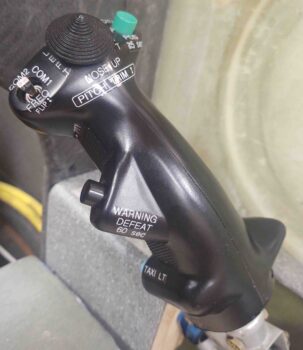
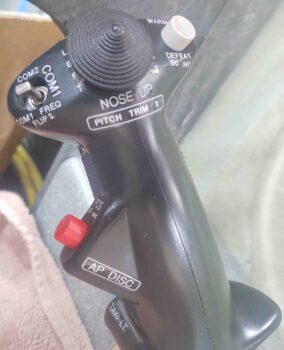
I then wondered off my assigned heading a bit with an impromptu arts and crafts project. Sometimes that wild hair just gets you, and today it was labeling the control stick. It ended up being over a 3 hour detour (whoops!).
I already had a few labels on it just to test out the label size and attachment, and with these labels on a few years (grant it, not under constant operational use) I figured I would charge ahead with the rest of the labeling. So I’m calling this labeling Round 2.

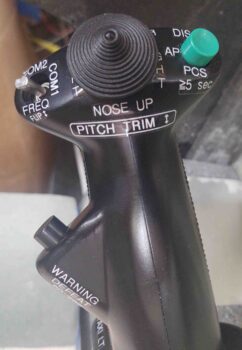
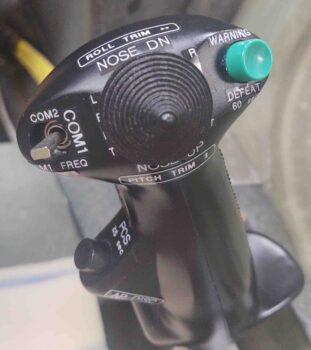
 I had two issues with the round 2 labeling, one minor, one major. The minor issue was the font size was a little too big in a lot of areas and made it look a bit gaudy to me.
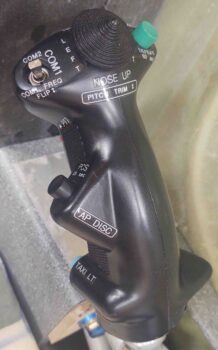
The more major, critical issue was that I sent the pics of my control stick round 2 labeling shenanigans to Marco. Critical mistake! ha (Just kiddin’….) With him being a professional pilot, I was quickly informed that airline standardization would have the autopilot disconnect on the side where my temp warning defeat button (black) was currently located. Moreover, the button should be red. This latter recommendation was on my to-do list anyway, but I really do appreciate Marco’s input, since he’s been involved with a lot of human factors training with the airlines and I want to be as safe as possible (thanks again Bro!).
Thus I tweaked my labeling yet again, primarily swapping the autopilot disconnect with the temp warning defeat button. I also took this opportunity to replace a bunch of labels with the smaller font. I really do think it helps reduce the gaudiness of the stick.
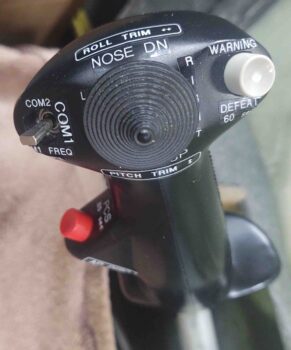
A bit later when I went back into the house, I dug around and found my Infinity Aerospace box and grabbed a red and gray button to swap out.
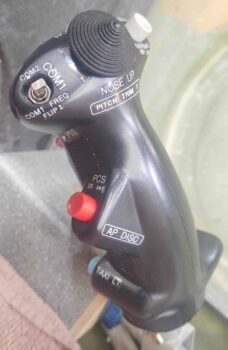
This is the final mod (so far) that I made on the control stick:
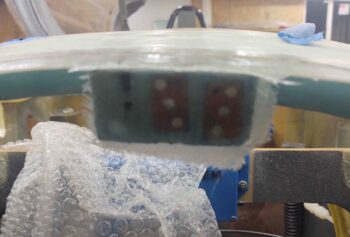
I then got back to work on the nose. I made up a test nose hatch door latch striker and mount to dial in the nose hatch door latch. I simply used Gorilla duct tape to hold it temporarily in place.
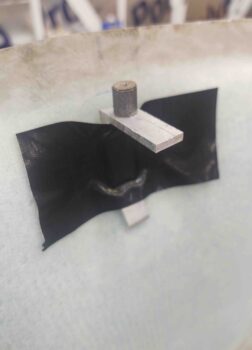
After a few iterations of finding the correct interface, height, alignment, etc. between the striker and the latch, I made up a couple phenolic nutplate assemblies with K1000-3 nutplates and floxed them into a 3/8″ piece of scrap Devinycell foam to make up the nose hatch latch mounting plate.
About an hour later I filled the nutplate threads with Saran wrap, made a 5/16″ hole in the lower right (left, looking at pic) for a flox hardpoint [for cable-securing adel clamp], and then 5-min glued (+ flox) the top edge of the mounting plate to the underside aft lip of the nose hatch.
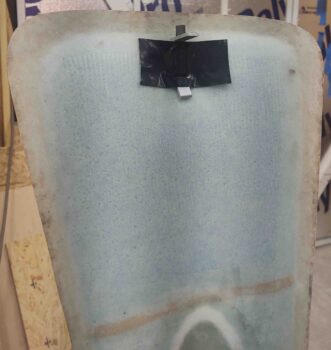
When the 5-min glue was nice and cured, I then laid up 2 plies of BID on the front face . . . (sorry for the fuzzy pic)
And 3 plies of BID on the aft face.
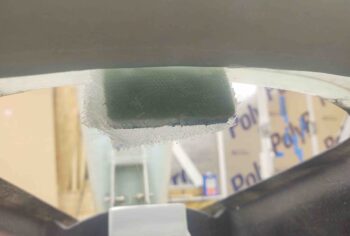
Here’s my attempt at getting a shot to show the black marks on the latch mounting plate with the nose centerline… at least the pic of the latch mounting plate is clear here.

And with that, I closed up shop to the let these layups cure overnight.
I then went in the house and spent about 20 minutes annotating the control stick switch circuit changes on my wiring diagrams.
Love that beautiful red button 😁
Thought you might! ;)