
Today was mainly about the canopy . . . and yes, I went over on my allotted airplane building time! (Oh, well . . . )
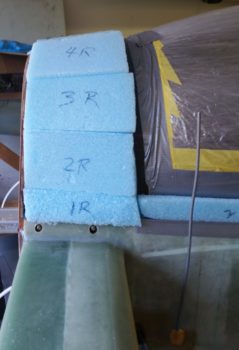
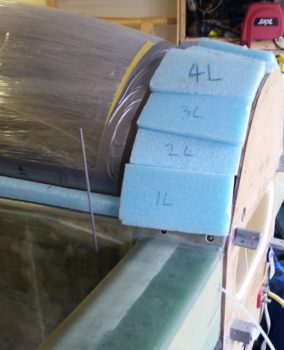
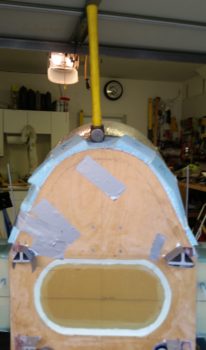
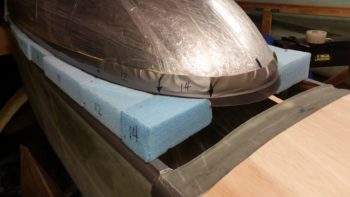
I started by spending a couple of hours cutting, shaping and sanding the blue foam blocks for the aft canopy structure, or the “turtleback” as some folks call it, while I’ve also heard it referred to the “D-Deck” as well since it looks like a capital “D” fell over on its back.
Of course there are a myriad of angles going on with each one of these blocks, but since I already have my GIB headrest installed I can’t just stuff this area full of big blocks of blue foam and then hack it down afterwards. Of course there’s nothing wrong with that way at all, and I’m sure it’s definitely easier than this method.
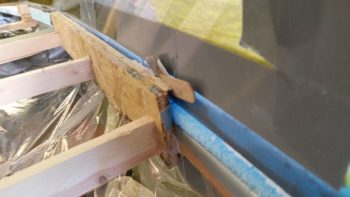
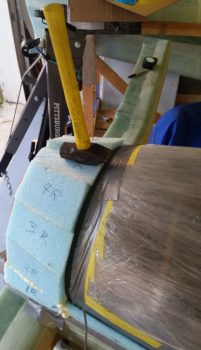
Here’s a shot from the aft end with the blue foam pieces peeking up above the perimeter edge of the firewall. To be clear, the foam at this stage has been configured, but not installed in place yet.
After I got the “turtleback’s” blue foam blocks cut and sanded to a pleasing shape (ha… had to throw that in there!), I then set them aside to tape up the GIB headrest structure a little better to protect it from any nasty stuff.
I also taped the longerons, leaving the aft ends exposed since that’s where the canopy structure that will remain on the aircraft side will get secured to. Again, obviously I’m not doing my aft canopy area as per plans, and that includes the width of the canopy side aft structure, which will be a bit wider/longer than normal, while the structure coming off the firewall will be narrower than typical. As a reminder, my aft canopy structure is patterned quite a bit after Wayne Blackler’s… although my canopy is way oversized compared to his more stock canopy size.
Since I was using spray foam in between the foam blocks, I decided to protect the aft edge of the canopy where glass will eventually get attached to. The spray foam has a significantly strong hold and I didn’t want to have to be sanding it off of the aft canopy edge.
Now, I hate to point this out, but it’s another one of those “Sins of the Past” deals in that since my fuselage is a little off-balance symmetry wise, then it makes the canopy –which is following the curvature of the longerons– stick out about an 1/8″ more on the left side and pulls the right side over just a hair as well. This IS noticeable from the aft side, especially with no engine or cowlings in place.
To mitigate this unsymmetrical dilemma as much as I could, I removed the spacer from the left side of the aft canopy spreader and pulled the canopy’s foam “frame” inboard to align the inside edge of the foam more with the inside edge of the longeron. I then slathered it a bit with Bondo.
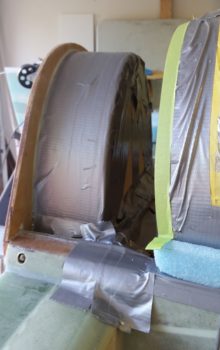
On the right side I simply tried wedging in a razor blade first, to split the glue seam and see if it did anything to get the right aft canopy to move outboard a bit. It did, so I wedged in a mixing stick, etc. to get the very aft right side canopy to move outboard about 0.1″. I included both pics since the top one shows the canopy spreader setup.
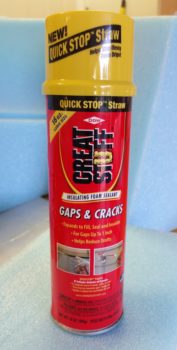
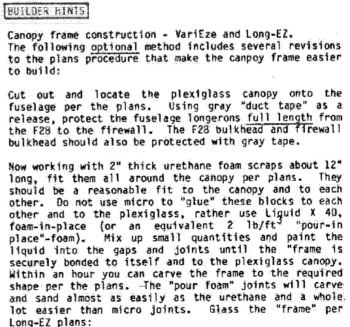
I then prepped for my craft project of assembling all the blue foam pieces between the aft canopy edge and the firewall to create a D-Deck/Turtleback, et al. I had in my notes on the canopy build a little tidbit from CP 35 (shown below), and then just recently Mike Beasley also reminded me about using “pour-in-place” foam to secure the foam pieces together. I should clarify that I used this foam just between the sides [“sides” here defined as actually top & bottom of each piece] of the foam pieces and still used micro on the aft canopy edge and around the perimeter of the firewall front face.
Here’s a screen shot of the first part of the CP 35 Builder Hint regarding using the “pour-in-place” foam.
Ahh, and then here’s the bias a lot companies have against us homebuilders! Basterds…ha!
I wanted to get this knocked out, so I used fast hardener in my epoxy. It’s HOT here so man did I have to move out to get ‘er done! But I did, and the micro was starting to get a bit gummy just as I was finishing up!
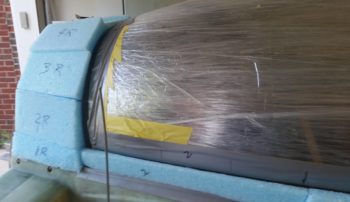
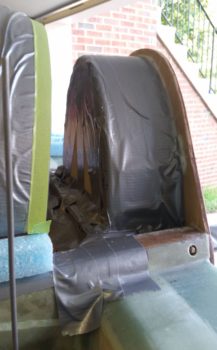
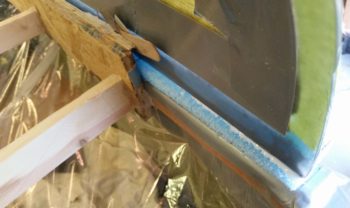
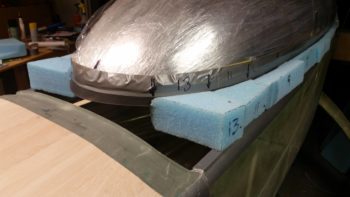
Here’s a wider angle shot of the freshly added “turtleback” blue foam along with the existing canopy foam along the right side.
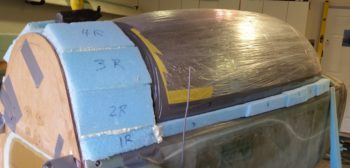
And here are shots of the freshly added blue foam to create the “turtleback” on the aft end of the canopy. I have to say that I was really impressed with that spray foam, and I think it will do well. To be clear, with the amount & type of glass that is getting laid up in this area, I have zero concerns about using this spray foam.
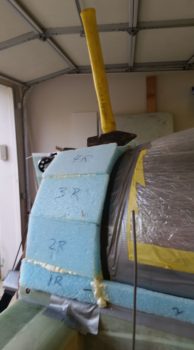
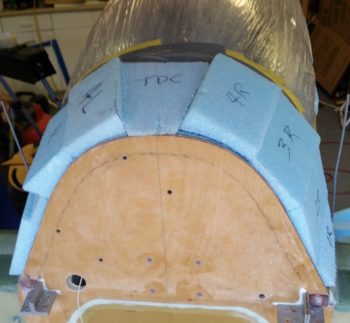
Another aft shot from the firewall.
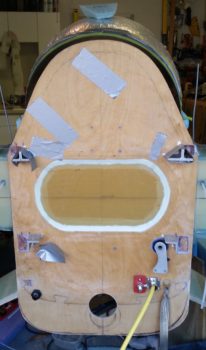
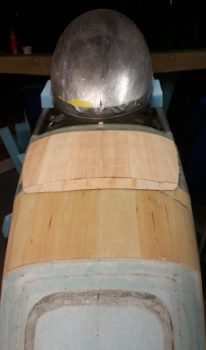
And finally a shot from above of the newly micro’d and foamed-in “D-Deck”.
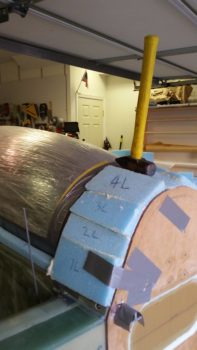
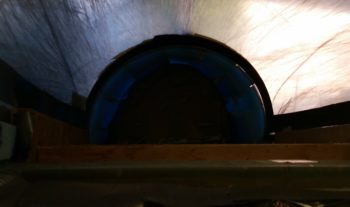
It’s a bit hard to see (at least for the camera since I could see it plain as day), but peaking from under the front of the canopy I could see the seams between the blue foam pieces were pretty solid and by using this method I will have way, way less to carve to prep the interior surfaces for glass.
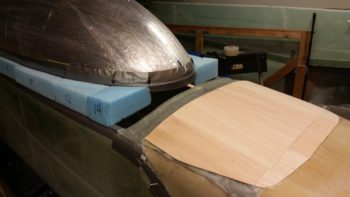
I knew that I was going to have to refigure, remark and re-tape my front canopy edge line since I added more height to the Aft Nose Cover on the back side of the cover…. using strips of 1/8″ thick Balsa wood. I was going to have to readjust this line anyway, I just wanted to double check with the new Balsa wood in place.
Since it had been well over 24 hours since I had added the Balsa wood strips, I removed the securing tape.
I then took the long sanding board and did a good amount of fairing in on the added Balsa wood.
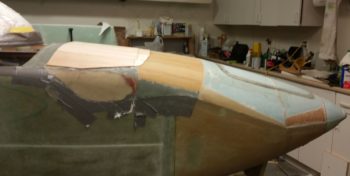
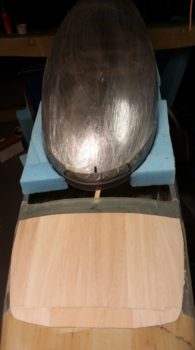
I then put a straight edge on the top of the newly added Balsa wood and marked the line on the canopy. With the angle of the nose curving up as it goes aft, it meant that I was going to have to move the line up to 0.9″ on the front canopy edge, up from 0.4″.
I pulled the tape off from around the front of the canopy and then marked the front edge of the canopy with hash marks at 0.9″ from the edge. In the pic below you can actually see the strip of unsanded canopy above the original sanded strip. After I re-taped the canopy edge I of course re-sanded the entire edge using 220 grit sandpaper.
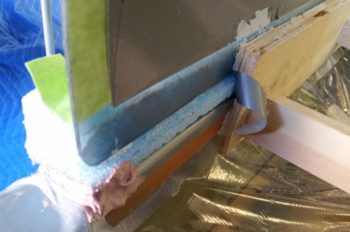
I then spent almost 2 more hours getting 2 foam block pieces shaped and micro’d in place on each forward side of the canopy.
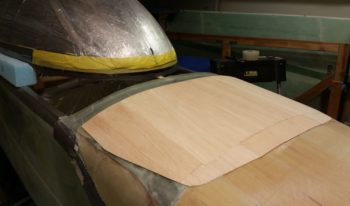
Here we have a wider angle shot showing the newly added foam pieces at the front of the canopy and the newly added 1/8″ thick Balsa wood plate on the Aft Nose Cover.
And a head on view of above.
I will reiterate that I do plan on getting a good bit of the canopy completed… at least to the point it’s strong enough to travel down to North Carolina on the back of the trailer when I haul the fuselage down there at the end of July. However, I will make it a priority to start working on the house more since I got such a big chunk of the canopy (and Aft nose cover) both figured out to a more granular level and nearly completed.
Again, being a bit of a geek, my total calculated completion of foam on the canopy frame is at 91%. But of course we all know that last 10% –the canopy/nose cover interface– will take a fair bit of time and effort to dial in!