
Today I started out by getting some epoxy/layup work done out of the gate so it would cure as I did a bit of machining.
First up is what will be a glass tab, or catch if you will, that will simply be a semicircular “C” shape on the underside of the nose hatch door with the opening facing aft. It will snap into place on a simple 1/2″ diameter 6061 crossbar bolted in between the tips of each hinge. Add an aircraft locking pin between an added underside flange on the nose door and each hinge to make it so that the nose hatch door will be removable… to make the remainder of the build easier and for when a lot of work needs to be done in the nose hatch area and the door is simply getting in the way.
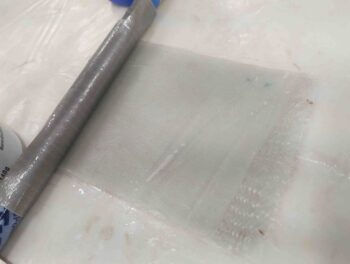
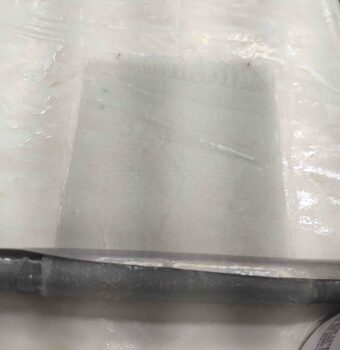
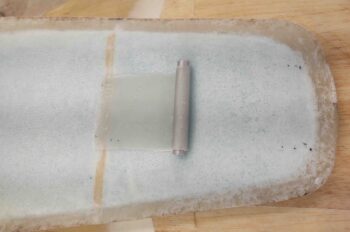
I used a different 1/2″ tube than the one I was machining on the lathe as the mold, and simply laid up about a 4×4 inch ply of BID, a middle ply of UNI, and another ply of BID with peel ply on both sides. I then wrapped one end around the 1/2″ tube and duct taped it into place. I then had to set a couple of objects on each side to keep it from unrolling.
The cured layup is at the end of this post.
I then used the small bit of epoxy left over from the layup above to whip up some micro to fill in some holes, divots, scratches, etc. on the front lip. I would normally use my Metal Glaze filling compound for these small filing jobs, works much better, but I found that my hardener for that is toast… will have to order some more. So I tried some micro for the minor fills I’m doing here.
I then left both of my epoxy-tasks to cure…
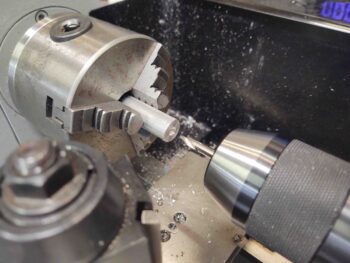
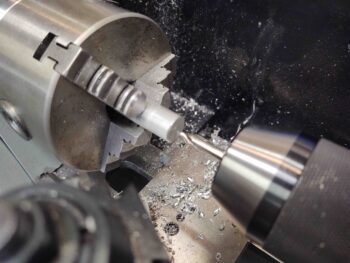
And rounded up a spare 1/2″ 6061 rod. I was thinking about re-using my 1/2″ elevator control tube with the aluminum Heim end-caps at the end for my bolted-in hinge crossbar, but with the design of my hinge door tab it will wrap around the bar and thus rivets are out since they would require the tab to be much narrower to avoid the rivets on each end. If I simply drilled a hole all the way through this less-than-3″-wide solid bar it would be very reasonably close in weight.
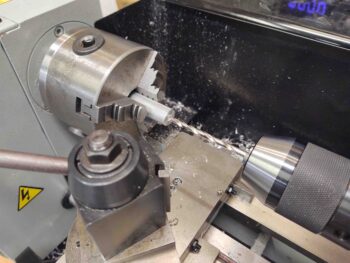
I started by facing (cleaning up) one end with a very slight bevel on the edge to “break the edge” and avoid any more cut fingers (I have a healing nice big gash on my thumb from a machined edge that I grabbed hold of . . .). I center drilled the end to then use a #21 drill bit to drill over 1-1/2″ down the center of the rod.
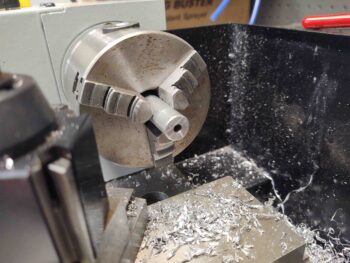
From there I simply threaded the drilled hole out with a 10-28 tap. Voila! Side 1 complete.
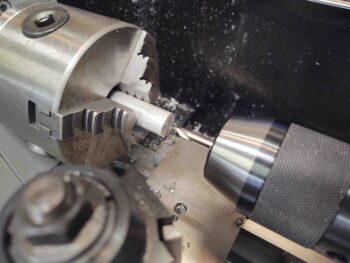
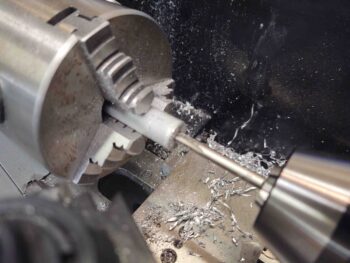
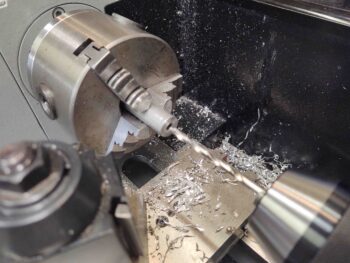
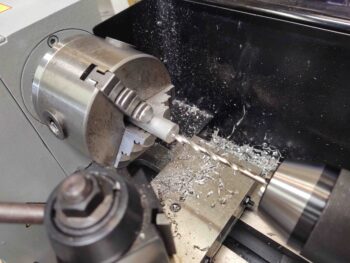
The hinge crossbar needs to be 2.9″ long, so I cut the rod at 2.95″ on my horizontal bandsaw.
I chucked it up with the unfinished end facing out (of course) and did the same thing as before: facing (although with the lighting [lesson learned] I noted at the very end that I hadn’t faced it all the way and had to redo it), bevel, center drill, #21 drilling (end-to-end), and 10-28 thread tapping.
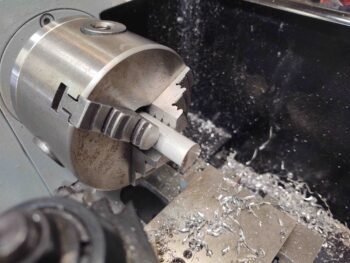
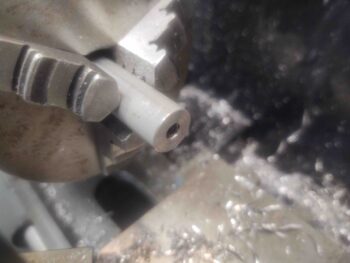
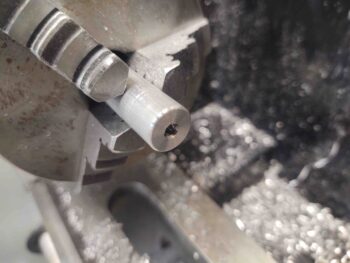
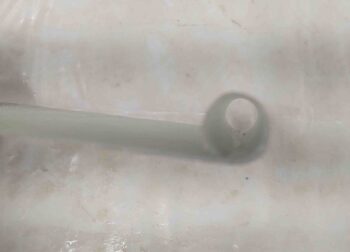
Here’s a closer look at one of the finished ends.
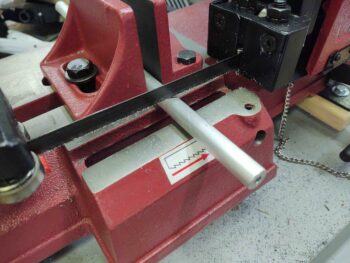
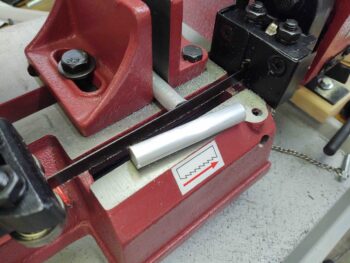
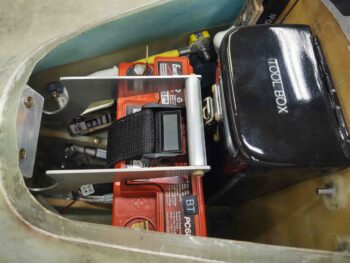
I then grabbed a couple of short 10-28 bolts off the workbench and installed the freshly made crossbar. Fits a treat!
Another shot, showing clearance with the tool box. It just barely touches the tool box latch, but then again it won’t sit this low when mounted to the the underside of the nose hatch door. It will be a couple of inches higher (towards the camera) and completely clear of the tool box latch.
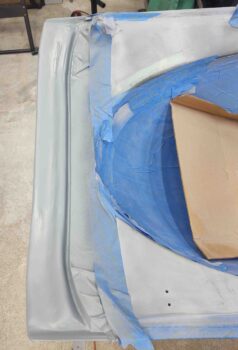
In the meantime I had taken the canopy outside in front of the shop and hit the front lip with a few good coats of darker gray paint + primer. I will sand this down and do some final tweaks (yep, really missing my Metal Glaze!) before a couple coats of final paint. I’m not looking for perfect here, but there are a few glaring areas I want gone. Compared to how this thing looked just a few short weeks ago, it’s a vast improvement.
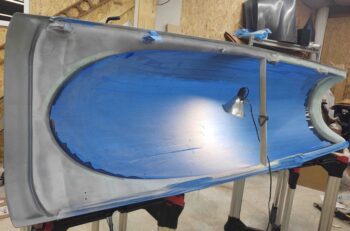
I then spent a few hours doing the final trimming and cleaning up of the glass edge around the interior perimeter of the canopy. The amount of small pieces of yellow painters tape was surprising… I had missed a fair bit on my initial cleanup. But being this is the last cleanup session before final interior paint, I was much more thorough this time around.
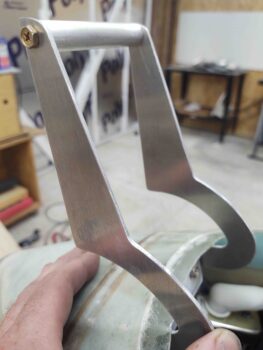
I then removed the 1/2″ tube and the peel ply from my nose hinge/nose door mounting tab. The diameter is a hair larger than I want (from the tape on the tube) so when I open it up into a “C” shape I’ll need to add a few plies of glass to the inside diameter.
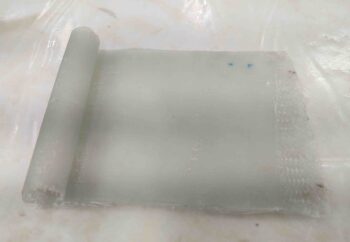
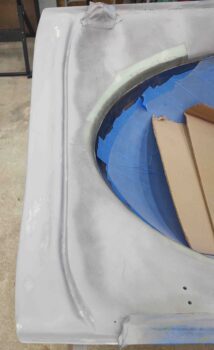
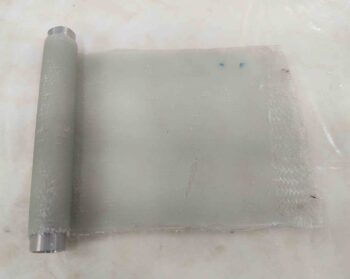
I slid yet another spare 1/2″ tube in place so you can see somewhat how it will look when installed. The first pic as if looking through the top nose hatch door. The second pic from inside the nose hatch door.
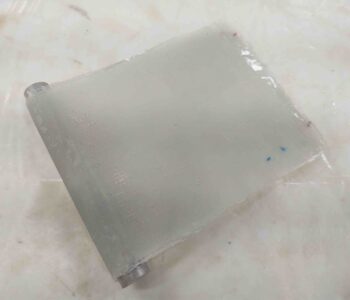
If you’re wondering about the long flat part of my strange contraption here, it is simply to provide an aft side mounting flange to this tab, and a bit of rigidity. Since the underside of the door is curved, I’ll have to fill-in under the circular tab a little bit with micro/flox when it gets installed. I’ll also trim the flat part into more of a rounded “V” or “U” shape to fit in the underside door curve better. After a decent-sized fillet on the front intersecting area with the door (right side in pic), more BID will be added going forward. Each end (top & bottom in pic) will also intersect with the respective vertical flanges that will be installed forward of this tab to interface/mount to each of the hinges.
Tomorrow will be a short build day since I have a buddy of mine, that I haven’t seen in over a year, coming to town. So dinner, libations and war stories will be the planned events for early evening on. I will try to get the canopy edges at least cleaned with the ScratchOff kit I got from VANs Aircraft. It that goes smoothly and quickly, then I may actually get the interior canopy frame painted.