
Within hours of discussing canopy scratch removal via email with my buddy Dave Berenholtz I watched a Long-EZ video on YouTube that lo and behold, along the edge of the canopy and frame junction were those rascally scratches that we were talking about. Now, if we hadn’t just been discussing them these scratches would have still been noticeable, but not what I would have been focusing on regarding the video content.
Moreover, after having just finished my diatribe in my project update of NOT seeking cosmetic perfection over build efficiency, here my first post out of the gate is about seeking cosmetics over an actual flying or safety-related requirement. In fact, this post is ALL about cosmetics… ha!
The bottom line is this is one of those things where the scratches along the edge of the canopy are just too plain ugly for me to live with. So, for me, I need to do what I can to best remove them.
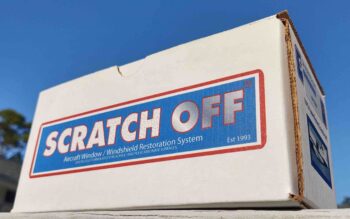
And after some research and the very often helpful input from our RV-building brothers on the VAF site, I pulled the trigger on a Scratch Off kit from VANs. I’ll point out that besides the overwhelmingly positive reviews and testaments I saw online, on the side of the box they highlight that this product is used by NASA…. not too shabby.
With that knowledge in hand, I invoked Tony Stark’s line in Iron Man, “sometimes you have to run before you can crawl” (or something like that!). I chose the most inconspicuous spot for viewing for either me (pilot) or GIB to test a scratch to remove. Clearly this would show if the canopy were open at a fly-in if the test were a fail, but I figured I needed to press forward.
In the instructions for the Scratch Off kit it notes that they do not necessarily recommend the use of wet sanding, but that their kit picks up where 600 grit sandpaper leaves off. In other words, if you have deeper scratches then some sanding will be required to remove them. They recommend 600 grit, but I only had 500 or 800 grit (and higher) on hand, so 800 it was.
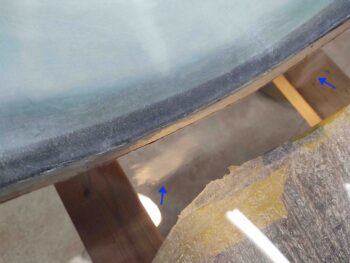
I first tried just using the Scratch Off kit for two distinct scratches on the upper aft edge of the canopy. Grant it, I was only using it by hand and the kit is made to be used with a powered hand drill. After using the most abrasive solution and pad included in the kit with no removal of the scratches, I resorted to using 800 grit wet sanding of the scratches (blue arrows).
If this isn’t a test of faith, then I don’t know what is!
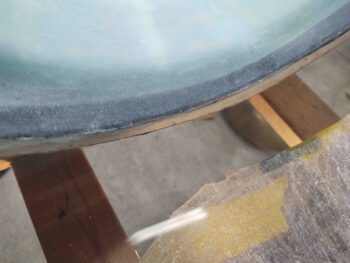
Again, by hand, I proceeded to use the most abrasive solution and pad included in the kit and was able to nearly completely buff out the scratches I had made in removing the deeper scratches. Satisfied, with this test, I pressed onward . . .
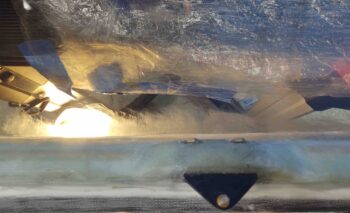
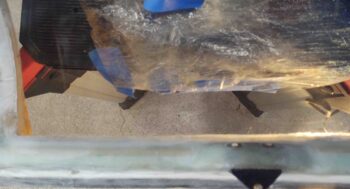
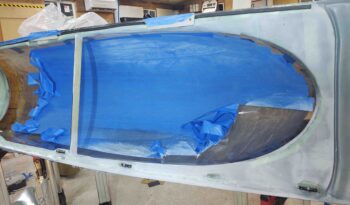
… to this area. Probably the worst area on my canopy for scratches. It’s located on the left side just forward of the aft corner. Moreover, I decided to simply use an entire wet sanding protocol starting with 800 grit, then moving upward in finer papers to 1000, 1200, 1500 and then 2000 before then using the Scratch Off kit.
Yep, this looks pretty ugly after all the wet sanding was complete (gulp!).
But even just after the first round (I still have the finer solution and pad to use) the wet sanding marks were removed. The myriad of finer scratches are gone, while the deepest scratches are still visible, but greatly minimized in depth and severity.
I should note here that I’m doing this scratch removal on the interior canopy now since I’m prepping the interior canopy frame for painting. I really don’t want to paint the canopy frame (either interior or exterior) to then subject the painted edge to a spinning foam applicator AFTERWARDS and risk damaging the paint. Thus, in my mind it’s either now or never for removing scratches along the edge of the canopy.
With that said, some of the scratches you may see in these pictures are actually on the exterior canopy surface. I’ll do what I can to remove/mitigate those scratches on the exterior canopy surface later, prior to painting the exterior canopy frame.
Again, my buddy Greg and his wife Marie were in the area and stopped by for a visit. I was just finishing up buffing out the edge scratches on the forward half of the left hand side of the canopy when they showed up. In all, I was able to get over 2 hours in on the canopy, finishing the majority of the back edge and the left side almost up to the front center point.
I will highlight that as per usual in these types of endeavors, that after working the aft left side my confidence grew immensely in using the wet sanding protocol followed by cleaning up the sanding scratches/marks with the Scratch Off kit. I highlight this because it’s a bit difficult to figure out what side the scratches are on for every scratch. The deeper scratches you can feel with your fingernail, but the lighter ones, although visible, aren’t quite as easy to ascertain what side they’re on.
So on the forward (pilot) edge of the left side I simply wet-sanded nearly the entire edge to clear away as many scratches as possible before getting the first of the four Scratch Off kit steps completed before my friends arrived.
My goal tomorrow will be to knock out the scratch removal on the interior edge for the remainder (right side) of the canopy. I will then prep the interior canopy frame and paint it.