
A major pitfall of a long airplane build is simply keeping track of all the massive amounts of data swirling around for each step of the build. It’s easy to say that we’ll verify each and every piece of information, but the truth of the matter is stuff falls through the cracks…. or I should quantify all this with the statement that it definitely does so for me at times.
Thus, my assumptions that past Wade had done right by present Wade may have been a bit optimistic in the case of the pair of rocker switches on my panel. I had a rocker switch already targeted for my RAM air open/close switch, but a wiring configuration change quite a while ago ended up making that one obsolete.
Moreover, its twin was to be used to control the oil cooler louver actuator to allow for oil temp to be controlled remotely (and accurately via the EFIS display) from the pilot’s seat. Well that design never came to full fruition, so rocker switch number 2 was also dead in the water before it ever made it to the panel.
Well, it was then probably serendipitous that if any part of the panel plasma cutout was to be kluged, it would be these rocker switch cutouts… because after a good hour+ of research I was able to find a pair of rocker switches that met the wiring & operational use requirements, while only being just a scant tad off from the original panel hole size for mounting. So I pulled the trigger on those . . .
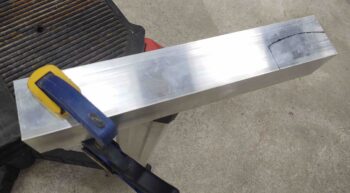
Out in the shop I grabbed a piece of angle 6061 aluminum and got to work on the new nose hatch hinge bracket… clamping it down for cutting.
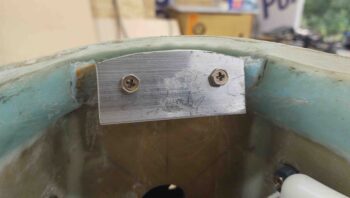
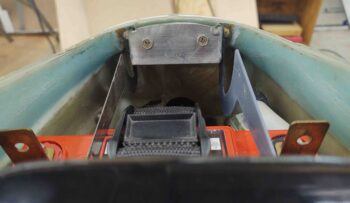
Here we have the new nose hatch hinge bracket after cutting it out of the angled aluminum extrusion. As you can see I transferred the bolt mounting hole positions from the old bracket to the new one and bolted the new one into place.
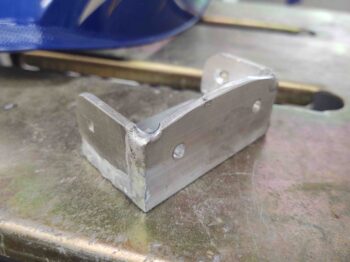
I then got to work on the sides. Here we have the left side wall of the nose hatch hinge bracket shaped, drilled and ready to be welded into place.

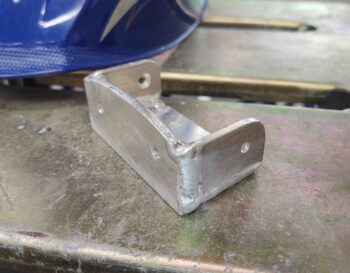
Welding 1/8″ sides to the same 1/8″ thick bracket front wall and bottom went much smoother this time around. These pics are of the welded bracket without any clean-up of the welds.
Again: much, much better than the initial bracket (I will do some clean-up on the welds, but nice not to have to test fit it!).
I then bolted the freshly welded nose hatch hinge bracket into place, with a couple of test hinges attached.
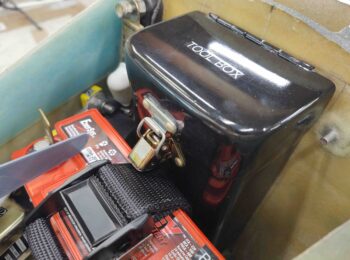
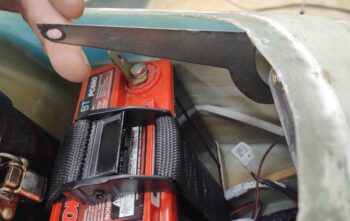
I thought I’d post a better shot of the trimmed tool box latch handle… I even turned the battery securing belt around to see if it made any difference in clearance, which it didn’t.
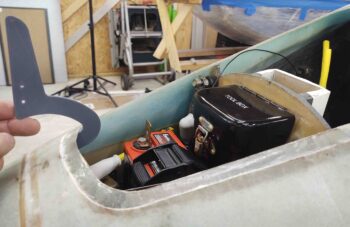
With the hinges mounted much further forward (as per Mike Toomey’s recommendation), you can see that the last test hinge that I cut doesn’t even clear the hatch’s front lip.
One of the original 3D-printed test hinges now looks much better in its hinge geometry, although the alignment with the door bottom surface is still off.
I collected notes on some tweaks I needed to make for the final (hopefully) hinge configurations and updated my Fusion 360 CAD drawing. Fusion 360 (Autodesk) has changed its free CAD software version so when I went to cut out the final hinges on the plasma cutting table I got an error. When I looked up the error on the Langmuir Systems plasma cutting forum I saw that a number of Fusion 360 users are getting the same error… so I, like thousands of hobbyists around the world, have some decisions to make [btw, Marco and I discussed this issue a fair bit last week… I didn’t realize it would effect my plasma cutting table ops].
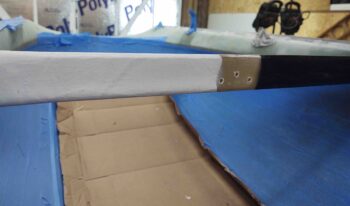
Of course I have a ton of other tasks to work on, so I taped up the canopy and painted the cross support bar white on the right side and black on the left, just on the aft side facing the GIB/passenger. These colors will be used as background colors for “NO HOLD” and “WATCH FINGERS” warnings on the cross bar. The fingers warning on the side where the canopy strut scissors up and down.

As the paint was drying I realized I had a number of pin holes on the surface. And since I was mixing up some micro to apply to the canopy front lip . . .
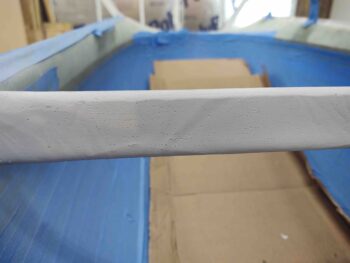
I went ahead and slathered some on both the white and black painted surfaces of the canopy crossbar. I’ll hit both colors with another coat or two tomorrow.
I then called it a night.