
Today I got 2 really big tasks knocked out in my quest to get the bottom of the plane finished to allow me to flip it back upright.
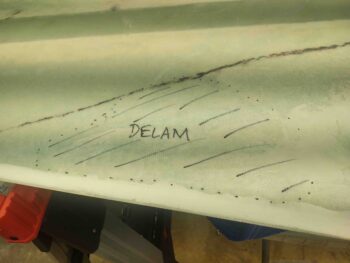
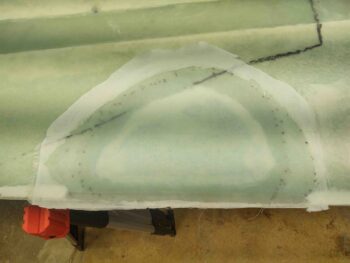
First was a delam on the outboard bottom trailing edge area of the right wing that I discovered when I pulled the wings out to cut the aileron pockets. I have been pondering on exactly how to fix it, but since I have not dealt with a delam this big before I knew I would need to dig into the plans to help guide me on the how-to.
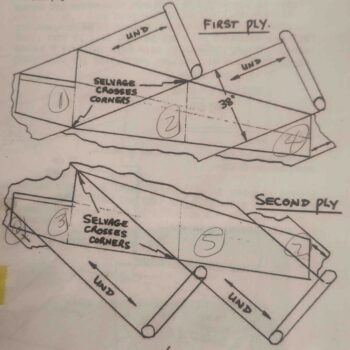
And I’m glad I did. I discovered that any delam larger than a couple of inches in diameter need much more of repair than just shooting raw epoxy under it and weighing it down. According to plans Chapter 3 the glass needs to be removed, the edges feathered back, and new glass laid up in the same bias as the original glass, with an overlapping ply of BID.

Yes, I had to then go to Chapter 19 to double check the direction that the plies of UNI were laid up on the wing. About 30° each ply as per below.
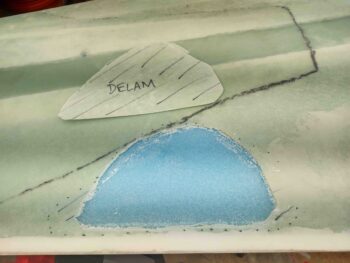
I then ID’d the edges of my delam as best possible, and marked the offending area for removal.
Then I grabbed my trusty Fein saw, took a deep breath, and then cut a large chunk out of my wing skin.
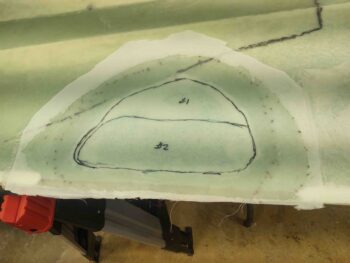
I then laid up the 1st and 2nd ply of UNI in the approximate orientation as the Chapter 19 diagrams shows, overlapping out onto the feathered glass a minimum of an inch (yes, the plans show 2″… I made a call here). I then covered the UNI plies with a ply of BID that went out beyond the UNI a minimum of a half inch.
Planned anyway. My BID went a little wide, and not so tall, but it stilled covered the UNI and all looked good.
I then peel plied the layup.
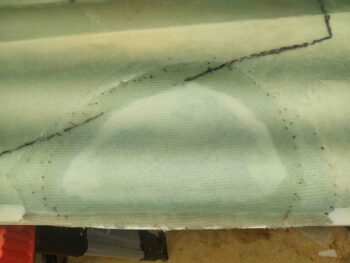
Late in the evening, with the layup fairly cured, I then marked up the peel ply with subsequent plies of BID required to help back fill this large divot I had just created on my wing.
You see, it doesn’t seem like removing the top layer of 2 plies of UNI should make that much of crater in the wing, but when it takes all the interfacing top surface of foam that is secured to the underside of the skin with micro, that’s a good 1/8″ of material gone. I suspect I’ll need even maybe another round or two more plies of glass to fill in this area.
Huge task #2 was getting my nose gear doors working so that when they open up as the gear is lowered, both doors are vertical and parallel to each other. In their current state for the past 5+ years, this has not been the case.
A serendipitous discussion with my Long-EZ building buddy Brian Ashton, and a few pics and measurements he texted me, was just the trick I needed to fix this long-nagging issue. I explain what I did and discuss it in a video I made here:
With these tasks out of the way, I’m getting much closer to sanding and micro-finishing the bottom surface of the bird in prep for paint and flipping it back upright to continue on with my topside build tasks.