
That’s what I’m calling the interior style of my plane . . . ha!
I had originally planned to take my vehicle in for an oil change and to get inspected at a place in Greenville on the way down from DC last weekend. However, with road construction delays I had to cancel my appointment and reschedule for today.
The weather temperature high today was only 58º, but I call that good enough for clear coating! But I needed to wait until mid-afternoon for the weather temp high to be reached, so I needed a task that wouldn’t take too long and preferably one that had been on the “to-do” list for a while: I decided to layup the bottom/LE canard contour in the nose just forward of F22.
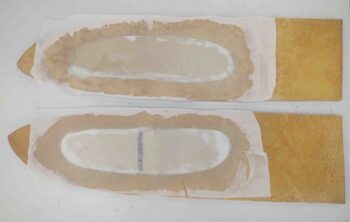
I started off making my angled cuts along the edges for a nice flox corner, and then assembled and cut my BID glass (all scraps, of course). The small pieces of BID are for building up the thickness at the front of the contour to bring it closer to vertical, and closer to the canard LE.
I then laid up the BID and peel plied it.
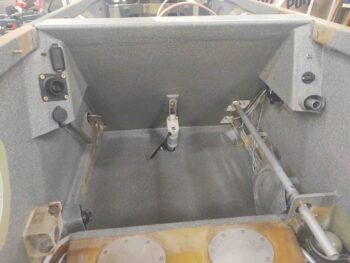
I took a very short break and then pulled the fuselage back out of the shop and proceeded to clear coat the cockpit paint I shot yesterday.
This stuff is dry –but not usable– within a good 20 minutes, so I carefully but expeditiously removed the blue painters tape.
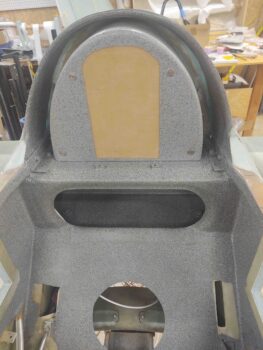
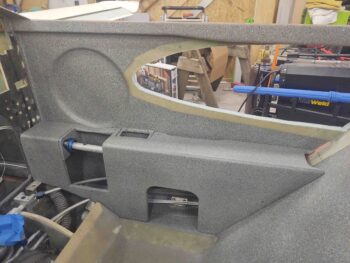
This gives you an idea of what the cockpit will look like when finished.
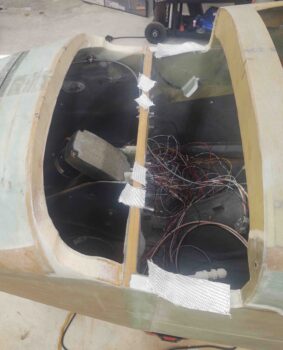
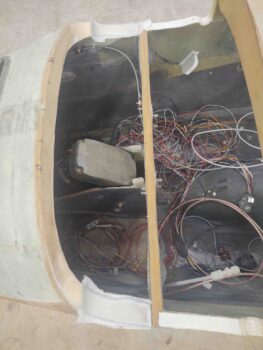
Moreover, this area here, the back of the pilot’s seat and the GIB floor, is the primary reason I wanted to paint the cockpit at this stage. As challenging as it was to paint with no strakes and access-providing sidewall openings, I can’t imagine painting all this with strakes on!
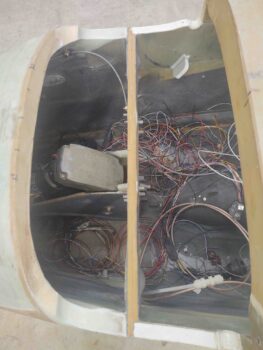
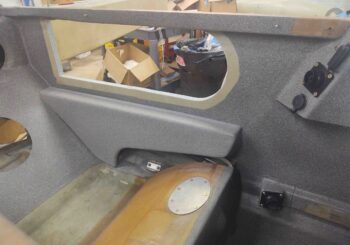
Here’s looking aft at the back seat and D-Deck. You might note that the area around the GIB headrest is not painted. I taped that off since I’ll be mounting the fuel tank vent lines back against the front face of the firewall that will then loop up, over and around the headrest to vent on the opposite side of the D-Deck vs the tank side (i.e. left side vents for right tank).
I then left for my auto appointment in Greenville, which is nearly 1.5 hours away. It took them about 2 hours to finish up, so all told I was gone about 5 hours today.
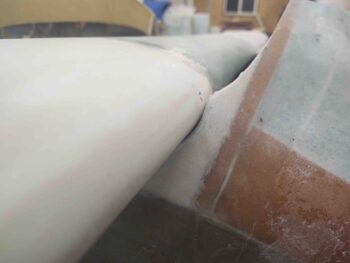
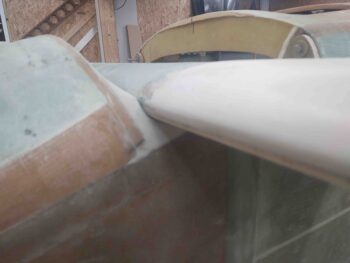
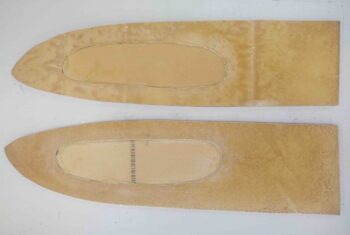
When I returned I pulled the peel ply off the nose contours for the canard bottom/LE. I then razor cut and cleaned up the edges of the glass.
I then re-installed the canard to check the fit…. I’m very pleased with how these layups came out. I’ll tape up the canard LE and then use micro to tighten up the gaps between the canard and the nose contours.
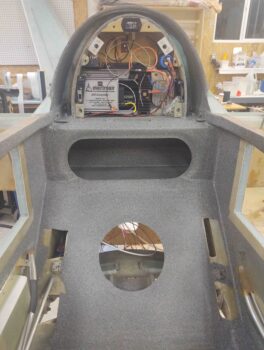
To check out more of the cockpit paint, I then re-mounted the GIB headrest/D-Deck cover plate.
I then rounded up the front seat right armrest and set it in place as well… I’m loving this paint!
Finally, I set the GIB left armrest in place. I’m finding little areas that will need paint, tweaking, etc. when I do cockpit paint round 2 after the strakes are installed.
You may note some slight color variations of the armrests, GIB headrest plate, etc. with the freshly painted cockpit. IMO this paint is a lot like Candy coat paint: it’s a bit finicky and the final color, depth and shade solely depends on how many coats you apply.
Starting out I was more concerned about paint weight, so I did a coat or two less than I just did on the cockpit. Lacking the OCD affliction that so many home builders have, and I know I’m weird, but I like the story that the slightly different shades of components tell. We’re building hand-carved airplanes here, so a little variance is a good story in my book!
My last task of the evening was laying up a ply of BID on the outboard side of the strake OD ribs. Since I’m making the inboard side now a fuel cell (the forward part), I glassed it using EX-Poxy. But since the outboard side doesn’t touch fuel, I’m using the way easier (to me) MGS 285 epoxy.
That being said, I did spend a good half hour prepping the ribs to remove dead micro, etc. to get these ready for glass layups.
About 1.5 hours later I had the 1-ply BID glass laid up and peel plied.
And with that, I called it a night…