
I started out today reviewing the initial strake build steps both in the plans and my self-edited instructions that I modified from John York’s excellent CSA newsletter writeup on his install of the Feather Light Strake Leading Edge Kit. Part of that overview was also reviewing 15 separate strake build-related topics in the CPs…. about an hour total.
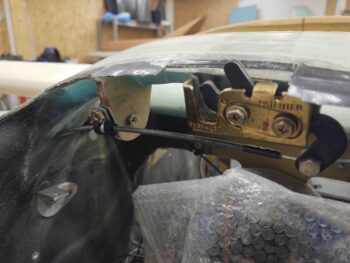
I then went out to the shop to check on my threaded adel clamp stud that I floxed in place into the right hinge bracket for the aft nose/avionics cover. Last night I wrapped a bunch of thick duct tape around my initial thread-protecting piece of electrical tape to serve as a a depth stop of sorts.
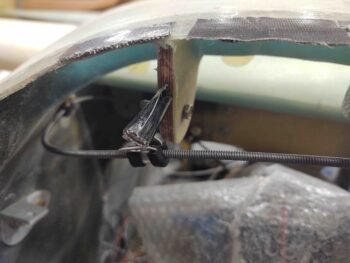
I took the tape off within a few seconds and was met with this… not bad at all! I’ll take it.
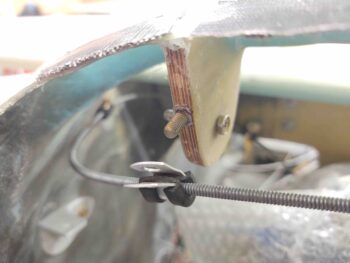
I then tested out the fit and configuration of both the adel clamp and the nose hatch latch cable… both look great.
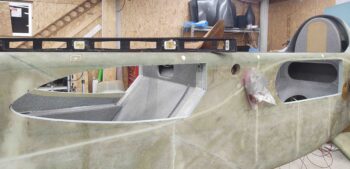
Next, I then spent well over an hour finalizing the sanding and shaping of the fuselage strake cutouts. Probably a few very minor tweaks that I’ll find here or there as a slight divot or bump catches my eye, but overall I’m very pleased with the shape and cleanliness of the cutouts.
An interesting note that I read in one of the CPs —that was NOT in my instructions anywhere— was that the glass edge next to the foam on the top and bottom of the Feather Light prefab strake LE was peel plied. Who knew?? Well, I investigated that and found that there was indeed peel ply.
So I set about to remove it on the left strake LE (peel ply above blue dashed, and none below it).
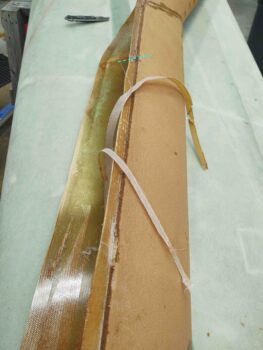
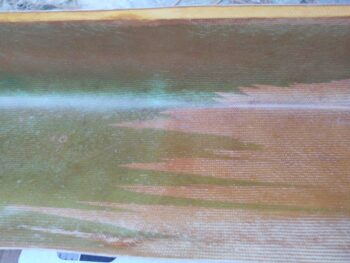
I then noted this green residue on the interior glass of the prefab strake LE, which I assume is PVA from all the research that I’ve done.
After I got one strip of the peel ply off, and my curiosity satisfied. I pulled out the plans and started measuring all the strake ribs and baffles to compare them to the plans configuration. I kept noting that on most of the pieces they were about 0.1″ greater in dimension than what the plans called for.

Not wanting to mess anything up, I decided to check with the source before doing something like trimming all the pieces down to plans dimensions just to learn that they were supposed to be that size for this strake LE kit. So I called “Feather Light,” which is now Aero Composites. I spoke for a good half hour with the new owner, Gregory, who was very much up to speed on the Strake LE kit, although Feather Light had stopped selling them years before he bought the company.
I confirmed the green residue was in fact PVA, and that I should hold off on trimming any parts until after I had mocked them all up. Good stuff.
I then went out to buy some more Christmas gifts and went over to some friends house for a few hours. Tomorrow I’ll be heading up to Greensboro for a few days over Christmas, so no building for a few more days (although I will get few hours in tomorrow morning). I will however be fine tuning my strake build task list.
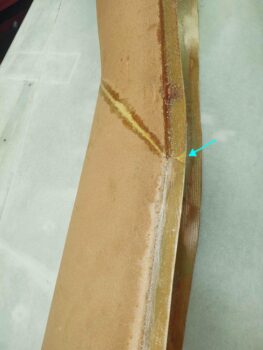
When I returned home from my friends’ house, I then got to work pulling the peel ply from the top side of the left prefab strake LE. I will say that when they laid in the peel ply on the leading edge-to-top skin flange, they positioned it a bit too far under the LE foam, by about a 1/4″.
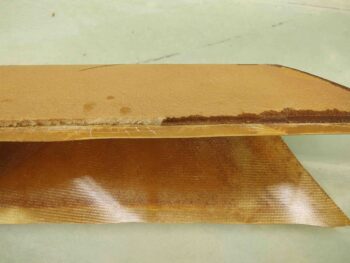
This meant I had to remove a good bit of the edge of the foam to get the peel ply out and removed. It’s really not that big of deal since the foam has a hard epoxy-soaked edge that needed to come off anyway. There’s no hard measurements for the top skin foam so I can simply “add” a 1/4″ to the front of the top skin foam piece and all should be fine (blue arrow is demarcation between no peel ply [bottom] and peel ply)
Realizing that the hard epoxy-soaked edge needed to come off, I then flipped the left pre-fab strake LE over and did the same on the side I had previously removed the peel ply from.
My main goal tomorrow will be to work prepping both the strake leading edges and the ribs and baffles to be as in an install-ready condition as possible so I can hit the ground running when I return from my Christmas break.
I then spent the last 45 minutes of my evening in the shop removing old dead bondo off the left wing.