
The last couple of days have been filled with a lot of configuration planning and some research on finalizing the electrical runs and wire management before the remainder of the strakes get installed.
Since it started out cold a rainy today, I knocked out a sideline task of printing out all the labels for the instrument panel (no pic). As I stated in my last blog, I’ll apply those labels to my panel and then clear coat it matte with a 3-4 coats.
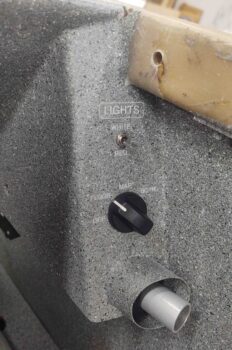
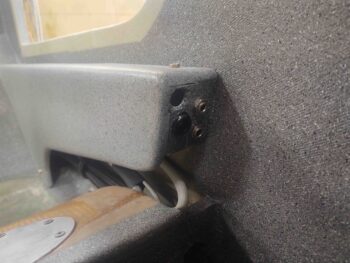
I then tested out some white-on-clear labels I had to annotate functions on the GIB seat right sub-panel. I would have preferred black-on-clear but didn’t have any. To keep this build moving along as quickly as possible, I went ahead and used the white lettering to label the right sub-panel.
I’ll note that the lettering is significantly more visible in person than it shows on camera. In the near future, when I take the fuselage out for final paint once the strakes are installed, I’ll clear coat these labels.
This biggest challenge –and way more of time bust than I would have imagined– over these last 2 days has been wiring up the GIB headset jacks, Bose LEMO plug and PTT button. I will say that this effort proves to me that I made the right call in doing this now vs waiting post-strake build. The end result is that I had to destroy a lot of previous hard work on my Dynon intercom wiring harness to allow me to install these GIB headset cables.
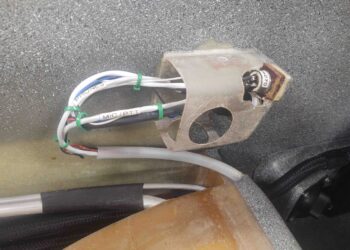
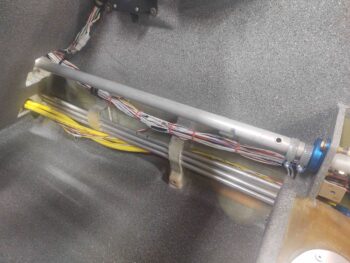
The main culprit was unseen and existed somewhere within my cable conduit that I created along the front lip of the back seat thigh support sump. I know the rounded corner of the tube shown above was definitely a bottleneck, but I suspect there was another one in the conduit as well.
I had to strip off the majority of wiring labels on all the wires/cables and remove the grounding solder sleeve on one of the cables in order to get these cables through the thigh support cable conduit. My guess is that adding the LEMO jack to the mix –which requires a pair of 22 AWG power and ground wires to drive it– exacerbated my space issue even more.
I will say I don’t remember using such force before when pulling cable on this plane build. I was literally pulling from the right end of the conduit while pushing from the left side of the conduit… about 1/2″ movement at a time. It took a couple of hours total, and I finally got it. No damage to the wires or cables to boot (just a raw thumb…),
I was also a little surprised at the amount of room eaten up by the attached wires to the separate headset jacks, as the internal space got a whole lot tighter installing these this time around… at least compared than the few times I’ve installed them in the past. It was so tight that I had originally planned on removing all the GIB headset components from the left armrest bracket and putting them in a protective bag will sanding the finish on the plate… No dice! These were simply such a pain to install that I am leaving the whole enchilada installed! (I’ll cover the entire bracket with plastic and tape).
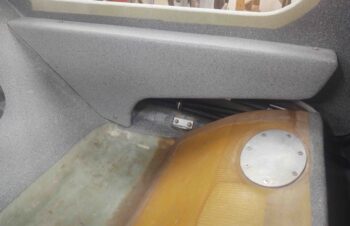
Just to ensure all was good, I replaced the GIB left armrest. Here’s a familiar shot to show how these newly added wires are hidden.
And how it will all look when the plane is flying. BTW, the PTT button I used here was reclaimed off my F-15 throttle handle: a military grade PTT… pretty cool eh?
I then reran all the new wires and replaced the zip ties along this busy section of the upper wire bundle. I plan on eventually using lacing cord to secure the wires but will wait until I’m certain that I won’t be adding more wires to the mix.
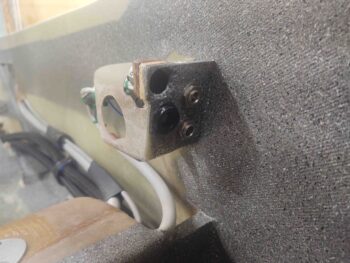
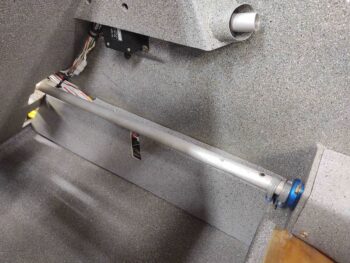
Also, with the new cables & wires added, I had to increase the size of my Adel clamp, which is just visible under the left side end of the control tube.
The bigger diameter upper wire bundle also required me to increase the notch size on my wire bundle exit point on the kick plate panel. I knocked that out in short order with my saber saw before remounting the kick plate. I will file the forward edge of the notch a bit more, but as you can see the kick plate fits once again.
Yesterday the weather was good so I clear coated the GIB right side armrest. Today after a good cure I put it back in its place.
If you note the yellow wire pigtails coming out from underneath the armrest you’ll see that I lengthened the pigtails a bit and terminated these GIB seat warmer power cables.

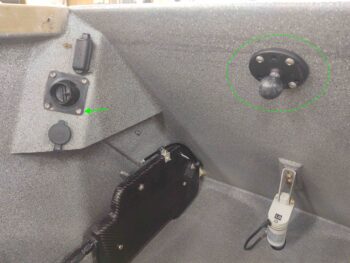
I also spent a few minutes simply doing now, pre-strakes, what will be a bit more of a pain later on. Here I’ve re-installed the GIB RAM ball mount on the center top of the pilot seat back. I also swapped out the industrial looking AN screws securing the eyeball vent to the much nicer stainless steel cap head screws.
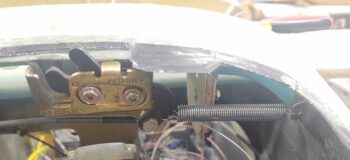
I also checked out my nose hatch latch spring tab by installing a longer spring than I had originally bought. Still, this particular spring is both a bit too long and looks to be a bit wimpy. I’ll have to opt for either a shorter spring to get more pulling action, or larger diameter wire gauge… or both. I’ll assess what my local bubbas have in stock.
Like I said, I really didn’t expect the GIB headset jacks, etc. to take so friggin’ long to install. Now that that’s pretty much out of the way (some wire RE-terminations still required) I do expect to be finished with all my pre-strake build tasks tomorrow.