Today wasn’t a huge build day as far as shop work. I spent a little over an hour doing some much needed research & planning on my upcoming steps, which allowed me to figure out my glass cut sheet & layup schedule.
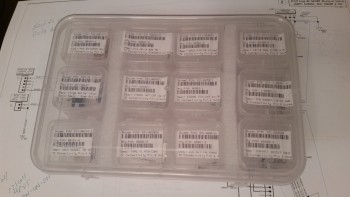
I then ran around the next half of the day running errands, etc, and then I headed south to Harbor Freight since they were having a huge parking lot sale & stuff is normally way less expensive during these sales. So I picked up a number of consumables & items for the build project, including the much needed storage bins for my electrical connectors. Instead of keeping 20 baggies lying around on the table, I now have them all consolidated into one location… in mini-bins no less inside the larger one. You can’t beat that for storing small items like electrical connectors!
I watched a bit of playoff football before heading down to the shop where I spent a good hour and a half organizing it. I bought a few other work bench storage bins that should help keep things a little bit more organized. I did clean the floor a bit and organize most of my foam scraps, but the shop really does need a good cleaning, which it will get after I glass the nose.
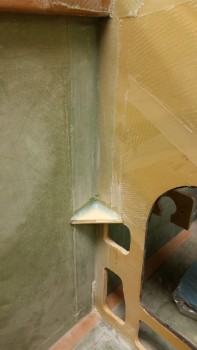
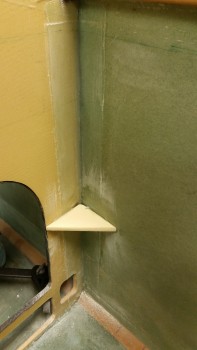
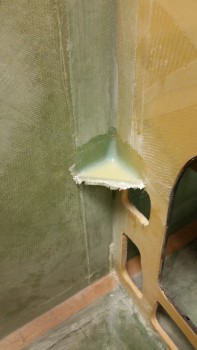
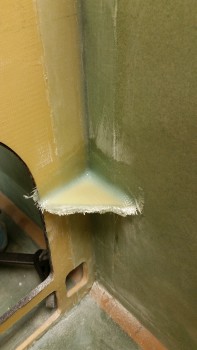
I then continued working on glassing in a couple corner reinforcement H250 1/4″ thick foam plates at the forward (so behind) side of the panel & the fuselage side wall. Since I already had the instrument panel clamped forward a bit, and had already started down the road of getting it to stay a little straighter by coercing it forward with the nose wheel well cover (NB), then I would continue on with my quest since this is a significant to do item on grand list of things that need to get done.
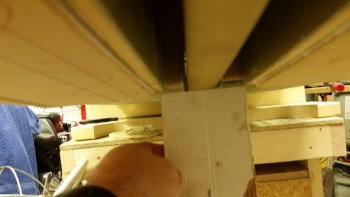
After measuring and cutting the corner triangle pieces, I mixed up some 5-min glue and put a dab on each end of the foam and on the corner. Then on the edge of foam in between the 5-min glue dabs, I added some flox. I pushed these reinforcement triangular pieces into place and held them for a few minutes while the 5-min glue set up, which you can see in the pics below.
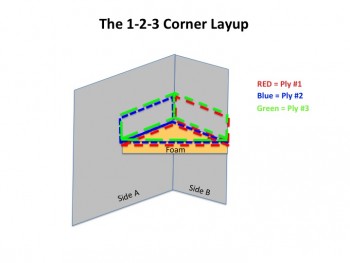
I then added a flox fillet and laid up 3 plies of BID in what I call the 1-2-3 corner layup method. I have no idea how it compares in strength to other conventional corner layups, but we’re talking flox fillets and a minimum of 2 layers of BID per corner, so I’m thinking it should do the trick strength-wise.
As you can see below, there’s only 1 layer that ties the first 2 plies together in the corner, but you have a minimum of 2 plies of BID per each wall, all converging on the face of the foam where you end up having 3 plies of BID. And it’s fairly EZ & fast since you’re only dealing with 1 ply total that traverses a 3-sided corner. The other 2 layups are simply corner layups.
Still, I’m thinking it will add a decent measure of reinforcement to the corners to help keep the panel straight. I’ll leave it clamped overnight, then check the affect that these corner reinforcements have on the panel’s alignment.
Here is both the right and left corners glassed with 3 plies of BID each. I should not that the height of these are as closely matched to the height of the arm rests, so that there’s no infringing upon real estate for switches, electrical, etc. I ran a piece metal down from about where the elevator control tube will travel from the elevator torque tube to the control stick, and although it will be tight, as of right now I don’t foresee ANY interference.
I then took some time to tweak the up limit microswitch, which is much more challenging to do now since the forward NG30 nutplate tabs keep me from pulling the nose gear motor actuator tube above the NG30s to gain access to the back of the microswitch screws. Now I have to bungee tie it up and reach one hand from the bottom while the other one twists the screw driver on the top side. I got the travel I wanted, but then realized that it won’t be enough since the wheel fork assembly needs to be higher so that the NG15 bolt heads are above the bottom skin and thus won’t cause the gear doors to protrude when the gear is in the up (closed) position. I’ll work on that tomorrow.
Here’s an initial shot showing that the nose gear strut front edge is above the channel sides, but as I mentioned before, the NG15 bolt heads do not clear the bottom fuselage edge.
Tomorrow I’ll check my corner reinforcements layups, then reset the gear up limit microswitch, then l start prepping the fuselage to flip and get some nose sanding in.

