
While awaiting my G10/phenolic to get delivered to start work back on the aft nose/ avionics cover (more on that below), I decided to get some panel components installed.
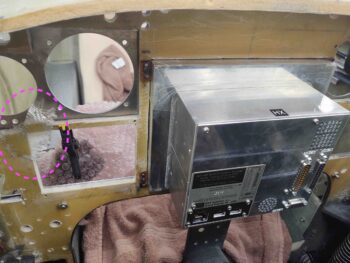
My main goal was the HXr, which I had already made up the 4x #6 nutplate assemblies. Before I started I was going to make up the #4 nutplate assemblies for the Mini-X EFIS, but found as I was drilling out the mounting screw holes (which I overlooked when I drilled all the panel holes) that the top right corner (left in pic) was cracked. There just wasn’t enough meat at the corner so my drilling caused it to snap right through. Not good if I want a 4th screw to secure my Mini-X.
So my plan on floxing in nutplates changed to also laying up a 2-ply patch to that corner (denoted by magenta circle).
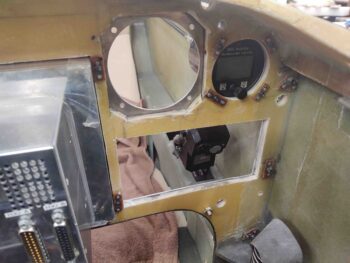
I was actually halfway through making up the #4 nutplates when I remembered I forgot to drill the Mini-X holes (which I discovered last night as I was mounting all the panel components). I then figured I would simply use the #4 nutplates I was working on to mount the MGL clock/timer, which I could do concurrently with the HXr –I couldn’t do that with the Mini-X due to clearance/access issues.
As you can see, I realized I wouldn’t really be able to get to the outboard screws, or at least see them well, so I just flipped the MGL clock/timer around backwards to still get the correct spacing on the screws. Looks odd but worked a treat.
Below is another shot of the HXr EFIS and MGL clock/timer from the front side of the panel. However, the more important item in this pic is the Garmin GNS-480 GPS mounting tube in place. It took just a few minutes sanding down the edge of the composite panel bulkhead to get it to fit, but it does fit… and well!
A point of note: what didn’t take “just a few minutes,” but rather over half an hour, was simply removing all the wiring connectors off the back of the GNS-480 mounting tube… what a hassle! Crazy difficult job for what should seem like an EZ little one.
Moreover, speaking of seemingly EZ jobs: between making up the #4 nutplates and sanding down the edges of the #6 nutplates to fit close enough to the HXr EFIS, this entire endeavor took over 2-1/2 hours to complete!
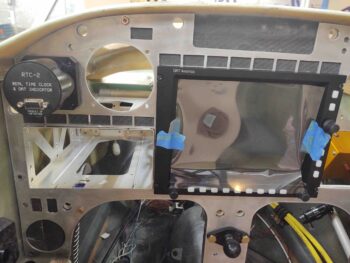
One area I’m extremely pleased with is the fit of the GNS-480 mounting tube. The back outboard corner (upper right in pic below) is a good 0.150″ off the side wall, which means I was able to drive the GPS unit far over to the left, very close to the sidewall and still obtain good clearance on the side.
Today and tonight really was another heavy planning and coordination work day. I don’t have any pics, but I was going to mount my ELT remote head under the aluminum panel and embedded into the composite panel, until I gathered it up to test the spacing. Then, upon looking at it I remembered it has a battery that will need replacing every so often. Even if it’s every 5 years I don’t want to have to remove the entire panel just to change a battery –not worth it– so I decided to mount it externally on the face of the aluminum panel. This means, yep, another four 4-40 nutplates on the list!
I also assessed spacing for my WxWorx XM satellite radio weather receiver, and am happy to report it appears that it will fit just fine top centerline just forward of the panel. I’ll show more when I get to installing it.
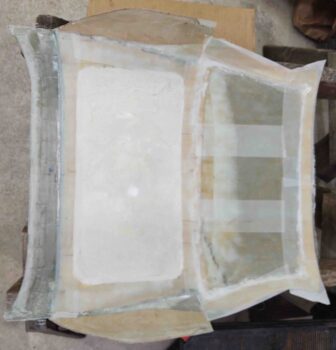
I went out for dinner to take a break after sanding the pour foam on the aft nose/avionics cover down (for about 45 minutes) so that it was level with the surrounding surface on the interior side of the cover. I then vacuumed it, and cleaned off the bare glass spots for receiving glass.
Upon returning home, I got to work making a large paper template to then cut a single ply of BID to cover from the wood lip just aft of the big pour foam area (left in pic) all the way to the front edge (right in pic). I micro’d the foam and also around the edges of the forward bare glass area where it is bordered by wood (and some glass).
I laid up the 1 ply of BID and then peel plied most of the edges… and 2x 3″ strips in the forward bare glass area where the hinge brackets will be mounted.
Yep, this “simple” 1-ply layup took about 3 hours!
I was also going to make up the 4x #4 nutplates for the Mini-X panel mount, but after this grueling layup (I know, laughable!) I decided to have a glass of wine and pen this captivating blog post instead! Cheers.