
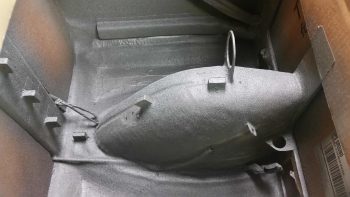
I started off today doing the final sanding on the Oil “Tower” Storage Box. My micro job was a little rougher than what was required for this box that had its fair share of imperfections (don’t we all!), so there’s a shallow crater on one side. Good practice and generated some neural connections for when I finish the actual aircraft skin for paint.
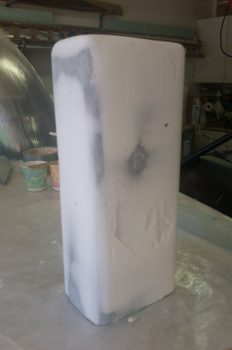
Since this blog is comprehensive (read: big) I’m jumping ahead here over 10 hours for topic flow and showing the completed epoxy wipes ala the Cory Bird method. I went as per Cory Bird’s instructions with the full complement of 5 coats of West Epoxy, all squeegeed as to get as much excess epoxy off the surface at the initial and subsequent 2-hour intervals.
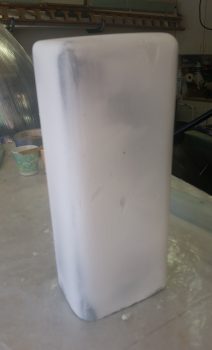
Again, as per instructions, this will then cure for 48 hours before I sand it down for any additional filling required (i.e. the Grand Canyon sized divot on the one side) and then primer, paint and clear coating.
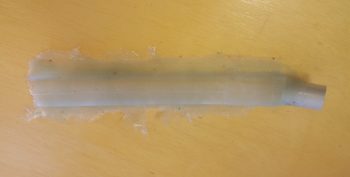
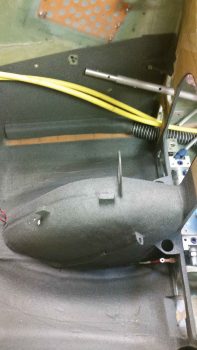
On the heating foot vent duct for the left side, I trimmed the glass on the edges then sanded it smooth.
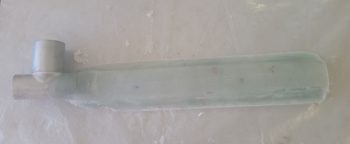
I then pulled the right side heating foot vent duct off the right fuselage sidewall, with tape and foam plug in tow. I pulled the tape off and did a little digging to get the foam plug out. Here it is with the wild and crazy glass edges in raw form.
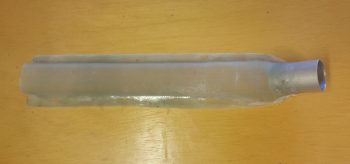
I then cleaned up the edges and sanded them. As you can see, although I tried rooting around on the underside edge with a very wet brush while laying up the glass, I still missed a spot or 2 in my epoxy application.
I then checked my fit by mocking it back up in place on the right side wall.
What I don’t have pics of is my repairing the dry spots on the foot vent ducts and also adding in some micro and glass on the outboard (sidewall) sides of the foot vent duct and SCAT attaching tube intersections. This was for both the left and right foot vent ducts. (Also note the white micro repair job that I failed to report on… it replaces a foam ramp that I originally glassed/micro’d in for the big yellow cables… which I have obviously since routed higher).

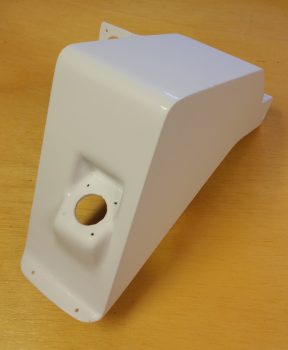
As the repairs/additions to the foot vent ducts cured, I then finished prepping the NG30 for its final finish. I will state up front that with standard rattle can (Rustoleum) primer, paint and clear coat, it’s a bit tricky to maintain a sharp edge like the ones I have here. I do have some minor break throughs in the paint along the top right edge (looking at the pics below, actually on the left side) and one spot a hair under a centimeter on the lower edge also on the right side.
So, I’m invoking 2 sayings. The first is: “Perfect is the enemy of good enough” (I think Gen Petraeus said that) and the opposing viewpoint: “One ‘ah-shit!’ can ruin a thousand attaboys!” ….. so, my NG30 covers all ends of the spectrum! In short, since this is round 2 on paint and clear coating, it will have to do. I can’t spend another countless number of days dialing this into perfection or using a different paint system that lends itself to maintaining structural integrity on a hard 90° edge (like epoxy primer on a 2-part system).

The end result for the evening was that I got the right side (again, per pics…although pic below is pre-buffout) and the top buffed out, but still needing polish.
With so many surface scratches I put on these things getting rid of my just silly number of runs, I would actually buff for a bit, then heretically wet sand with very fine paper on whatever scratches were still visible. Then back to buffing out. So far the results have been fairly good. I’ll state for the record that if this were a part in constant view I might rethink doing it to a bit higher standard (also for the record, it still looks pretty darn good!), but not when it spends over 90% under cover in the nose.
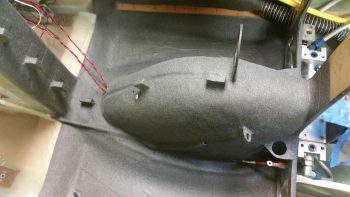
After working on the NG30 cover for almost 2 hours, my shoulder needed a break. I checked the repairs/additions on the pair of foot vent ducts and all looked good. And moreover, cured.
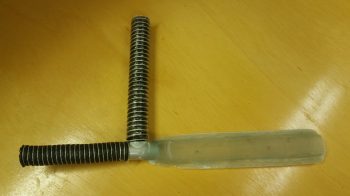
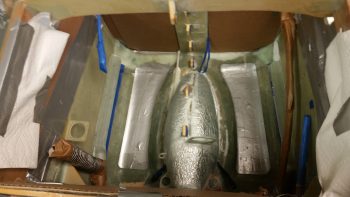
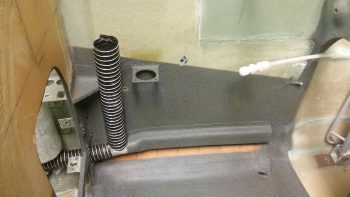
I pressed forward on determining the length of the 1-1/4″ SCAT tubing that will connect the right foot heating vent duct to the pilot thigh support integrated duct, that has the port on the right side. Once I got the required length in hand, I cut the SCAT tubing and attached it to the piece of 6061 thin-walled transition tube on the aft side of the right foot vent duct. To attach it I used my new toy: the ClampTite tool, which with 0.032″ stainless steel wire it worked a treat! In addition, in the pics below you can’t see the actual SCAT tubing on the forward side because I taped it up for painting the avionics bay.
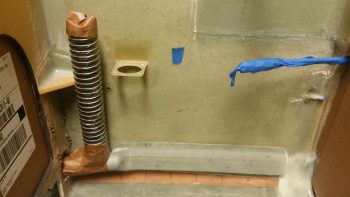
Then using Silicone RTV and a couple well placed dabs of 5-min glue, I attached the right foot heating vent duct to the lower right fuselage sidewall between the instrument panel and F22.
In case you’re curious, here’s the other end of the 1-1/4″ SCAT tubing for the right foot heating vent duct. The SCAT tube attach port is visible on the thigh support integral duct (see the cardboard in place over the right leg hole? …. ah, a clue as to what is coming up!)
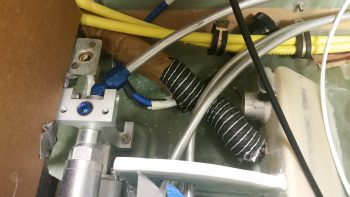
For the left side foot heat vent duct, I then measured & determined lengths on the 1-1/4″ horizontal SCAT tubing that heads straight aft to the heat duct plenum —looks like a kidney bean on the left side of the fuselage under the left pilot armrest— and the 1-1/2″ vertical SCAT tubing that feeds the panel-mounted eyeball vent. After cutting the SCAT tubing to length I attached both of them to the “T” junction ports with 0.032″ stainless steel wire using my ClampTite tool. I do have to say with the wire used to mount the SCAT tubing it doesn’t look like anything is holding the SCAT tubing in place!
I then taped up the exposed parts of the SCAT tubing and “T” junction to protect against paint (note the cardboard and taped up items …. hmmm, looks like some painting is about to go down!).
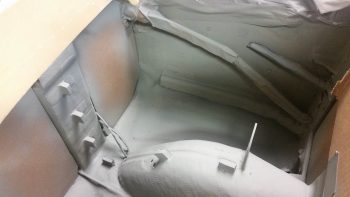
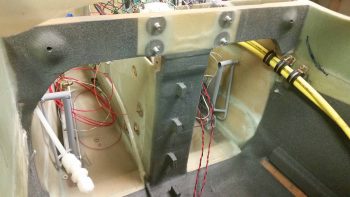
I then spent a good 45 minutes prepping the avionics bay between the panel and F22 bulkhead for paint.
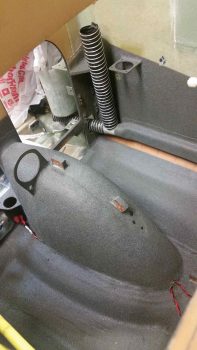
As you can see, I eventually just created a large box by sealing off the leg and other smaller holes on each side.
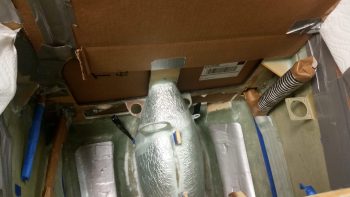
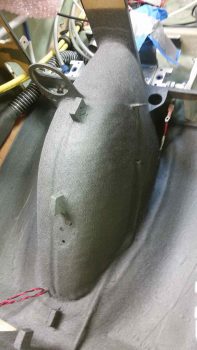
After everything was taped up, I shot the nose wheel cover and surrounding avionics bay area with some self etching primer.
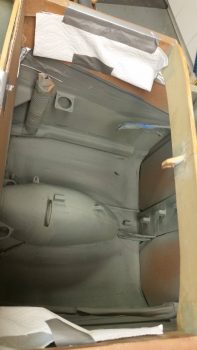
After the primer cured, I then shot the nose wheel cover and surrounding avionics bay with Duple-Color trunk paint (yes, folks, TRUNK paint . . . ha!).
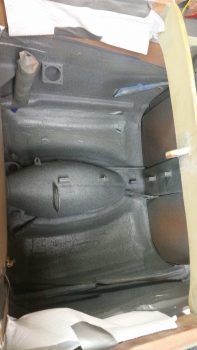
I tried to lay the paint down in 2 lighter coats, but there were a number of odd angles where I had to get the can in closer then I wanted…. and it laid a much heavier, sloppier, wet coat in those areas. Luckily this paint proved itself as the forgiving sort and self leveled as it dried.
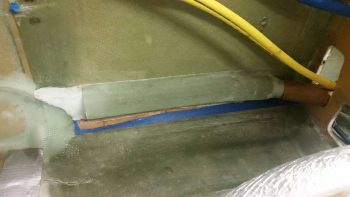
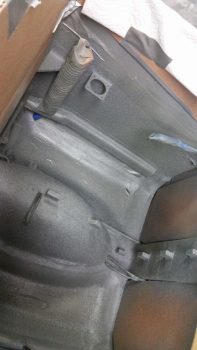
It may be odd, but having grown up the son of a cabinet maker and carpenter, and doing a fair amount of wood working myself, I just couldn’t bring myself to cover up what I think is a really cool build aspect of these planes: the triangular Spruce stringers in the lower fuselage corners. With the clear MGS that I use it looks like a bare wood strip down there and the hash cuts we make at intervals to install them is just a fun design feature in my book. So… I covered each side’s stringer with tape to protect it from paint…. call me crazy! (I prefer “eccentric” . . . ha!).

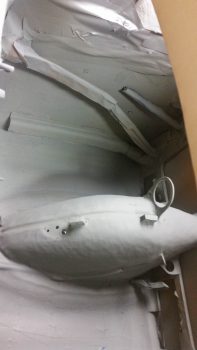
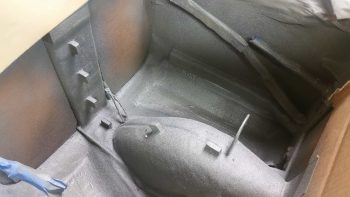
I carefully pulled out all the cardboard blocks and removed the protective tape from all the wires, cables and components. Yes, I’ll admit the majority of this painting endeavor is for simple cosmetic reasons. There was some junky looking spots I had going on here, and for the most part I try to avoid adding weight with paint. Also, as you can see by my stopping point on the sidewalls, it really is for the view that we see when peering into either leg hole.
Here I covered up some unsightly areas on the aft side of F22.
And here we have the left side foot heating vent duct with attached SCAT tubing. I have to say, I’m really digging this paint color!
My decision in painting the sidewalls and some of the floor was a bit of scope creep in my initial task of painting the nose wheel cover (BTW, I couldn’t bring myself to remove the duct tape for the eventual anti-skid inserts off the floor just yet… it looked too good and I didn’t want to spoil it!). Clearly (IMO anyway) I couldn’t NOT paint the insulated NB cover. Although an unpainted NB cover would have been an interesting discussion generator, it badly needed a good color of paint on it (again … IMO).
You can also see that my personal preference is to leave components their natural color if I can. I see a lot of canards where once all the wiring and hardware is in, then it all gets blanketed with a coat of paint. I think that style looks good as well, and serves to clean up & declutter the fuselage visually… I just prefer to preserve components sans paint if I can.
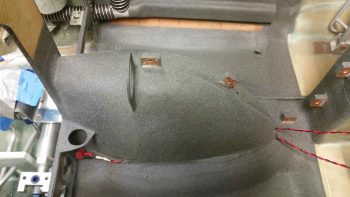
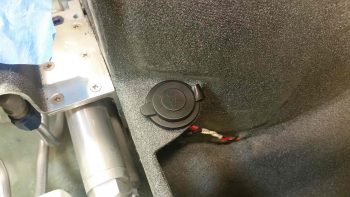
With the USB charger bracket and surrounding area finished to paint, I decided to go ahead and quickly install the USB charger port in its bracket and connect the wires.
I know my 3-DAY BLITZ Round 2 has busted it’s mandated timeframe and is going on nearly a week, but I think these preparations of finishing off prerequisite internal nose area items is well worth it. Tomorrow a main goal will be to finish buffing out and polishing the NG30 cover. In addition, I’ll most likely mount the canard and start focusing more on the F22 and F28 areas in prep for the nose build.