
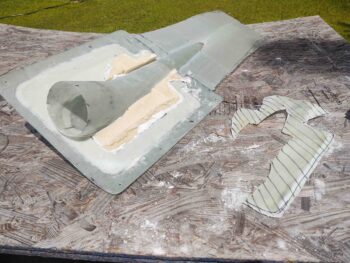
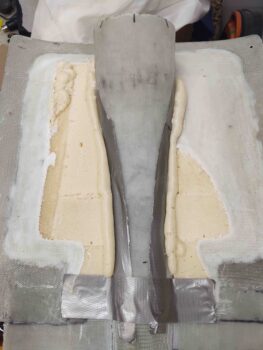
Today i started by pulling off the now combination RAM air scoop/hell hole hatch cover from the hell hole/fuselage bottom. Although I had taped up what I could in the hell hole, I was hoping not to find any errant epoxy, flox or micro had welded any parts of the forward and aft RAM air scoop sections together…. thankfully nothing like that happened and with just a scant bit of wiggling and rocking the entire assembly popped off.
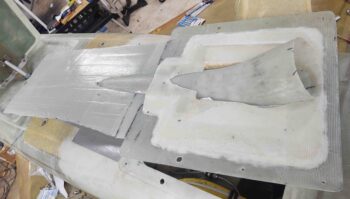
I then assessed the interior situation of my hell hole hatch cover/RAM air scoop assembly. To be honest it’s a bit chunkier in weight than I would prefer, especially given the original plans weight of things down here is a shaped piece of urethane foam micro’d into place and secured by a single ply of BID. Uh, this thing is a bit more robust. So the last thing I wanted to do was add more weight in securing the interior RAM air scoop to the interior hell hole hatch cover.
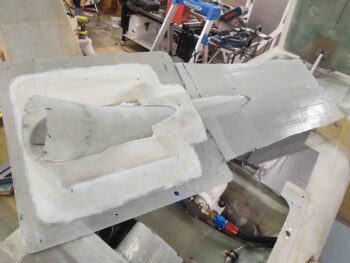
Something had to go to at least make this a zero sum endeavor in regards to weight.
Moreover, I’ll note that this is the epitome of armchair engineering in that I didn’t weigh things before or after, I just lopped off what looked heavy (unneeded multiple plies of glass) or unbalanced (extra foam on one side) and went for it. I’ll further note that I certainly needed much of the extra glass and depth in foam pre-RAM air scoop install, but now that it’s securely integrated into the hell hole hatch cover, much of this stuff is now longer required… yet another reason it can go.
Thus, I marked the offending areas with hash marks.
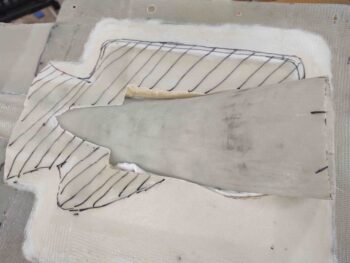
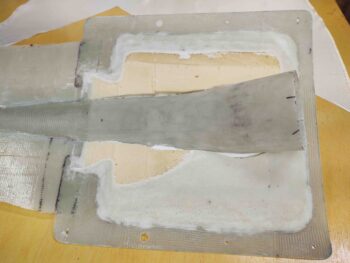
Took the entire assembly outside and went to town on it with the Fein saw, Dremel tool and sanding blocks.
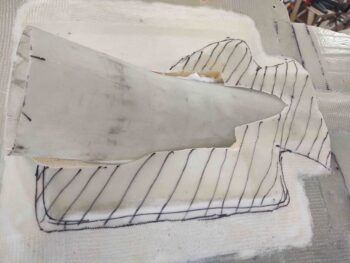
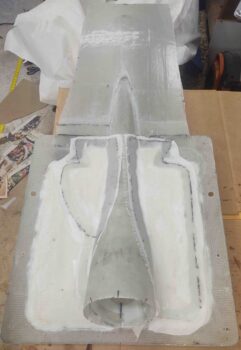
Back inside we have a sanded and cleaned up version pretty much ready for glass.
First I filled the narrow trenches between foam and RAM air scoop with pour foam.
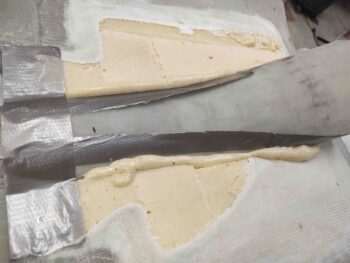
The long view…
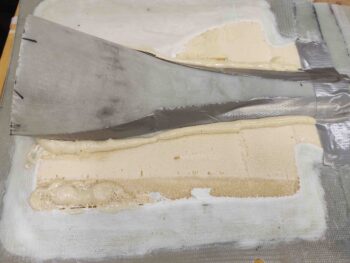
And then made some patterns out of clear plastic to then cut a single ply of BID each side.
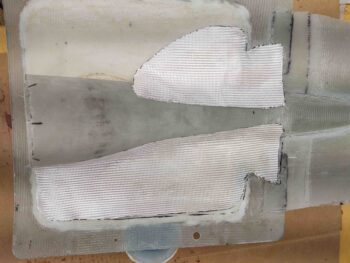
Micro’d the foam and laid up the plies of BID. I then peel plied the layups.
With the RAM air scoop/hell hole hatch cover interior layups curing, I then got back to work on the nose landing light 1/16″ thick lens install… for a more final install on this landing light lens to complete this task before flipping the bird back upright.
Note that I added narrow strips of clear packing tape around the edge of the lens simply to keep the entire perimeter edge clean of micro so that if I need to pull this lens in the future, the micro doesn’t have a death grip on the lens.
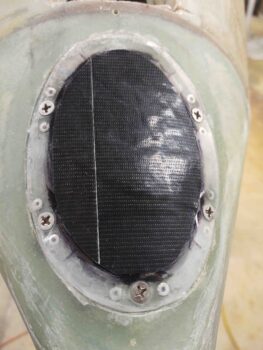
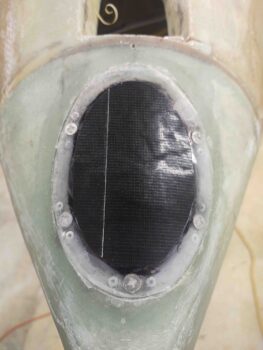
In prep for glass around the perimeter of the lens, I melted some wax and filled the Phillips head slots of the screws to keep epoxy out of there as well. I then scraped off any excess wax and carefully cleaned the perimeter lens with acetone (pic #1).
I then added micro around the perimeter edge of the landing light lens (pic #2).
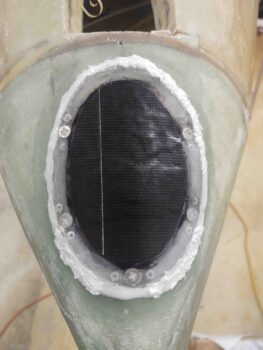
I laid up an initial ply of BID that covered up to the edge of the lens, so surrounding the perimeter to about an inch out —essentially covering the micro “fillet” outward.
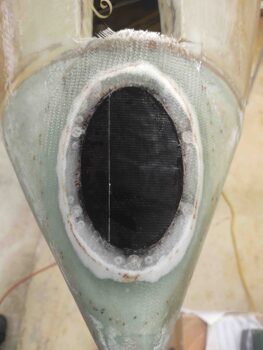
The final and second ply of BID actually overlapped about an inch onto the surrounding nose glass and covered the perimeter of the lens right up to the edge of the protective tape. I then peel plied just the top lens perimeter edge of the glass.
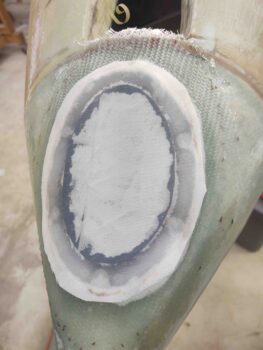
And with that, I left my multiple layups to cure overnight.