
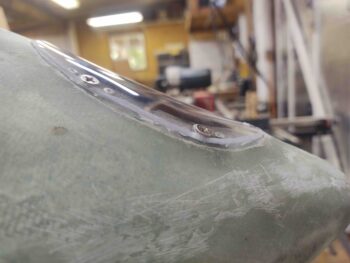
Today I started with a fairly early morning pair of single ply BID layups to more fully secure the inside front lip of the hell hole hatch cover to the extended glass base for the RAM air scoop.
I actually cut out the foam almost an inch deep into what was left off the front side foam face of the hell hole hatch cover. I then sanded and prepped the area for glass before cutting the 2 separate pieces of BID. As you can see, I had to notch the BID plies to go around the intersection where the slanted top inside edge (or “floor”) of the hell hole hatch cover dives into the exterior surface.
To be clear, the layups will go where I’m pointing to with the yellow and black tipped pointer.
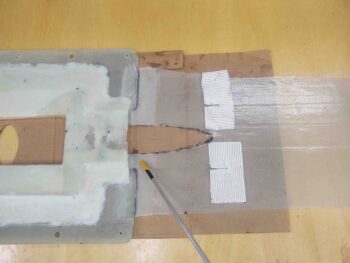
I then laid up the respective plies of BID (pic #1) and then peel plied them (pic #2).
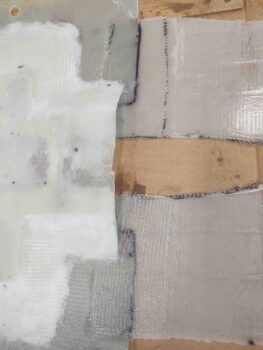
Jumping ahead quite a few hours, here’s what these layups look like cured, with the peel ply pulled.
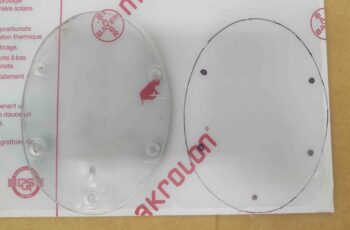
While the layups above were curing, and I couldn’t work on the hell hole hatch cover nor the RAM air scoop install, I got to work on one of my inverted fuselage tasks: the replacing of the much too thick 1/8″ nose-mounted landing light lens for a more diminutive 1/16″ thick lens.
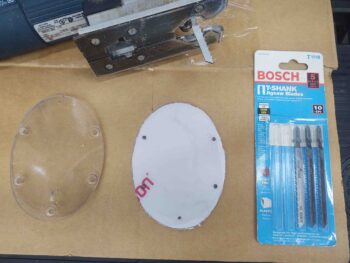
I first grabbed the sheet of 1/16″ thick plexiglass and used the old lens as a template to mark up the new one.
I had looked around for a good jigsaw blade to cut the plexiglass and finally found one that would work (yep, last place I looked!)… and quickly cut out the new thinner lens.
I then drilled and bore the countersink holes for the #8 stainless steel CS screws and test fitted the new lens. I have to admit that part of the problem with the old 1/8″ thick lens might have been that it was overlapping the lens inset, that I had created when I made the original sunken lip —compared to the surrounding nose—for the lens to sit down into.
The bottom line is that the lens was not sitting in its depression correctly and needed some trimming. Instead of taking the lens off and cutting it with the jig saw again, I decided to just trim it (judiciously!) while still mounted to the nose with a cutoff wheel in the Dremel tool.
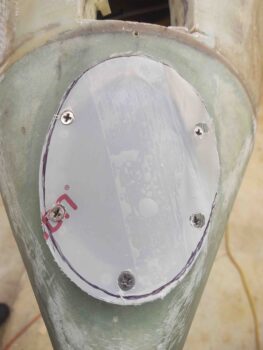
Here’s a look after I trimmed the edges and pulled the protective plastic.
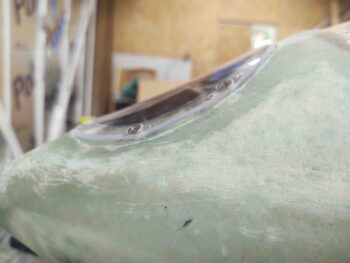
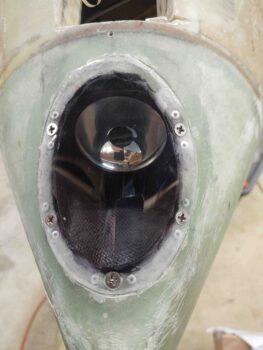
And yet another shot of the initial landing light lens test fit. Note that I beveled the edges of the lens for a better transition to the surrounding nose.

“Better transition for what?” you might ask, since there are clearly mounting screws. Well, see the rivets and lip under the screws? Sure I could paint that and make it look a little better, but it would still need a good bit of cleanup around the edges and I just never liked that transition from lens to nose. Maybe someday I could machine or create a nice aluminum flange, or perhaps even maybe a glass or carbon fiber one, but for now I wanted something that would be fairly quick, fairly easy and really make this landing light lens look like it’s integral to the actual nose.
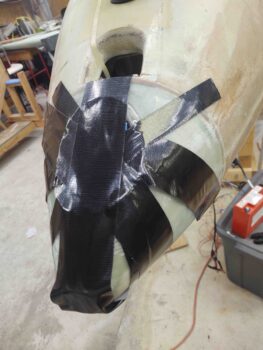
So I decided to glass the edges of the lens, overlapping onto the nose, in a quasi-permanent lens install. First, to both help seal the edges of the lens from water getting in and to help keep the areas in between the screws from flaring out (“oil canning”), I siliconed the lens to the nose before securing it with the screws. I then applied Gorilla duct tape as tightly as I could to keep the sides of the lens pressed as tightly against the nose as possible.
After my nose-mounted landing light lens shenanigans, by this point the BID layups had cured and I could press forward on the RAM air scoop install.
I started by trimming first the aft part of the center opening, then some of the forward channel, of the hell hole hatch cover to allow the RAM air scoop to settle into place. This took nearly a dozen small rounds of cutting, sanding and shaping.
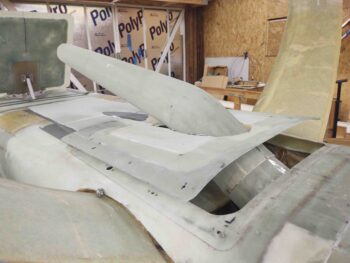
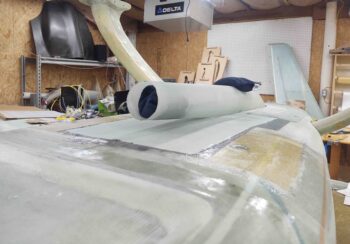
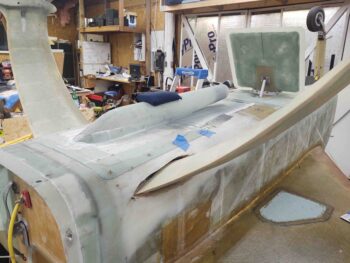
Voila! The RAM air scoop is now fitted into the hell hole hatch cover. I will say that somewhere in this fitting “transaction” I lost, or rather gained actually, about 1/16″ in the gap between the front edge of the RAM air scoop and the aircraft belly (now glass base).
My acceptable gap between fuselage bottom and RAM air scoop inlet was to keep it between 3/4″ to 1″, but I was shooting for 0.75″. Since I first started installing the RAM air scoop that number went from my targeted 0.75″ up to about 0.87″. Not bad.
Again, with this latest round of actually installing/integrating the RAM air scoop into the hell hole hatch cover, that gap is now 0.95″. Clearly still within my targeted range and I’ll take it any day of the week!
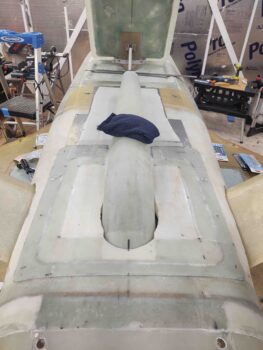
Here we have an aft view of the RAM air scoop fitted into the hell hole hatch cover.
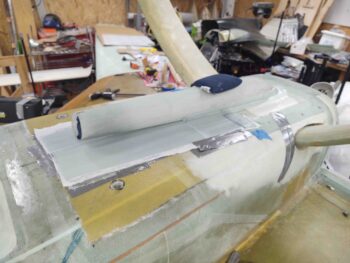
The next step was to physically attach the RAM air scoop to the hell hole hatch cover. I started this off by laying up ply #3 over the cured initial 2 plies of the RAM air scoop base, that extends forward off the front of the original hell hole hatch cover.
I went ahead and peel plied the front area that will sit underneath (as situated, technically above) the overhanging RAM air scoop. Also note that I wet out the BID that crosses over the scooped divot in the fuselage (light blue arrow) so that when I set the RAM air scoop into place it pressed up tight to the bottom of it (again, as situated, technically top edge).

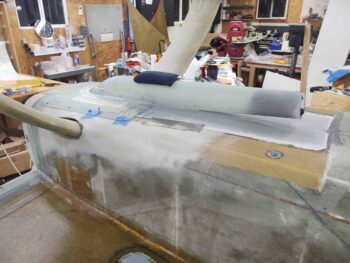
I then added a flox fillet on each side on the forward area of the RAM air scoop interface with the hell hole hatch cover opening. Toward the aft end where the gap was much larger, and it was essentially attaching glass to foam, I used thick micro to fill the gap and create a fillet [Note: I had considered using pour foam on the aft end, but I had no way to create a dam underneath to keep the foam out of the hell hole innards, so I opted for fairly dry micro instead].
I then laid up 2-ply BID tapes along each side and around the aft end. On the forward side, these BID tapes overlapped onto BID ply #3 by a good 6″ each side.
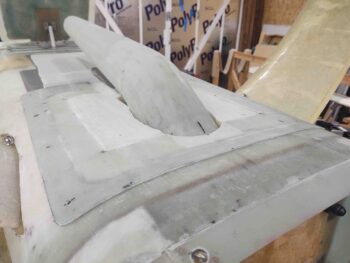
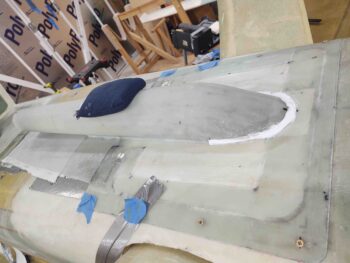
Here we have the RAM air scoop mounted and integrated into the hell hole hatch cover
—finally!
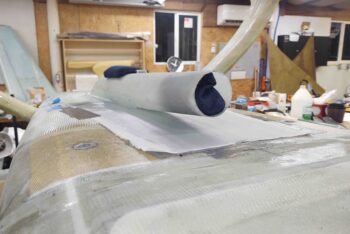
Another shot of the mounted and glassed RAM air scoop. Note that I did peel ply these layups.
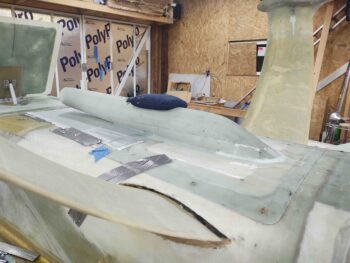
One last shot of the mounted RAM air scoop.
Finally, after a couple of hours for the silicone RTV to set and cure a bit, I pulled the Gorilla duct tape from the nose landing light lens… so far so good!
And with that, I left the glassed/floxed/micro’d RAM air scoop to cure overnight.