
I started out today pulling the peel ply and cleaning up the layups on the forward side of the aft nose/avionics cover thru-panel CAMLOC tabs. I then laid up 2 plies of UNI on the aft side of the tabs overlapping about an inch onto the underside of the cover. I peel plied it and left it to cure for a couple of hours (before mounting it back in place on the nose, to ensure the tabs cured in the correct position). Sorry, no pic of this.
After an hour or so assessing my interlocking hinge securing points for the aft nose/ avionics cover –located on each longeron just forward of the paneI– I then got busy making up some steel 1/4-20 threaded hardpoints to secure the interlocking hinges’ pin knob, which will be on the face of the panel in each upper corner.
When I want to open the aft nose/avionics cover, part of the process will be to unthread these knobs, about the size of dimmer switch knob, and slide the pins out of the interlocking hinge pins along the longeron. Another securing point/release for the aft nose/avionics cover. To remount the cover I’ll simply reverse the process: insert the interlocking hinge pins and thread the knob in the secure/closed position.
I was leaning towards using a 10-32 nutplate or RivNut to thread the knob into, but after assessing the hinge pin diameter I needed a bigger threaded screw-post that will both secure the hinge pin in place and the attach to the knob (used to insert/remove the hinge pin). It will become more clear over the next day or so… and as I said on the nose hatch video: I plan on making another one for the aft nose/avionics cover.
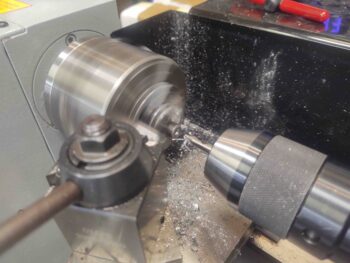
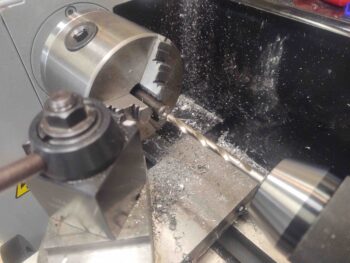
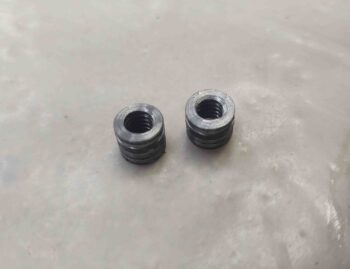
Here are the 2 steel 1/4-20 threaded panel inserts. I lathed 3 flox grooves around the outer surface for better gripping in the 3/8″ holes I drilled into the panel. I then floxed these guys into place…
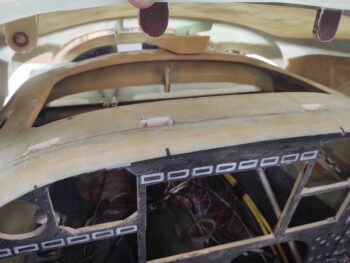
Back to the aft nose cover thru-panel CAMLOC tabs… here they are all glassed up with a quick trim.
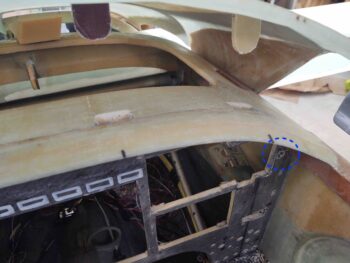
And here’s a shot of them with the slots on the top surface of the aft nose sub-structure that allows the tabs to fall right into place behind the panel [the right pic also has a shot of the right side steel threaded panel insert floxed into place (blue dashed circle)]
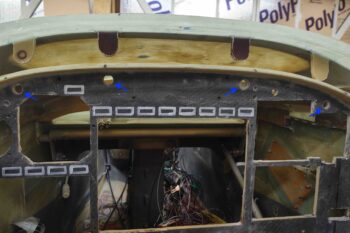
I took this shot of the panel to show the 4 associated CAMLOC thru-holes on the panel for each tab (blue arrows).
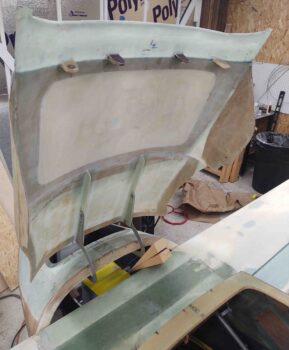
Another shot of the tabs with the cover open, for a bit of overall size perspective.
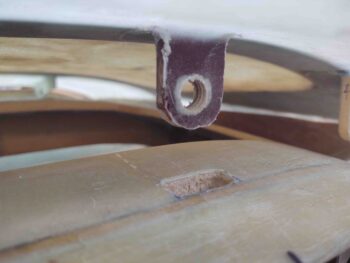
Here we have tab #3 after I drilled it out and tapped it with 1/2-13 threads… the threads are actually visible in this pic.
I then threaded a SkyBolt (CAMLOC) receptacle into each tab. After some thought yesterday I decided to also flox these in place as well… so each receptacle was slathered in flox before threaded into place. I then spent a few minutes on each one to ensure no flox was where it shouldn’t be.
After the tabs were all cleaned up, about a half hour later, I closed the lid and grabbed a shot of the threaded SkyBolt/CAMLOC receptacles peeking though their respective holes in the panel.
With that, I left the floxed homemade threaded inserts and the threaded/floxed SkyBolt receptacles to all cure overnight.